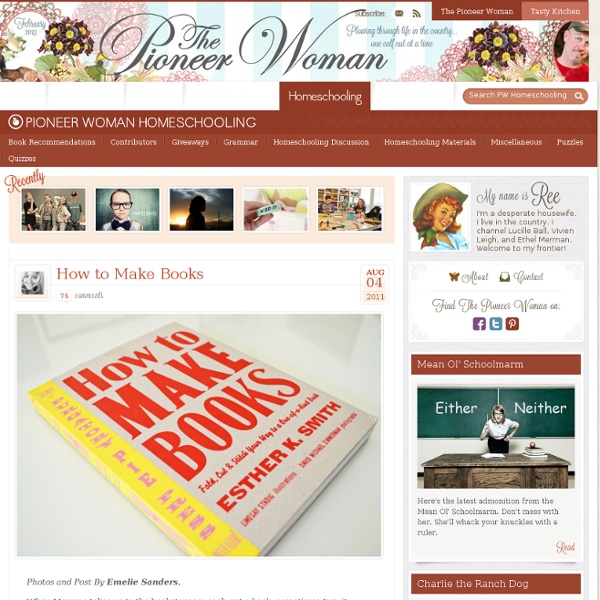
Book Cover
Here's another DIY project from our sweet friend, Sasha - from the The Gilded Bee. Be sure to check out her awesome shop full of handmade packaging lovelies. Thanks for being here with us Sasha!
Matheus Lopes
Manifesto, traditional art, mixed media Building a galaxy, digital art, mixed media Alternate ending, digital art, mixed media Ace of Wands, digital art, mixed media In Between, digital art, mixed media
Upcycled Journal From Book
Old Book + Recycled Paper = New Journal! As part of the Elmer's Holiday Memories Campaign* through Social Fabric, I had the opportunity to create an easy, affordable last minute holiday gift using my favorite Elmer's and X-ACTO products, and requiring only one quick stop at our local Walmart! With all the homework, music lessons, karate and dance classes, school performances, cookie exchanges and all the other holly jolly of the season, there's been little time to shop, let alone craft! So a one-stop-shop was an absolute must for my** handmade gift project, which was inspired by the Ordy & Joon post I had tacked to my "Crafty Inspirations" board on Pinterest earlier this year.
Lessons
Drawspace Pro Lessons are designed for artists of all levels and educators, and are logically organized into resources and activities. Eventually, all lessons and E-books authored by Brenda Hoddinott will be available here: four to eight brand new lessons and newly-revised older lessons are being added every month! Upgrade Now: Download all 246 lessons and 4 e-books! Try for Free: Download lessons marked as "Free"! Free 1.1.R1 Glossary Of Art Terms
DIY Bookbinding
By Arounna Khounnoraj of bookhou I wanted to do a project using some vintage wallpaper I had kicking around. If you like, this project is also good for recycling and reusing some other types of papers. This project is fun and fast and makes great gifts or for your own use. what you need: -paper for the cover (I used wallpaper - you can experiment with different weights and thickness) -small piece of craft paper (2.5 x 5 in.) for the spine -recycled bond paper for the inside of the book (cut to 4 x 5 in.) approx 60 sheets -cutting mat -exacto knife -two large clips -two pieces of thin wood 1 x 6 in. -brush -white glue
Judith Ann Braun's Fingers Are Magical
With an art career spanning more than three decades, Judith Ann Braun has tested the limits of her artistic musculature. She began as a self-described “realistic figure painter,” and worked through the struggles common to anyone who endeavors upon an artistic pursuit, that of searching for one’s own voice in the chosen medium. Fast forward to the 21st century where the evolution of Braun’s work has brought us to the Fingerings series, a collection of charcoal dust landscapes and abstracts “painted” using not brushes but her fingertips. Braun has a specific interest in symmetry, as evidenced by the patterns she follows in a number of the Fingerings pieces as well as work in the Symmetrical Procedures collection. Her fingerprints are obvious up close in some of the paintings, though a step back and the grandeur of Braun’s imagination sprawls into a landscape of soft hills, overhanging trees, delicate florals, and a reflective waterway. Share With Your Friends
Staple-Free Matchbook Notepad
In an effort to use up the damaged & small surplus of 2010 calendars I have on-hand, I've been experimenting with ways to repurpose them. These matchbook notepads were this week's project. They are easy to make .... and adorable ... and completely practical. I'll be making these to drop into my customers' packages as a token of thanks.
expressions
Boy, I didn't know what I was getting myself into when I started this. I've had requests for some sort of expressions tutorial dating back a while now, so I figured, "Sure! I can explain expression drawing...and it'll be way better than all those tutorials out there that are nothing but charts of generic expressions.
how to draw hands
So everybody knows that the hands and the fingers are one of the hardest things to draw. So here is a personal collection of different hand references, hope to enjoy it and never stop practice. Hogarth hand poses from Iron Giant (middle of page)
Creating Colorful Bookcovers
bySusan MyersonAugust 2, 2012 With school time just around the corner, I came up with a school craft project that incorporates brightly colored paper. After all, a long school day could certainly use some sunshine! I created fun book covers using the technique called Iris Folding! The plan was to revamp the old version of the book cover. You know, the one that is made from a grocery bag?
Quick craft // DIY galaxy envelopes
Galaxy DIY’s are everywhere at the moment and it’s easy to apply this theme to lots of paper-craft projects. All you need is an old astronomy magazine (they contain page after page of mind-blowing images that you can cut out)! I made some envelopes (and some geometric wall-art….coming soon)! There are a gazillion envelope templates on the web that you can use (or you could use my string-tied envelope template). You could also make some galaxy gift-tags/ribbon or some 3d galaxy geometric shapes. Do leave a comment if you have any more ideas ^_^


