background preloader

10 Easy Ways To Preserve Herbs
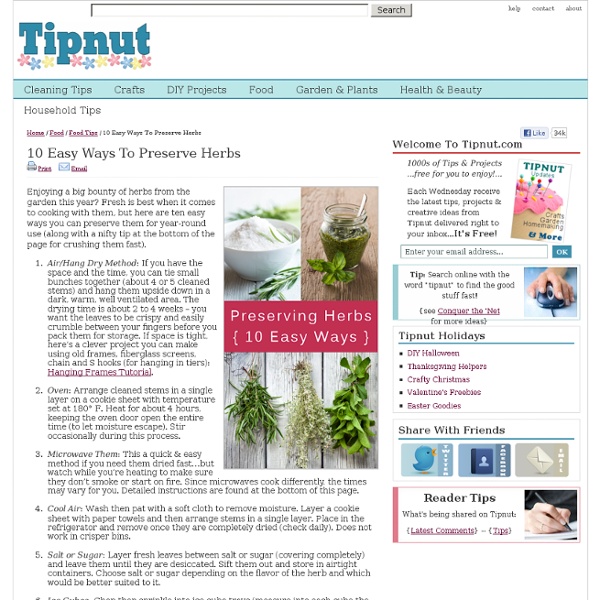
10 Easy Ways To Preserve Herbs
Enjoying a big bounty of herbs from the garden this year? Fresh is best when it comes to cooking with them, but here are ten easy ways you can preserve them for year-round use (along with a nifty tip at the bottom of the page for crushing them fast). Air/Hang Dry Method: If you have the space and the time, you can tie small bunches together (about 4 or 5 cleaned stems) and hang them upside down in a dark, warm, well ventilated area. The drying time is about 2 to 4 weeks – you want the leaves to be crispy and easily crumble between your fingers before you pack them for storage. If space is tight, here’s a clever project you can make using old frames, fiberglass screens, chain and S hooks (for hanging in tiers): Hanging Frames Tutorial.Oven: Arrange cleaned stems in a single layer on a cookie sheet with temperature set at 180° F. *First published December 19, 2006 Here’s a quick method to try if you need them fast…but watch to make sure they don’t smoke or start on fire.

Preservation Guide: How to Freeze Herbs Cut Off Long Stems The little stems between the leaves are fine to chop up. Chop With A Mezzaluna If you have one of these handy chopping devices, chopping fresh herbs is all that much easier, but a regular chopping knife will work just as well. Spoon Into An Ice Cube Tray Once everything is chopped up, spoon the herbs into an ice cube tray, making sure to distribute evenly. Pack them in pretty tightly. Top Off The Tray With Water Pour the water in slowly. Put The Cubes In A Freezer Bag After the cubes are frozen, pop them out of the tray and stash them in a freezer bag to keep them tasting their freshest. 6 fascinantes servicios para publicar tu portafolio online gratis Con la crisis que ha afectado a un buen sector de empresas convencionales y el aumento de empleados freelance, se ha empezado a notar que las oportunidades laborales ahora se encuentran en la red, pero al igual que en la vida cotidiana el trabajo virtual demanda innovación, creatividad, algo impactante que no se limite a la creación de un perfil en Twitter o Linkedin por ejemplo. Pues bien, en Mashable han compartido algunos buenos servicios para artistas gráficos que desean dar un punto adicional a su perfil virtual publicando su portafolio online de una manera sencilla, sin prescindir en momento alguno de la calidad y con el suficiente poder para captar la atención de un buen número de lectores y clientes. También pueden ser de utilidad para empresas que quieran compartir sus catálogos o promocionarse un poco más a través de la parte visual. En fin, aquí están: Carbonmade Behance WorkSimple Dribbble Portfolio by Deviantart Pinterest

Long Overdue Fusing Plastic Bag Tutorial - StumbleUpon I realized this afternoon that I basically explain this technique to an Etsy Labs visitor at least once a day, but had never put the instructions online. So, here it is. Fusing! Plastic! Bags! What you'll needPlastic bags (thin, flimsy ones work best)Parchment paper, freezer paper or plain old copier paperIron (and your favorite ironing surface) Making it Flatten out the bag and trim the bottom seam and handles off. Turn the bag inside-out if it has printing on it. Next, run a hot iron (we set ours to "Rayon", but you will need to experiment a little to see what works for you) and keep the iron moving constantly. Peel a corner of the paper back to see if the plastic is fused together. Peel the parchment paper away from the finished plastic sheet. Here are a few more rad examples of what you can do with this stuff, courtesy of Etsy seller Eclipse Alright, y'all.

Top 10 Essential DIY Skills That Aren't as Hard as You Think I think it depends on your definition of "maintenance." I wouldn't hesitate to change my own oil or something like that but I wouldn't dream of replacing a radiator myself. That isn't my idea of "maintenance." That's fixing something. Sorry you are afraid of doing that stuff, but even a complete engine rebuild is easy to do, and no you don't need "special tools" unless you call things beyond a hammer and screwdriver "special" I can do a front end alignment on a car in my driveway with a tape measure and a couple of carpenters squares along with the wrenches most people would have. Also if you do buy the cheap but special tools you can replace your own tires and balance them better than the "laser computerized" balance machine at the tire place. In fact the only expensive special tools I need are a Crane and engine run stand. Danger? This is why I don't take my cars to the dealer for any routine maintenance. Aside from that, dealers are inconvenient.

lovelywholesale.com USER info Tissue Paper & Paper Flowers Tutorial I debated sharing this tutorial for a couple-o-reasons. Reason 1. It's a craft that has been around since before I was born and reason 2... it's a craft that has been around since before I was born. Since it's new to me I figure it's got to be new to someone else too so I am doing it anyway! Supplies you'll need to make tissue paper flowers:Tissue paper (seeing as how this IS a tissue paper flower tutorial it would stand to reason that some form of tissue paper will be required)16 HUGS (just checking to see if you are actually reading this)Pipe cleaners or floral wireScissors Extras (for pizzaz): glimmer mist, brads, 2 inch Styrofoam balls, ribbon, more hugs (still checking), a flower girl (seriously), and lastly... As I stated last week, I purchased a Martha Stewart tissue paper flowers kit a few months ago on clearance at Malwart. Since I know a lot of people cannot find these kits I figured I would share some of the details and the templates I made so you can make them too! ...or...

Make Clothes and Accessories When you make your own clothing and accessories, your style is truly like no other. DIY fashion is often quite easy to accomplish, and the satisfaction of saying 'I made it!' is priceless. Start with some easy projects and advice. DIY style can happen in a matter of minutes. Shirts and Tops Create these cute tops and shirts with a little DIY know-how. Bags and Purses Carry something that makes a statement or simply holds all that stuff. Skirts Tailor your prom dress or just make a skirt shorter. Dresses You can create simple dresses or alter your dress to the perfect fit. Pants and Shorts DIY Pants. Hair Accessories From headbands to hair sticks, you can make all sorts of hair accessories at home. Belts Make your belt do more than hold up your pants. Hats Cap your lid with a toasty winter hat or a breezy sun-blocker. Gloves, Wristbands and Warmers Warm your chilly hands with these gloves, wristbands and arm warmers. Wraps and Scarves Add a wrap or a scarf, be it for warmth or style. No-Sew Clothing

15-Minute Arm Workout: Armed For Summer The heat of summer is right around the corner, and that means breaking out the essentials: sundresses, tanks, and lots of skin. If your arms aren't ready to see the light just yet, don't freak. New York City personal trainer Hannah Davis has a plan that will get you toned and tight in plenty of time. The trick: Most women focus on single-joint exercises, like biceps curls, which work primarily one muscle, says Davis. Follow this workout two to four times a week: Warm up with three sets of the inchworm, resting for no more than one minute between sets.

Make A Cheap &Easy Solar USB Charger With An Altoids Tin : TreeHugger - StumbleUpon Photos by Joshua Zimmerman The craftster behind the very popular $3 solar-powered emergency radio is back with a new awesome project: a cheap solar battery charger with a USB plug. Zimmerman wrote, saying that he saw a lot of small solar powered chargers being talked about over Earth Day, but there was a big problem: "They're all quite nice, but also quite expensive. So, he came up with his own, using one of our favorite reusable items -- the ever wonderful Altoids tin. In looking for the cheapest way to accomplish the task, Zimmerman found that he could build a USB solar charger for under $30 (or $10 if be buys parts in bulk, though it's not likely you'll be buying bulk solar cells and DC-to-USB converter circuits). Zimmerman states, "The central brain of our project is a DC to USB converter circuit. It can be done with a Minty Boost kit, a premade circuit off of ebay, or grabbing one from a cheap USB charger.

Related: