background preloader

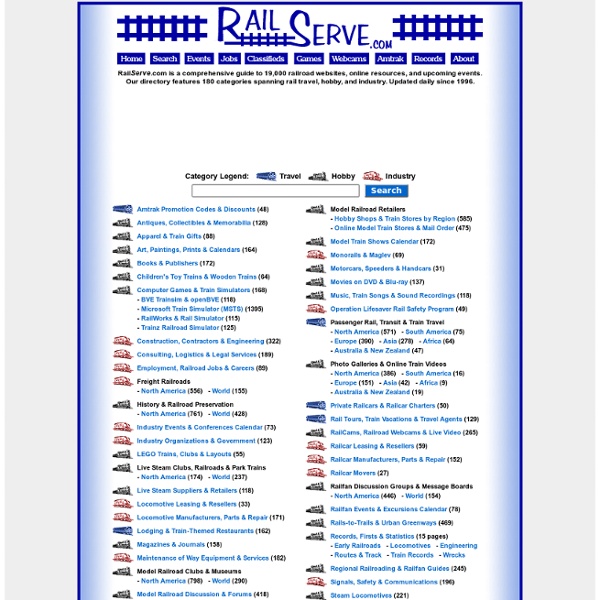
RailServe.com Railroad Links Directory: Rail Travel, Hobby & Industry

RailServe.com Railroad Links Directory: Rail Travel, Hobby & Industry

Modelmates The American Railroads Column - My Modular Adventure: Roundhouse weathering | Model Railroad Hobbyist magazine Dorman64, Thank you for your comments. You are perfectly right; this all started out as an article about an operating TT and roundhouse which would be published in two or three articles. Well, as you so rightly observed it is quite a lot more than that. When I stated the article, based on Joe Fugate's recommendation, I went with a step by step format. I must say that if you read the first article, or "book", with it's 90 some pictures and 40+ pages, you might have been intimidated and rightfully so. But if you take the time to read through it, there is a lot of detailed info that can be applied to most any project, not to mention different tools and jigs to make life easier. This is true of most every article or column I have read, even though it is not in my scale or not a project I want to build, there is always a technique or some item of interest that makes it worthwile for me to take the time to read it. Now where have I heard that one before...hummm??? Les Halmos Modular Columnist

Railroad Picture Archives.NET How to make villages for model train layouts How to Make villages for model train layouts In this series of hobby videos, you will learn how to create accurate layouts of model train villages by comparing them with vintage photos. Make villages for model train layouts - Part 2 of 16 Click through to watch this video on expertvillage.com Make villages for model train layouts - Part 3 of 16 Make villages for model train layouts - Part 4 of 16 Make villages for model train layouts - Part 5 of 16 Make villages for model train layouts - Part 6 of 16 Make villages for model train layouts - Part 7 of 16 Make villages for model train layouts - Part 8 of 16 Make villages for model train layouts - Part 9 of 16 Make villages for model train layouts - Part 10 of 16 Make villages for model train layouts - Part 11 of 16 Make villages for model train layouts - Part 12 of 16 Make villages for model train layouts - Part 13 of 16 Make villages for model train layouts - Part 14 of 16 Make villages for model train layouts - Part 15 of 16 See Also

Southern Pacific Transportation Company The Southern Pacific Transportation Company (reporting mark SP), earlier Southern Pacific Railroad and Southern Pacific Company, and usually called the Southern Pacific or (from the railroad's initials) Espee, was an American Class I railroad. It was absorbed in 1988 by the company that controlled the Denver and Rio Grande Western Railroad and eight years later became part of the Union Pacific Railroad. The railroad was founded as a land holding company in 1865, later acquiring the Central Pacific Railroad by lease. In 1929 SP/T&NO operated 13848 route-miles not including Cotton Belt, whose purchase of the Golden State Route circa 1980 nearly doubled its size to 3,085 miles (4,965 km), bringing total SP/SSW mileage to around 13,508 miles (21,739 km). By the 1980s route mileage had dropped to 10,423 miles (16,774 km), mainly due to the pruning of branch lines. The SP was the defendant in the landmark 1886 United States Supreme Court case Santa Clara County v. Timeline[edit] Origins[edit]

Detailing an Alley By Christopher Brimley Occasionally, when doing a little city planning on your layout, you find extra space between your buildings. There are a few remedies for this space, such as sizing the block to fit the buildings perfectly, kitbashing or scratch building a structure to fit, or leaving the hole open for an alley. I purposely plan alleys because they add a large amount of visual appeal and break up the monotony of a row of buildings. Whatever the era of your layout, you can easily detail an alley to blend in. For my alley, I modeled the transition era for a mid-sized city. Building a Plate I decided to build my alley on a small diorama in HO scale. To begin, I built a mold from sheet and strip styrene. The height of my curb and the raised street is .100”. After the mold was built, I poured the plaster into the mold. Next, I scribed the expansion joints in the concrete sidewalks, curb, and gutter using a ruler and a hobby knife with a dull blade. Structures Details

SoundTraxx Welcome to the SoundTraxx Tsunami Preview! We know you can't wait so here are just a few small samples of what you can expect from a Tsunami Digital Sound Decoder! Keep in mind that the reproduction of the sound will not have the fidelity of the sounds you will hear from your SoundTraxx sound systems. The files have been compressed and kept deliberately small for quick downloading. You may also notice slight overall volume differences depending on your computers sound card and the speaker being used. These sound files are the property of SoundTraxx (Throttle Up!) In the player below, find the part number or use the description to locate the sound you wish to hear. CLICK on the sound title you would like to listen to! Cheap Junk By T.W. Rimer All photos by T.W. Rimer Creative clutter has become an art form in the hobby of model railroading, and consists of miscellaneous paraphernalia strewn about an area to represent the untidy habits of the miniature populace. With the abundance of commercial detail castings, a scene can now be detailed to the point where a photograph will defy detection from the real thing. Printed circuit board etchant in a small non-metallic container, a receptacle or water, tweezers and an eye dropper are about all that is needed to etch aluminum corrugated siding. The portion of my Redbank Creek Railway that never fails to draw the viewer’s attention and compliments is the scrap yard located behind the locomotive servicing facilities. The realism attained in this collective pile of metallic refuse can be attributed to the fact that the scrap items were carefully selected, finished, and placed in this setting piece-by-piece, rather than as one pre-cast unit.

RIDING THE CAB FORWARDS When I was a young boy around ten years old I rode up front with the engineer and fireman in the cab of a fully operable freight hauling Southern Pacific Railroad 4-8-8-2 cab forward locomotive, one of the largest most powerful railway steam engines ever built --- and I rode in one not just once, but twice. The first time was with my older brother on the slightly down angle 50 mile straight-on set of rails in California's high desert out of the community of Mojave. The 100 car plus train was heading southbound towards Los Angeles, the locomotive's 63-inch drive wheels sometimes wavering along the distantly mirage laden tracks howling at flatout speeds approaching 90 miles per hour. It wasn't long after we arrived at the ranch that we started showing up along the siding and watering stop when the cab forwards showed up, watching the train crews do whatever train crews do and getting as close to the rail cars and locomotives as we could.

Scratch Build a Billboard Frame pt1 : N Scale Limited Have you ever needed a frame to stick a billboard into? You see them everywhere, on road sides, sides of building and on the roofs as well. While there are many great commercially available ones available, I will teach you a few basics on how to scratch build one. Unlike previous articles this one will be a little different because it is the first that I have experimented with video. Construction Materials Used .010x .020″ .010x .040″ .020x .040″ .060x .060″ .060x .080″ .010″ sheet styrene Aged Concrete (414320) Burlington Northern Green (414209) D & H Grey (414197) Rust (414323) Dirt (414308) Elmers Stix All Billboard of Your Choice The paint listed is the colors I used and I encourage you to make yours unique and use whatever colors you chose. Video Stay tuned for part 2 as we finish the art deco billboard frame. About the Author

Age of Steam Roundhouse Prototype Yards: Adapting Prototype Operations to Model Railroading Originally presented as a clinic at the 1998 NMRA National Convention Introduction This is an opportunity to look at my memory of how one particular prototype operated. Personal Background I grew up on the Rock Island. Prototype Basics Crew Size – During my time as a railroader crews consisted of 5 men on nearly every job. Crew Duties – The engineer was the “driver.” Crew Assignment – Whether the yards was small, a la Carrie Ave., or huge, a la Armourdale, there were specific jobs assigned to specific crews. Special Jobs – In addition to the standard 5 man crew jobs there were also some assignments that did not require a full crew. Crew Communication – In my time all communication among the 5 man crew was done by hand, lantern, or fusee signaling. Safety and Operating Rules – The rule book spelled out how the job was to done “safely.” Model Operations I have some purely personal ideas about how various aspects of prototype operations can be adapted to model operations. Conclusion Glossary

4-12-2 "Union Pacific" Type Locomotives In the mid 1920s many western railroads were using the 2-10-2 and 2-8-8-0 type locomotives for mainline freight trains. These locomotives were getting the job done but were limited to about 20 mph. The Union Pacific Railroad experimented with a three-cylinder 4-10-2 in 1925 and actually bought ten of them. These 4-10-2 locomotives were capable of slightly greater speed while being capable of pulling about 20% more tonnage. The UP wanted more and approached the American Locomotive Company with a design for a 4-12-2 and received the first of this new design in 1926. The American Locomotive Company built eighty-eight of these fast freight locomotives for the Union Pacific Railroad. The UP ran these locomotives at 50 mph hauling 120 car trains. UP 9000 Geometry The UP 9000s had two outside 27"x32" cylinders driving the third set of drive wheels and a third 27"x31" cylinder in the center driving the second axle. 1st Axle Clearance Crank? Driver "Quartering" and Valve Gear "Loping" Exhaust

Related: