background preloader

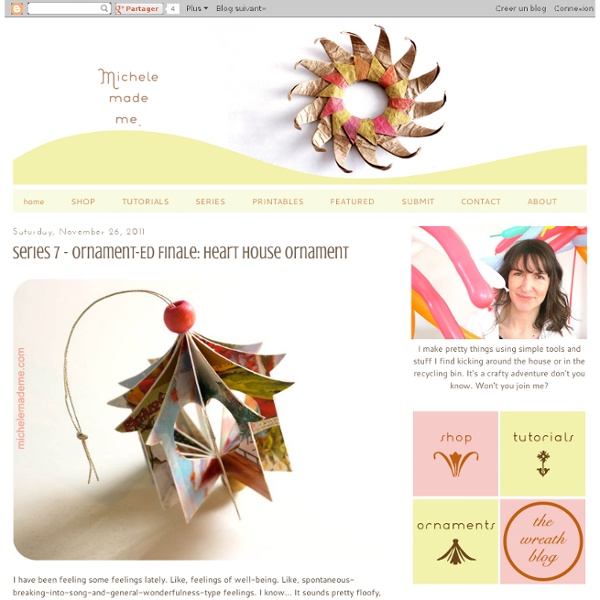
Series 7 - Ornament-ED Finale: Heart House Ornament

Series 7 - Ornament-ED Finale: Heart House Ornament
I have been feeling some feelings lately. Like, feelings of well-being. Like, spontaneous-breaking-into-song-and-general-wonderfulness-type feelings. Before I Begin: I made two versions of this ornament. Tutorial ♥ Heart House Ornament You will need: Old greeting cards or tissue box (but I strongly recommend old greeting cards)Pair of scissorsExacto knifeCraft glueClothespins (for clamping)Pretty stringTwo wooden beads (I stole these from The Boy's stash. 2. 3. 4. 5. Don't look now, but the cute heart house is complete and ready to hang! It reminds me of a itsy garden gazebo or merry-go-round, hee hee. On that note, it is time to bid a fond farewell to this little series... Have a happy weekend.

Adventures in garlanding « Bookity I made these map garlands as a special request for a customer and they have proved rather popular. The map colours glow in the light – all those blues and green smoosh together into something very pretty. This is the style I call ‘paper onions’. These are paper hearts, strung on twine. I’d like to experiment with something other than twine though. Like this: Like Loading... Création my way Paper Star Lantern Tutorial Buon lunedì a tutti!! Iniziamo la settimana con un bel DIY dedicato alla Pasqua! Tra mille possibilità di decorare le uova, io ho scelto di fare dei coniglietti, da usare per vivacizzare la tavola e far giocare i bambini, o anche come segnaposto. Questo post ha avuto una gestazione un po' lunga e piena di imprevisti... Happy Monday everyone! Ma come vedete, almeno oggi sembra andare tutto bene!!!!! But as you can see, at least today everything seems to be going well!!!!! Vi serve: tempera acrilica rossa, cartoncini panna e rosa, pennarello nero indelebile, matita, pennello, gomma, colla stick, forbici, bicchieri di carta, colla vinilica. You will need: red acrylic paint, cardboards cream and pink, permanent black marker, pencil, brush, eraser, glue stick, scissors, paper cups, PVA glue. Il vostro coniglietto è pronto! Your bunny is ready! Vi suggerisco anche un semplice giochino da fare con i bambini!

border punched ornaments I was excited to get a chance to use the new interchangeable border punches from Fiskars. They function the same way as their regular border punches, except you can pop out different design cartridges so they store very compactly! I used them to spice up the popular paper strip ornaments. You can view full photos and details in my article here at Fiskars. Le blog de Coeur d'artichaut. Pour les amoureux du fait-maison et DIY addicts Making stickers out of recycled paper Making stickers out of recycled paper October 25th, 2011 I recently discovered this great tutorial by Amanda Wood on how to make lovely stickers from recycled paper. You will need: For the glue: 6 tbsp white vinegar 4 packages of unflavoured gelatin 1 tbsp flavouring such as peppermint, lemon or vanilla extract For the stickers: foam paint brush security envelopes or other papers from the recycling bin (enough glue for about 20 envelopes) paper punch (I used a 2″ scalloped circle punch in the picture) sponge for moistening stickers First of all you need to make the glue, so bring the vinegar to boil in a small pan. If you don’t want to go to all the hassle of making glue, you could always use ‘lick n stick’ glue – it’s the stuff I use for my recycled envelopes and you can get it here. To make the stickers, take apart your chosen envelopes and open them up flat. Next you get creative with paper punches – you can use whatever size or shaped punches you like.

Today's crafts, paper tree - Craft of the Day, paper Christmas tree Det finns lite olika varianter på den här idén har jag sett (se t ex Ellas Inspiration, @ Down Under, Martha Stewart och Fru Fly). Mina pappergranar gjorde jag med hjälp av pepparkaksmått. Ett perfekt pyssel att göra tillsammans med barn. I’ve seen some variations on this theme online (see for example Ellas inspiration, @ Down Under, Martha Stewart and Fru Fly). Jag använde mig av min skärmatta, placerade pepparkaksformen ovanpå papperet bankade lite med en hammare för att markera formen. I used my cutting mat, placed the cookie cutter on top of the paper and pounded a bit with a hammer to mark the shape of the tree. Klipp eller skär ut en liten stjärna i gult eller vitt papper och skär en liten skåra i ena stjärnspetsen. / Cut out a small star in yellow or white paper and make a score in one of the points. Trä granarna i varandra och placera stjärnan i topp.

Des chapeaux à faire soi-même Les 10 doigts de Doudi 10doigtsdedoudi.canalblog.com Cette fleuriste créative a plus d’un tour dans son sac. Bricolage, broderie, couture, jardinage… Si son blog n’est plus mis à jour, il y a encore plein de chose à y apprendre ! Doudi vous propose une capeline ample et confortable pour l’été. Quand on voit son tuto, clair et concis, on n’a qu’une envie : multiplier les capelines pour les assortir à nos tenues d’été ! le 20 juin 2012 - photos : Fotolia/DR Pour célébrer l’arrivée du soleil, PureLoisirs vous a sélectionné cinq très bons tutos de chapeaux. Des chapeaux à faire soi-même Ce chapeau en laine bouillie nous fait craquer ! Vous voulez un chapeau inspiré des années 30 ? Et pourquoi pas moi etpourquoipasmoi.canalblog.com On aime ce blog car il montre comment ajouter des petites touches de poésie dans le quotidien. Chiffons Papillons chiffonpapillon.canalblog.com De nombreuses créations à découvrir sur ce blog. Ne vous arrêtez pas au nom de ce chapeau ! M.E.L.C.R.E.A.Tmelcreat.canalblog.com

DIY Paper Feathers A few weeks ago I was helping my friend create her hat decoration for the Kentucky Derby party we were going to be attending together. We made over-sized paper flowers in bright pinks and plums and added some huge paper feathers into the mix to finish the over-the-top look. They were so pretty I knew I had to create a post for you on making a smaller version of these simple paper feathers. You can use them for gift toppers, a wedding boutonniere, put a few in a shadow box to hang on your wall, or. . . make a paper feather wreath for your summertime decor. Stay tuned for the wreath post later this week. These feathers are very simple and would make a fun craft project for kids.

D-I-Y: Loopy Christmas Balls | Laura Wears... Comment flouter un visage sur une photo La publication de photos d’enfants sur un blog de classe est un sujet délicat, parce qu’il fait intervenir à la fois le droit à l’image et la protection des mineurs. L’objet du présent article n’est pas de faire le point sur la réglementation, parce qu’à ce jour je n’ai pas tous les éléments en ma disposition, et je ne voudrais pas vous dire des bêtises. Je lance d’ailleurs un appel aux « Atice », vous qui connaissez bien le sujet, merci de me contacter grâce au formulaire de contact du site. Je vais préparer un dossier précis et complet sur la question, je vous le présenterai bientôt. Mais en attendant, voici une vidéo qui vous explique comment facilement « flouter » les visages des enfants (ou des adultes d’ailleurs), en utilisant un outil gratuit et compatible à la fois avec Mac, PC ou linux. Lorsque vous rendez flou un visage, n’en oubliez pas la raison: il s’agit de ne pas pouvoir reconnaître la personne en question. Visionnez la vidéo (elle va s’ouvrir en grand format):

Imprinted Easter Eggs Every Easter, as long as I can remember, my Grandma dyed the prettiest leaf and floral imprinted Easter eggs! They were so natural and lovely, but produced with nothing more than an easily concocted natural dyestock and little bits of flora. We lost my Grandma last year and for the first time, Jaydin and I recreated her dye with spanish onion skins, water and a few tablespoons of vinegar. We also purchased a few pair of cheap panty hose and elastic hair bands. We first skinned about 10 spanish onions and placed the skins into a medium sauce pan along with about 4.5 cups of water and 2 tablespoons of white vinegar. We placed our leaf and/or flower petals onto the raw eggs and wrapped them tightly in a small piece of nylon securing both ends with elastic pony tails. We placed all of our eggs into the dye pot and hard boiled them by bringing the pot to a very light simmer on medium heat and lowering the temperature to low then covering them for about 12 minutes.

Handmade Hourglass Ornaments Today, I’m over at CraftSnob sharing a quick handmade ornament tutorial made with supplies you likely already have on hand. I guess you could consider me a major scrooge since I don’t really decorate for the holidays. Or any holiday. In the past couple of years (including this one) we’ve moved just before the holidays so I haven’t really had much time to prep for them. Also, I hate buying Christmas decorations. We’ve always been really low on storage space (until now – we have nearly 1300 sq feet of storage space in our new place!) My mom was always a huge decorator for the holidays & I have such fond memories helping my mom decorate the Christmas tree. Click here to see the full tutorial at CraftSnob.

Mes conseils, trucs et astuces Archives Le coton enduit ou toile enduite est principalement utilisé(e) pour des nappes, tabliers ou sacs de toilette. C'est un tissu plastifié, étanche, mat, moins épais que la toile cirée et qui (de loin) donne l'impression d'être un tissu "normal". Mais il ne se comporte pas du tout comme tel ! Epingler Utiliser un dé à coudre pour enfoncer les épingles. Mettre le moins d'épingles possible car les trous se verront. Couper Je vous conseille vivement de ne pas utiliser vos beaux ciseaux de coupe pour ne pas en abîmer le tranchant. Plutôt que d'épingler le patron sur le tissu, il vaut mieux le fixer avec du ruban adhésif sur l'envers puis dessiner sur le tissu le contour de la coupe. Coudre à la main Choisir une aiguille de grosseur moyenne : il ne faut pas qu'elle se casse, mais il ne faut pas non plus qu'elle fasse de trop gros trous ! Coudre à la machine sur l'endroit La face enduite de la toile ne glisse pas sous le pied pressure, ni sur la tablette de la machine : l'ouvrage patine.

Related: