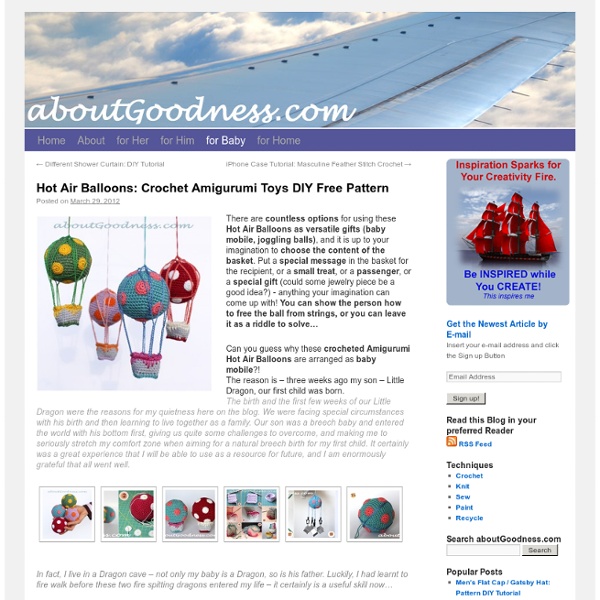
Hot Air Balloons: Crochet Amigurumi Toys DIY Free Pattern
Hobbes - Amigurumi Patterns.net
I've finally decided to write up my Hobbes pattern and instead of selling it I'd like to give it to you for free. The reason he is free is because the creator of Calvin and Hobbes, Bill Watterson did not want to commercialize his work so keeping that in mind Please don't sell this pattern and don't sell the completed work. ~~~~~~~~~~~~~~~~~~~~ I originally made this up for my son because of his love for Hobbes (he's 23 now) I armed myself with Watterson's brilliant drawings as a reference. I made this pattern to look as close as possible to the Hobbes' drawings . I realized that Hobbes could be broken down into basic shapes. He also had the muzzle of a cat so I looked to the famous Amineko cat. Once I got the shapes down I worked on size. Until I started making him I never realized how different Hobbes looks from a regular cat. His head and body are a lot longer thanan normal cat plus he has the shortest fattest legs. That caused me problems since tubular legs and arms don't want to bend. Resources:
DIY Crocheted Hair Ties
Last week was a busy one. University-busy, not crafty-busy. And always when I'm having a busy week and I'm working like crazy my brain just likes to tease me with all the creative things I could be doing instead. A nasty brain I have. So between homework and studying I decided to whip up these lovely crocheted hair ties and it took me less than 45 minutes for all three of them! You'll need: A simple hair tie, best are ties that are slightly darker than your hair or slightly darker than the color of the yarn (you won't see them shining through later). The white one was designed to look like you took a simple crocheted ribbon instead of a hair tie, so I added fake ribbon ends and a knot. [1] Start with a slip knot and continue with 5-7 chain stitches. I'm in love with the light and natural look of these hair ties.
Big Snowy Owl
There’s something about owls. Is it their baby-wide eyes? Their mysterious nighttime habits? Or their totemic gumdrop shape? This one is heavy on the lovable! Making the Big Snowy Owl was probably the most fun knitting I’ve done all year. Materials For the Main Yarn: 4 skeins of Blue Sky’s Bulky, 50% Alpaca and 50% Wool. Gauge 2 1/2 stitches = 1 inch in stockinette Size From Ground to Top of Ear: 17 inchesCircumference: 38 inches Pattern The Bottom With the Main Yarn and the double pointed needles, cast on 8 stitches. Place a stitch marker and join for working in the round, being careful to not twist your stitches. Round 1: Knit into the front and back (kfb) 8 times. (16 stitches) Round 2: Purl. Round 3: *P1, kfb, repeat from * to end of round. (24 stitches) Round 4: Purl. Round 5: *P2, kfb, repeat from * to end of round. (32 stitches) Round 6: Purl. Round 7: *P3, kfb, repeat from * to end of round. (40 stitches) Round 8: Purl. Round 9: *P4, kfb, repeat from * to end of round. (48 stitches) The Body
Related:
Related:
