ARIA Example: Drag and Drop Tic-Tac-Toe Validate DOM (HTML5) Tic Tac Toe Game Keyboard Shortcuts Tab: Move focus between dragable objects and grid Up Arrow: Move focus up one grid cell Down Arrow: Move focus down one grid cell Left Arrow: Move focus one grid cell to the left Right Arrow: Move focus one grid cell to the right Space: Pick up / Drop game peice ARIA Roles and Properties Roles: role="application" role="grid" role="gridcell" role="alert" role="button" States and properties: aria-labeledby aria-disabled aria-grabbed aria-dropeffect HTML Source Code Show HTML Source Code: draganddrop1_inline.inc Javascript Source Code Show Javascript Source Code: globals.js /** * * The Globale Variables */ var KEY_PAGEUP = 33; var KEY_PAGEDOWN = 34; var KEY_END = 35; var KEY_HOME = 36; var KEY_LEFT = 37; var KEY_UP = 38; var KEY_RIGHT = 39; var KEY_DOWN = 40; var KEY_SPACE = 32; var KEY_TAB = 9; var KEY_BACKSPACE = 8; var KEY_DELETE = 46; var KEY_ENTER = 13; var KEY_INSERT = 45; var KEY_ESCAPE = 27; var KEY_M = 77; return str; }
JavaScript Garden Although JavaScript deals fine with the syntax of two matching curly braces for blocks, it does not support block scope; hence, all that is left in the language is function scope. function test() { // a scope for(var i = 0; i < 10; i++) { // not a scope // count } console.log(i); // 10} There are also no distinct namespaces in JavaScript, which means that everything gets defined in one globally shared namespace. Each time a variable is referenced, JavaScript will traverse upwards through all the scopes until it finds it. The Bane of Global Variables // script Afoo = '42'; // script Bvar foo = '42' The above two scripts do not have the same effect. Again, that is not at all the same effect: not using var can have major implications. // global scopevar foo = 42;function test() { // local scope foo = 21;}test();foo; // 21 Leaving out the var statement inside the function test will override the value of foo. // global scopevar items = [/* some list */];for(var i = 0; i < 10; i++) { subLoop();}
Blog do Barbi-Carlos Barbieri Create an HTML5 Canvas Tile Swapping Puzzle In this tutorial we will be working with the HTML5 canvas and Javascript to create a dynamic tile swapping game. The result will be a puzzle that works with any given image, and has flexible difficulty levels that are easily adjusted. Here is a quick shot of the puzzle we will be building: Click to play A couple of notes: Cross-browser compatibility: This puzzle was tested and works in all versions of Safari, Firefox, and Chrome that support the canvas element.Mobile: The code provide here works in the above-mentioned desktop browser and is not optimised for mobile. To get started, create a directory for the project. Open a new file using your favorite text editor and save it inside your project directory, next to your image. All we need to do here is create a standard HTML5 template containing one canvas tag with the id of “canvas”. Now start by placing your cursor inside the script tag. Ready? Let’s set up our variables and take a look at each one. Next is a series of variables:
Chosen - a JavaScript plugin for jQuery and Prototype - makes select boxes better Chosen is a jQuery plugin that makes long, unwieldy select boxes much more user-friendly. Downloads Project Source Contribute Standard Select Turns This Into This Multiple Select <optgroup> Support Single Select with Groups Multiple Select with Groups Selected and Disabled Support Chosen automatically highlights selected options and removes disabled options. Single Select Multiple Select Hide Search on Single Select The disable_search_threshold option can be specified to hide the search input on single selects if there are n or fewer options. Default Text Support Chosen automatically sets the default field text ("Choose a country...") by reading the select element's data-placeholder value. Note: on single selects, the first element is assumed to be selected by the browser. No Results Text Support Setting the "No results" search text is as easy as passing an option when you create Chosen: Limit Selected Options in Multiselect You can easily limit how many options the user can select: Right-to-Left Support
Blog do Márcio d'Ávila A Gentle Introduction to Making HTML5 Canvas Interactive - simonsarris.com I wrote a book on HTML5, including three chapters on Canvas! Buy it here. This is a big overhaul of one of my tutorials on making and moving shapes on an HTML5 Canvas. This new tutorial is vastly cleaner than my old one, but if you still want to see that one or are looking for the concept of a “ghost context” you can find that one here. This tutorial will show you how to create a simple data structure for shapes on an HTML5 canvas and how to have them be selectable. The finished canvas will look like this: Click to drag the shapes. We’ll be going over a few things that are essential to interactive apps such as games (drawing loop, hit testing), and in later tutorials I will probably turn this example into a small game of some kind. The HTML5 Canvas A Canvas is made by using the <canvas> tag in HTML: A canvas isn’t smart: it’s just a place for drawing pixels. Canvas also has no built-in way of dealing with animation. So we’ll need to add: The things we draw . They are pretty self-explanatory.
Override function (e.g. "alert") and call the original function Tutorial: Root no LG Nexus 4 (E960) - Showmetech Alguns dias atrás nós publicamos aqui o review do mais recente aparelho da linha Nexus, o LG Nexus 4 (E960) um aparelho surpreendente! Agora vamos aprender como desbloquear e conceder o acesso ao root nele. O procedimento é muito simples, porém é sempre recomendado ler tudo com muita atenção antes de clicar em qualquer opção. Lembrando que a concessão do acesso ao root do aparelho pode configurar em violação dos termos de contrato e você perder a sua garantia, portanto, faça por sua própria conta e risco, somente se realmente for necessário. Bom, primeiro baixe e instale o Nexus Root Toolkit, um programinha que praticamente fará tudo por você. Conecte o seu aparelho ligado ao computador através do cabo USB. Agora abra o Nexus Root Toolkit e siga os passos a seguir: 1) Informe qual o seu aparelho e qual a ROM atual dele na opção “Your model type”. Em se tratando de um processo de root em um Nexus 4 escolha obviamente a opção “Nexus 4 (LG E960)” na lista de opções “Select the device you have”.
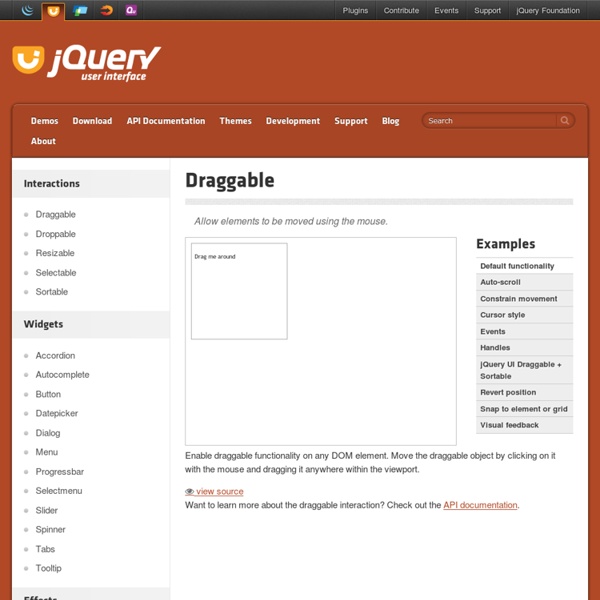
Implementing Drag and Drop Functions with HTML5 and JavaScript With HTML5 and JavaScript, you can implement native drag and drop functions within the Web browser. This is one of the emerging HTML5 tools that promises to make websites more interactive without relying on additional technologies such as Flash. In this tutorial we will create a simple page with images the user can drag and drop into designated areas. Create an HTML5 Web Page Create an HTML file for your drag and drop function. Add Drag Targets to the Page Your page will contain elements that can be dragged and elements in which the dragged items can be dropped. The draggable images in the page will be able to drop within these elements. Add Draggable Elements to the Page Let’s use a couple of image elements to drag within the page. Alter the width and height to suit your own images and give each one a unique ID attribute value. Alter the image elements to suit the name, location and dimensions of your own image files as well as your chosen IDs. Style the Elements Implement Dragging Conclusion