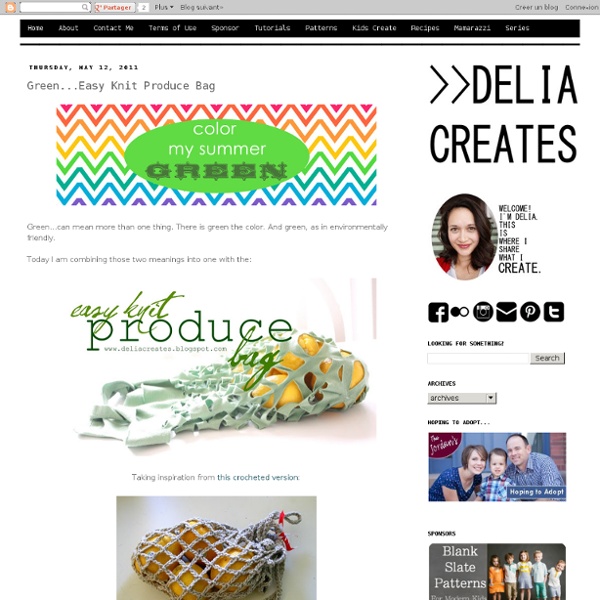
Crocheted Produce Bag Well, I thought since the produce bag was something I just made up real quick I should post the pattern. I am sure there are way better ones out there, but most of them end up decreasing at the end to get a smaller opening, but I wanted mine large so leafy stuff that I buy in multiple little bunches could poke out, like baby broccoli or bok choy. So here is the pattern, just in case you want to make a couple as well. Materials: 1 skein Lion Brand Organic Cotton Yarn (#680), or similar worsted weight yarn Size I-9 Crochet Hook Little scrap of fabric (optional) Rnd 1: Begin with an adjustable loop, and crochet 12 double crochet (dc) into the loop and pull tight. Rnd 2: *Chain 7, skip 1 dc and slip stitch in next dc.* Repeat around. Rnd 3: Chain 7, Slip stitch (slst) into 4th chain (ch) of round 2. Rnd 4: Ch 7, slst into the point where the last two rounds meet, then ch 7 and slst into the 4th ch of the last round as well. Rnd 16: Single crochet (sc) in every chain around, join with a slst.
Potholder from an old T-shirt - Recyclart Unique and budget-friendly. I invented a fun way to recycle old T-Shirt, making it useful items for your home. It ‘s very simple: just cut a T-Shirt in a circular fashion, forming a ribbon about 2 cm wide. Then I used clew got to knit a potholder to take pot boiling without risk, or keep next to barbecue. Not having the knitting needles you can use two ballpoint pens but, being very short, final size will be smaller. If you have knitting needles, however, you can create a larger object, to be used, for example, as a dinner placemat, or anything your mind suggests. If T-Shirt is multicolor, you’ll have a more varied and unpredictable result. It’s up only to you… Submitted by: Annamaria Cocuzzi !
Ten minute no-sew recycled t-shirt bag! Tutorial time! I got a gig teaching a recycled t-shirt project at the library a few months ago, with a request for a recycled tee bag – the only bags I’d made from tees in the past had required sturdy sewing, and I didn’t want hand-sewing to be the only thing holding the bottom closed in a class version of the bags, so I started brainstorming about some kind of hand-sewing-friendly or no-sew bag idea…. and here’s what I came up with! The simplest version of these bags is great for smaller tees, or the more light-weight kind of girl-tees – just turn the bottom of the shirt into a drawstring and tie it closed! As you can see, even with a not huge tee, this will still leave a significant hole in the bottom of your bag, but for purposes like grocery shopping, this size hole shouldn’t really matter… But to make smaller holes, just make more than one of them! Here’s a bag bottom with 2 holes: You could make it rounded, V-shaped, or squared like this one: My finished Sonic bag!
Buy Nothing Project | Bedroom Solutions Do you want to shift to a life with less plastic and less waste in general? Wondering where to start? Feeling overwhelmed? We’d love to help! We’ve learned a lot about how to change our own habits and perspectives over the past three years, and we’d like to offer this bit of advice: Please, don’t try to do everything at once! Remember that joy and pride are much better motivating emotions in the long run than guilt and shame. Here are our Bedroom Solutions. Kid Bedroom and Playroom: Skip the Cheap Plastic Toys to Make Room for Even More Fun © Liesl Clark If you already have plastic organizers for your kids’ toys and other belongings, keep using them! Curate Your Toys to Give Each Beloved Item Space © Liesl Clark Teach your children to curate their belongings, keeping those things that are meaningful, useful, well-made, and beautiful. Adult Bedroom: A Simple Bedroom is a Tranquil Oasis © Liesl Clark Pare your clothing down to what you truly like and wear. Like this: Like Loading...
Revamp old T-shirt into Cute Bra Strap! Yay! I saw a lot of T-shirt yarn projects in the blog land recently, So, Why not? T-shirt yarn for bracelet and necklace are some really cute projects, But I prefer something more useful that I can wear everyday! So, this is what I made them into... A cute bra strap...So, fun especially during summer time! Jojo helps me with the photo shooting session... Screen down for the tutorial... Ooops...more photos...can't help it Jojo take more than 50 shots... This is a really easy DIY, just simple 4 steps... Step one : Use 3 strand of the T-shirt yarn to create this strap Slot in the bra clip ... Cut and tidy up the end of the strap, and secure them with few stitches or run a stitch using the sewing machine Tie a knot at the other end Make two piece of these and you are done!!! Visit again later... I'm going to show you how to make another sweet easy bra strap it's only in super simple 2 steps!!! Love PC * Jojo I'm featured!!!
Reusing produce mesh / net bags | Eco Green Love Reuse: Net Bag from Oranges Reuse Garlic Bag as Soap Bag Reversible Dish Scrubber Using Recycled Mesh Produce Bags Mesh produce bags filled with styro packing peanuts in flowerpot before filling it with potting soil. Reusing mesh produce bags for Posh Paper Hats for a Royal Wedding Make Your Own: Repurposed Produce Mesh Bag Pot Scrubbers Trash Hacker: Last Minute Valentine From A Plastic Mesh Produce Bag Craft Project!! Deco Mesh Pumpkin Make a Mesh Sports Bag Crochet Your Own Reusable Mesh Produce Bag Upcycle a Mesh Produce Bag into a Nesting Materials Buffet for Birds Repurposed mesh produce bag Sewing projects for pre-school age using mesh produce bag Make V-Day Gift Bags Using Produce Christmas in July: Go green and make a white, Plastic Bag Christmas Wreath Reused produce packaging- this was the material my garlic and avocados came in. Use Plastic Mesh Produce Bags for Cast Iron Clean Up flower embellishment using a mesh bag! Mesh wrapped over the brayer and rolled in ink. repurposed scrubby
Flip-Flop Refashion: Part 1 (Braided Straps Summer is great. And warm. And full of outdoor activities and trips to the pool and random walks around the neighborhood. I love it. And my shoe of choice for these warmer months?? So, I saw a tutorial for this flip-flop makeover (great work Mother Huddle), floating around the web…….and the wheels started turning. I decided to just string all of the ideas together and create a whole series. First up? A quick and easy flip flop…….made with some braided knit fabric scraps, using the 5 strand braiding technique, shown here. These soft braided straps streeeeeetch the perfect amount, right around the back of my heel……..keeping the flip-flop snug and in place. I added little loops of fabric to the sides, to keep the braided straps in place. These little sandals are so light, they’re soft and stretchy, and my favorite part……..they’re inexpensive. ($2.50 to be exact) These flip-flops make me think of the beach……and make me miss GA. I guess I better find a sandy spot at the lake. And that’s it. Enjoy.
DIY Wall-Mounted Clothes Drying Rack The ad on Freecycle said, Wooden Baby Pen, and described some sort of a freestanding baby jail made from dozens of dowels. With visions of a garden cucumber support in my head, I said I would love to have it, and could promise reliable pick up. Before I could worry about trellising cukes, laundry room inspiration hit and baby jail was repurposed into a wall-mounted indoor diaper and small-clothes drying rack. This project was 100% free. We used two of the baby jail panels off Freecycle and four white, wall-mounted plant hooks we had on hand. Then the baby jail panels were simply hung sideways from the hook. Now, I will admit I am not exactly a line-drying guru, but I do manage to line dry my son’s cloth diapers most of the time.This is how I used to line dry my diapers. The wall mounted clothes drying racks are so much nicer: Baby clothes, socks, undies, cloth wipes etc. do well on the rack too. Do you line dry any of your clothes indoors?
A Femme’s Guide to Improvement: Make a Blouse! So I got an email from Jane last week, linking to this top: “The one I tried on was shorter and not sheer. Can you show us how to make it? It looks SO beautiful on and it's a fucking square with a hole in it, that's it. It is three hundred dollars because they say it is! Dolce and Gabbana probably charged even more when they did this a decade ago for their S/S 2002 collection, which was when, as a freshman in college, I saw it and decided I had to have it. You’ll need: A yard and a halfish of standard 45" wide fabric with nice drape. So, how much fabric to buy? Machine or hand-sew the two folded edges on both pieces of fabric before proceeding, as close to the inner folds as possible. Next, three more measurements: get the distance from the top of your shoulder to the top of the side band of your bra — this will be for your armholes, and the fancy sewing word for it is scye. Headhole: 13” Scye: 9.5” Very loose hip: 39” You’re done! Photos by Helen Pearson.
Plastic-Free Potato Chips | Rock Farmer DIY Plastic-Free Potato Chips Craving potato chips? Make your own, right now. Yes, right this very minute. If you have a microwave, a sharp knife, a plate, a bowl, a few potatoes, oil, and some salt, you are about 10 minutes from plastic-free, home-made potato chips. But before you read on, ask yourself if you truly want to know how to do this. Are you ready? DIY Plastic-Free Potato Chips Ingredients You will need: Potatoes – I use my home-grown spuds of unknown variety; experiment to find your favoriteOil – I use grapeseed oil, Peter recommends olive oilSaltA sharp knife (or a mandoline, if you have one)A bowlA microwave-safe plateAn oven mittA microwaveA tiny bit of patience Here’s how to make your own potato chips. Slice your potatoes. Loosen Stuck Chips with a Sharp Knife TipSprinkle the hot chips with salt and other seasonings as desired.Eat.Repeat.Blame my friend Peter. Like this: Like Loading...
No sew t-shirt made into halter I have the exciting opportunity to head to the beach for a couple of days, to relax and soak up a little of that beautiful Florida sunshine. I wanted to do one more halter top to take to wear with my jeans and this is what I came up with. It can be changed in so many ways let's just say this is a 3 in one shirt. It seems like I am packing all of my DIY tops and dresses to wear. Video Tutorial Things You Need. Tee-Shirt~ mine is a mens mediumScissorsChalk Front Cut where the red lines are. The back cut the red lines Back Cut down the middle of the back cut out.. Front after cutting NOTE* you cut one continuous line from the front to the back. Back After cutting now tie the front wrap around your neck and tie to the two straps in the back. If you want to trim off the excess off the straps. I am leaving mine so I can play and change it up some more.. or tie them into a bow. Happy Monday. Lots of <3,
Upcycle: Chip Bag Purse/Tote | Once Upon A Craft This seriously is the easiest bag ever to make. It doesn’t involve any sewing and can be made in around 15 mins. It’s great to give as a gift or even to have for yourself. When I said this is super easy to make, I wasn’t kidding. Clean chip bagMatching Duct tapeScissorsMeasuring tape(optional) Start by turning your chip bag inside out and cleaning it gently. Now is the time to decide what shape of a bag you’d like. *when cutting the bottom of the bag, leave 1/2″ longer than you want* After cutting the bag, grab your duct tape and break off a piece that is longer than the cut area. Flip the bag over and fold the tape up and secure on the back side. Cut off access on sides without cutting the bag. *if your tape looks a little off center, don’t worry. Here comes a trick part. Do the same thing to the other side. When you look inside your bag your should see a triangle in each corner. STRAP: Measure the height of your bag. Using your measurements, add 1/2″ and rip off more duct tape. Like this:
stradivarius Wir nutzen eigene Cookies sowie Cookies von Dritten, um Ihre Erfahrung und unseren Service zu bessern. Mit Hilfe von Cookies analysieren wir das Nutzungsverhalten von Besuchern unserer Website. Die weitere Nutzung unserer Website wird als Zustimmung zu der Verwendung von Cookies betrachtet. Weitere Informationen finden Sie in unserer Cookies-Richtlinie. OK Dein Warenkorb ist immer noch leer Du kannst Artikel zu deiner Favoriten-Liste hinzufügen. wenn du bereits angemeldet biststarte die Sitzung Dein Warenkorb ist leer Füge Kleidung und Accessoires aus unserer Kollektion hinzu! Mein Konto: Ausloggen
The Home That Yard Sales Built | How to conquer life's obstacles one bargain at a time! So, you say you can’t afford a Christmas tree? Well, not to worry friend, do I have the solution for you! As Thanksgiving gave way to Black Friday and Black Friday paved the road to full on, bell-ringing, jingle-horsing Christmas, I realized something. This year, for the first time ever, I couldn’t justify the expense of a Christmas tree for my daughter and myself. Things are tight. Not to be discouraged, I set to mulling over possibilities. In October I cleared overgrown ivy, underbrush and all sorts of critter infested debris from the backyard of the apartment building where I live. Luckily, the management company that runs my building isn’t exactly what one might call ‘on the ball’, let’s just say they have about as much follow through as Kim Kardashian does with wedding vows. I will save the how-tos for later (see below), but let me say a few words, first, about the why you too might want to take on a project just like this one: 1. 2. 3. 4. 5. Now, onto the how. Step 1. Step 2. 5.