
Glossary This is a list of common terms and abbreviations used in the RepRap community. Acrylonitrile Butadiene Styrene, a thermoplastic used as a 3D printer material. Often ABS is used as a short form, actually referring to filament made of ABS: 'Do you use ABS in your Mendel?' Be careful that sometimes filament sold as ABS is in fact mixed with other thermoplastic, thus altering its characteristics. The melting temperature is 220-230°C, but can be different if the manufacturer has mixed this with other thermoplastics. ABS is soluble in acetone and can be use to smooth the surface of the print-out. Bed The build plate of the 3D printer on which parts are actually made. Belt Toothed gear belt, usually fiber-reinforced to prevent stretching (ex: GT2). Biopolymer Biopolymer has different meanings and is classified by Enders. Bill of materials. Also said to be "Book of Materials" in some contexts. Computer Aided Design / Computer Aided Manufacturing. Computer Aided Engineering. Carriage Catalyst Copolymers
These New 3D Models Put the Smithsonian’s Most Renowned Items in Your Hands | At the Smithsonian The Wright Flyer, the legendary aircraft built by the Wright Brothers and sent skyward over Kitty Hawk in 1903, was acquired by the Smithsonian in 1948. Since then, it’s been on public display nearly continuously. Of course, visitors aren’t allowed to touch the plane, and educators teaching lessons on the Flyer have had to use models to give students the chance to handle it and see it from different positions. Engineers and historians have faced similar limitations, unable to climb inside to examine its inner machinery or take out a tape measure to assess its specs. Now, though, anyone with an internet connection can handle a virtual 3D version of the Flyer and print a replica at any scale. “For a while, we were able to create these incredible, high-resolution 3D models, but in terms of public access to the data, we were really limited,” says Rossi. “If you play any video game, you’re looking at a polygonal model, and that’s also what you’re looking at in the viewer,” Rossi says.
70+ Web Tools Organized For Bloom's Digital Taxonomy The number of web tools currently available to teachers, administrators, and students is downright absurd. You can’t swing an iPad without hitting a free web tool looking to revolutionize your classroom. Luckily, there are a few brave souls out in the world wide web attempting to organize the chaos a bit. We like to take our best shot here at Edudemic but also like to showcase some of the great organizing done by others. One of those fabulous organizers is Phillippa Cleaves ( @pipcleaves – worth following!) The web tools are all listed (and clickable!) NOTE: You can click on any of the web tools listed in the presentation to go to their respective website. Source of top image: Wikispaces
Solar System Scope How To Create Outstanding Modern Infographics In this tutorial you will learn that data doesn't have to be boring, it can be beautiful! Learn how to use various graph tools, illustration techniques and typography to make an accurate and inspiring infographic in Adobe Illustrator. Start by using the Rectangle Tool (M) to draw a shape. The entire design is based on a grid of four columns. Condense the shape so it fits within the left-most guide and centre guide. Move the shape over to the right and add another guide to the centre here. Using the Rectangle Tool (M) draw a thin white box on the centre line that will be the width of the gap between the columns. Repeat the process for the other columns with your final result being below. I like to place the most important graphics first and work-in the ancillary charts and graphs afterwards. Early on you can experiment with placing a main graphic that will help give the piece some visual interest. Give the circles a variety of gradients. I'm using a variety of graphs in this infographic.
Stratasys Introduction to 3D Printing: From Design to Fabrication Download the full curriculum guide for grading tools and more detailed information on each unit below. The curriculum guide contains all unit guides listed below. Unit 1: Course Introduction Welcome students to the course and introduce the syllabus, course structure and major assignments. This week’s lectures highlight the major technology shifts in human history that have set the stage for 3D printing. Unit 2: Introduction to 3D Printing The special advantages of 3D printing are illuminated by a comparison to other technologies, both ancient and modern. Unit 3: What is a Mesh? Students learn the fundamentals of preparing CAD files for 3D printing. Unit 4: Ctrl + P A review of geometry terms conveys the concept of a 3D mesh, and students learn about the process of converting 3D CAD files into machine movements. Unit 5: Closed Gear Systems Part I Students will discover the advantages of 3D printing for interlocking parts. Extra Units
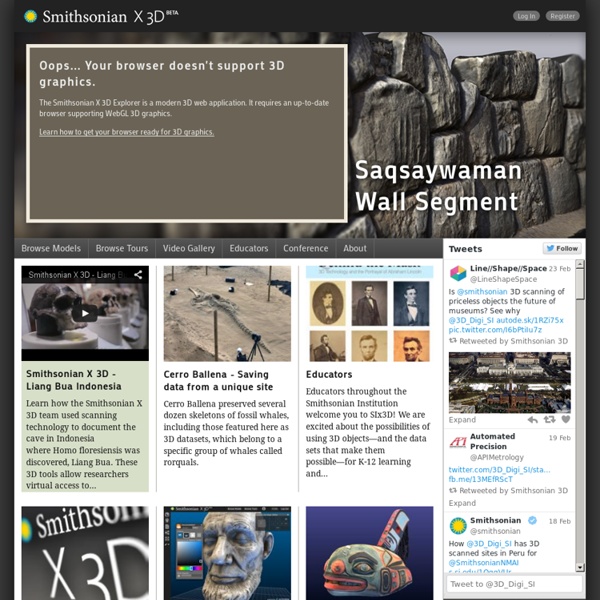
Getting Started | Smithsonian X 3D Learn about the fascinating features of the new Smithsonian X 3D Explorer and how to navigate, explore and manipulate 3D collection objects. This page gets you started and explains the functionality of the explorer in detail. The Smithsonian X 3D Explorer is beta software. If you find bugs or want to share ideas for improving the software and website, we'd be happy to hear from you. Please send your comments to 3d.feedback@si.edu. Getting started Prerequisites: What you need in order to run the Smithsonian X 3D Explorer.Overview: Navigating and exploring models and tours, 3D and 2.5D mode.Commands and gestures: Mouse, touch and keyboard commands and gestures. Advanced tools Setup toolbox: Manage split screens, load multiple models.Material toolbox: Change surface properties.Lighting toolbox: Change the direction and color of light sources.Environment toolbox: Chose background and grid colors.Tools toobox: Take measurements, create cross-sections, explore the height profile.
10 Tools To Add An Extra Hour To Your Day USGS Kids <object classid="clsid:d27cdb6e-ae6d-11cf-96b8-444553540000" codebase=" width="800" height="800" id="home" align="middle"><param name="allowScriptAccess" value="sameDomain" /><param name="allowFullScreen" value="false" /><param name="movie" value="swf/home.swf" /><param name="quality" value="high" /><param name="wmode" value="transparent" /><param name="bgcolor" value="#ffffff" /><embed src="swf/home.swf" quality="high" wmode="transparent" bgcolor="#ffffff" width="800" height="800" name="home" align="top" allowscriptaccess="sameDomain" allowfullscreen="false" type="application/x-shockwave-flash" pluginspage=" use the text menu at the bottom of the screen.</noembed></embed></object> Coloring Pages | Connect-the-Dots | Stories | Games | Puzzlers | Fun Projects
Meshmixer Tutorial: Using 3D Modeling Software for 3D Printing This tutorial was created for MeshMixer users who are interested in 3D printing. It provides an overview of the essential information required to create a printable model using this indispensible 3D printing modeling software. It is particularly useful to correct files designed for 3D printing. In this tutorial, you will learn the best practices for modeling, correcting and exporting an object for 3D printing using MeshMixer. Then, you will be able to upload your 3D file on our website and 3D print it! MeshMixer is free 3D modeling software that allows you to easily create and correct 3D models. You don’t have to be an expert or know how to use the software in great detail to understand this tutorial. To learn more about modeling with MeshMixer, please visit MeshMixer’s “Help” page. Lastly, you can download MeshMixer 2.9 on the following page : download MeshMixer. Summary
Voir, toucher, s'approprier les objets de collection Capture d'écran Smithsonian X 3D Explorer "Gunboat Philadelphia" La Smithsonian Institution a lancé tout récemment son fascinant Smithsonian X 3D Explorer. L'outil de visualisation de modèles 3D (développé en collaboration avec Autodesk et d'autres commanditaires) permet d'observer et de manipuler quelques pièces choisies dans l'immense collection des musées de la Smithsonian. Il y a présentement 21 modèles 3D à visionner sur la version Beta de cet explorateur. L'Explorer permet de faire pivoter l'objet modelisé et de zoomer pour le voir en plan rapproché. Il est possible d'avoir accès à des informations sur des détails de l'objet, par exemple pour comprendre les motifs décoratifs d'un artefact, en cliquant sur des points de l'image 3D ou en faisant des visites guidées (à l'onglet Browse Tours) qui les accompagnent. Impression 3D : la fin du "ne pas toucher" Sources
Soo Meta - A Nice, New Way to Create Multimedia Presentations Soo Meta is a new digital presentation tool from the same people that developed the YouTube remixing tool Dragon Tape. Soo Meta allows you to combine videos from YouTube, pictures from the web or from your desktop, text, and voice recordings to create a presentation. You can also pull content in from Pinterest and Twitter to use in your final product. The Soo Meta editor is fairly easy to use. Applications for Education There are quite a few possible uses of Soo Meta in the classroom.