background preloader

Paper Mache Recipes

Paper Mache Recipes
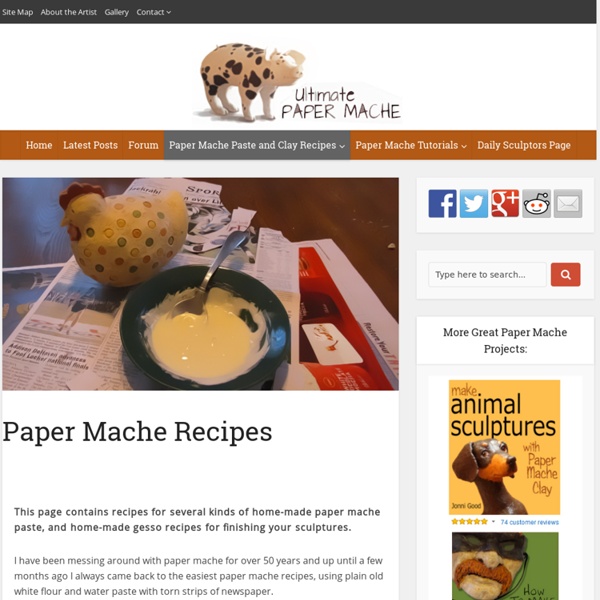
This page contains recipes for several kinds of home-made paper mache paste, and home-made gesso recipes for finishing your sculptures. I have been messing around with paper mache for over 50 years and up until a few months ago I always came back to the easiest paper mache recipes, using plain old white flour and water paste with torn strips of newspaper. Now, however, I have abandoned the traditional layered paper process and use my new paper mache clay recipe and/or the even newer silky-smooth air-dry clay recipe for most my sculptures. However, for younger artists or for those who really don’t want to make the trip to the hardware store, these following recipes work just fine, and most of the tutorials on this site would work using these traditional paper mache recipes. Paper Mache Paste Recipes: Paper Mache Recipe #1 White flour and water make a remarkably strong paste. Boiled Flour and Water Paste: Raw Flour and Water Paste: How thick should you make your paste? Glue-Based paste:

Paper Mache Clay Several years ago I developed a new recipe for a sculptural material I call “paper mache clay.” This material is so easy to use and so easy to make that I now use it exclusively for all my paper mache sculptures. The recipe has now gone “viral” and is being used by artists all over the world. It might be a bit more accurate to call this material “home-made air-dried cellulose-reinforced polymer clay,” but that’s way too hard to say (or type!), so for now, let’s just call it paper mache clay. The first video below shows how to make the paper mache clay, and the second video answers some common questions that I’ve received from readers since I first developed this recipe. I usually make mine fairly thin so it can be spread over an armature like frosting, by using less flour than the recipe calls for – but you can also make it thicker, with more flour, when you want more control over the modeling process. Paper Mache Clay on Snow Leopard Sculpture Making Your Paper Mache Clay Tools: Step 1.

Running Bride and Groom Preview Included The head is hand-sculpted based on the photos you provide. You can preview each stage of the creation process. The head and face of the bobblehead can be changed or modified until you are fully satisfied. Frequently Asked Questions 1. After you complete the order for this custom figure, we will email you a request to send front and side photographs of your face. 2. Because every figure is sculpted by hand, it will take about 3-4 weeks for your custom figure to be completed and presented to you for approval. 3. Poly-clay. 4. Yes, please request your baker to put a support inside the cake. 5. Clean the figures with a damp cotton swab. 6. Due to the personalized nature of the figures, all sales are final. Note: The bobblehead will be have exaggerated, cartoony facial features. Sorry, but this product has been discontinued. items.

... leaf lanterns - imaginechildhood.com | Blog A few weeks ago I began to notice the inevitable shift that happens every year around this time... the days have gotten shorter and the nights progressively longer (and colder!). This rather obvious realization got me thinking though, about all the fun things I did as a kid to get ready for this increase in darkness. One of which was to create a little light of my own. So that is what I decided to do, make lanterns! Start by mixing the glue with some water (about 2% milk consistency). Once the balloons are thoroughly coated string them up to let them dry completely. Once the tissue paper has dried completely (preferably over night), it's time to pop the balloon. Once the balloon is out attach the handle and any decorative additions, as well as place a small tea light candle at the bottom of the lantern. All that's left to do is wait for the sun to go down, light the candle, and be your own light on dark fall nights... Love the glowy-ness! ~Jordan P.S.

Upcycled Mason Jar Lights from Boots N Gus - Epheriell Designs Wow. I was just blown away when I came across Boots N Gus! I mean, how completely awesome are their collection of upcycled mason jar lights and chandeliers? Wait, don’t answer that – scroll down and have a peek first… …so, what did you think? Of course, my eternal problem reigns supreme – just which one would I choose? Oh, and make sure to check out the rest of Jeff and Marks’ creations – they use vintage cookware in their light-making adventures, too. 25 Repurposed Magazine Projects - DIY It's time for another installment of 'My Favorite Things'. This time I've scoured the net and found 25 of the best repurposed magazine projects. These repurposed craft and DIY ideas range from easy to advanced, some come with tutorials, and others you get to figure out for yourself (or even buy in the case of a few). Ready to be inspired? beads boxes drink coasters placemats wrist purse wallet wall art (leaves) decorative bowl photo frame hanging mobile clock mirror frame wall art flowers a wall of stacked magazines! wreath end table vases portrait art portfolio/briefcase starburst mirror art extra seating stool hanging stars Until next time... Michael Stumble this post

Advanced Papier Mache Recipes Some Advanced Papier Mache - Papier Maché Pulp Recipes Warning: Due to some of the ingredients and techniques involved in this tutorial, this is not recommended for children without adult supervision. Introduction I've been making paper maché items since I was 13 years old. My Grandmother used to make bird houses and feeders that my Grandfather would laquer with the remains of a product he used for finishing car paints (he was a car mechanic). Later on in life I got fascinated by the world of puppeteering (the muppet show is still in my top 5 favourite shows) and started my first trek in the business when I was 18. One of the things that fascinates me the most is that to the contrary of many beliefs, paper mache isn't just paper and glue. Here are a few that are my most used. Finishing paper mache (porcelain finish) You will need: - 1/2 roll good quality white toilet paper- 1 tablespoon raw linseed oil Instructions:Rip, mix and apply... simple as that! "Hard mache" (for strong pieces) Grind!

Quotes On Canvas Make Meaningful Wall Art If there are two things I love it is family photos and wall words. Filling our home with cherished photos and words that inspire makes me just plain happy. I found a great deal on a faux photo canvas and did some photo editing to combine two of my very favorite things. A little canvas for my daughter’s room that makes a big impact. There is something about mothers and daughters that just cannot be explained. I did some photo editing using Picknic and made some magic using a simple and sweet photo. I’ll love you foreverI’ll like you for alwaysAs long as I’m livingMy baby you’ll be- Robert N. I have to admit, when I picked this up and looked at it for the first time, I had tears in my eyes.

Game Capture Edit H.264-encoded game videos and add one of over 95 transitions, up to 6 picture-in-picture boxes, soundtracks, special effects, gamer-style text overlays and voice changed narration to match gameplay. Papier Mache vs. Paper Clay What is the difference between papier mache and paper clay? The answer is - quite a lot! There seems to be much confusion today about what the difference is between papier mache and paper clay. According to Wikipedia: Papier-mache: "(French for 'chewed paper'), alternatively, paper-mache, is a composite material consisting of paper pieces or pulp, sometimes reinforced with textiles, bound with an adhesive such as glue, starch, or wallpaper paste." Paper clay"(Sometimes referred to as fibreclay) is any clay body to which processed cellulose fibre (paper being the most common) has been added. So what is paper clay? The origins of paper clay go back hundreds of years. Apparently a lot of sculptors have used paper clay, but played down the "paper" bit so as not to get confused with papier mache - the snobs! There are products on the market making substitute paper clays (some of which contain no clay or even paper!) Instant manufactured products Paper clayCreative Paperclay is one of these products.

Handmade crafters label branding kit by Cathe Holden Four amazing branding label sets in 4 splendid colors: Black, Celery, Turquoise and Cigar. Each color set has 14 different sizes. Start branding the products you sell! Each color set is available in 2 different types of fillable printable PDF templates: one is auto-fill: insert your info and hit tab and the complete label sheet fills up. Use these Worldlabel.com size to print: Specs: These label templates are downloaded as cross-platform PDF files, which are application independent. Fonts: If you want to change the font type, size or color, (as well as bold, italics, etc.) select Control +E if you’re using a PC or Apple + E on a Mac. Tips: Printer settings vary from user to user. Here are the images for all the designs in each set:

Video Production - How to Create Budgets and Price Your Work by: lisa Pricing your work when you produce video is a tricky business; charge too much and the clients will run away screaming; charge too little and you may as well be creating content for free or worse still making a loss. So how do you work out a fair price for your videos? For many people the very idea of creating a budget is scary. I have worked with some amazing videographers over the years whose work I have greatly admired but too often they have been so focused on the creative aspect of the job that they have paid little or no attention to the business aspect and come to regret it later. If you want to have your own video production company and be successful then you have to pay attention to both the finished product and the pay cheque. The first rule of creating a price for your work is don't just pluck a number from thin air. Another important thing to consider is how to price for your own time.

The Many Faces of a Toilet Paper Roll I only recently came to know Andrew Orlando. He stopped by our studio to drop off a drawn Doodle Addict Postcard and with him was a bright green tote bag. When I looked inside, dozens of faces stared back at me. I immediately lit up, the bag was filled with toilet paper rolls that he covered with bright and bold colors of paint and marker. Eyes, teeth, scribbled hair and so many expressions formed these comical characters. Over 30 rolls in hand and he told me he had tons more back home, I believe he said his goal was to reach one-thousand. I was sold and feeling like I wanted one of his comical characters for our studio. A couple days later and there was a funny shaped monster (with the coolest sneakers) in line waiting to pee at our restroom. How To Solder - Soldering Tutorial Soldering is defined as "the joining of metals by a fusion of alloys which have relatively low melting points". In other words, you use a metal that has a low melting point to adhere the surfaces to be soldered together. Consider that soldering is more like gluing with molten metal, unlike welding where the base metals are actually melted and combined. Soldering is also a must have skill for all sorts of electrical and electronics work. This tutorial will cover the most common types of soldering required for electronics work. Soldering Equipment The Soldering Iron/Gun The first thing you will need is a soldering iron, which is the heat source used to melt solder. For hobbyist electronics use, a soldering iron is generally the tool of choice as its small tip and low heat capacity is suited for printed circuit board work (such as assembling kits). You should choose a soldering iron with a 3-pronged grounding plug. Solder The choice of solder is also important. Preparing To Solder That's it!

Related: