

Build Your own Compact Arduino Based Pulse Oximeter Sensor Circuit. There are many pulse-oximeter sensors available in the market for medical purposes, and in one of our previous projects, we also made an IoT-based Heart Rate Monitor where the data is sent from a device to the cloud.
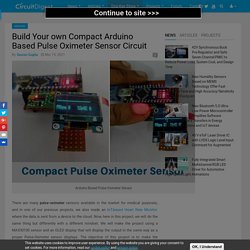
Now, here in this project, we will do the same thing but differently with a different mindset. We will make the project using a MAX30100 sensor and an OLED display that will display the output in the same way as a proper Pulse-Oximeter sensor displays. The objective of this project is to make the whole process simple, for this reason, we are going to use an Arduino Nano. Our goal is to make the device as compact as possible and smaller in size. So that it can be handy to use in the time of need.
This is the Pulse-Oximeter sensor-based project same as the available medical device. MAX30100 Sensor It uses photodetectors and optical elements where red or green IR LED modulates the LED pulses. The above sensor module works with the 1.8V to the 5.5V range. The module. Arduino Water Flow Sensor - Measuring water Flow Rate and Volume using Arduino and Flow Sensor. If you have ever visited large scale manufacturing companies, the first thing you will notice is that they are all automated.

Soft Drink Industries and Chemical industries have to constantly measure and quantify the liquids that they are handling during this automation process, and the most common sensor used to measure the flow of a liquid is a Flow Sensor. By using a flow sensor with a microcontroller like Arduino, we can calculate the flow rate, and check the volume of liquid that has passed through a pipe, and control it as required. Apart from manufacturing industries, flow sensors can also be found in the agriculture sector, food processing, water management, mining industry, water recycling, coffee machines, etc.
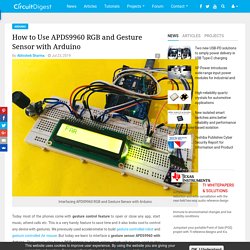
ESP8266 Based IoT Projects. Arduino Based IoT Projects. Simple 555 Timer Circuits and Projects. How to Use APDS9960 RGB and Gesture Sensor with Arduino. Today most of the phones come with gesture control feature to open or close any app, start music, attend calls etc.
How to make a Supercapacitor Charger Circuit. The term Supercapacitors and its possible usage in Electric Vehicles, Smartphone’s and IoT devices are being considered extensively in the recent times, but the idea of super capacitor itself dates back to 1957 when it was first experimented by General Electric to increase the storage capacity of its capacitors.
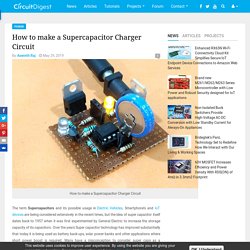
Over the years Super capacitor technology has improved substantially that today it is being used as battery back-ups, solar power banks and other applications where short power boost is required. Many have a misconception to consider super caps as a replacement for battery in long run, but at least with today’s technology supercapacitors are nothing but capacitors with high charge capacity, you can know more about supercapacitors from our previous articles. IoT Controlled LED using Thingsboard and Raspberry Pi. IoT Platforms are filling gaps between sensors and data networks.
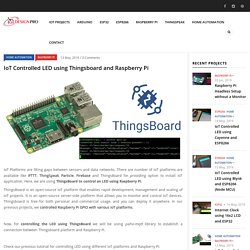
There are number of IoT platforms are available like IFTTT, ThingSpeak, Particle, Firebase and ThingsBoard for providing option to install IoT application. Here, we are using ThingsBoard to control an LED using Raspberry Pi. ThingsBoard is an open-source IoT platform that enables rapid development, management and scaling of IoT projects. Different Types of Transformers and Their Applications. A transformer is a widely used device in the electrical and electronics domain.
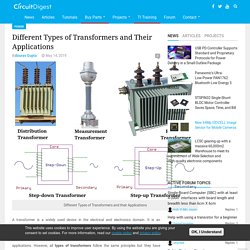
It is an electromagnetic device which follows the basic principle of electromagnetism discovered by Michael Faraday. We have covered about Transformers construction and operation in detail in previous tutorial. Here we will cover different types of transformers used in different types of applications. However, all types of transformers follow the same principles but they have different construction method. Transformer Types based on Voltage Level. IoT controlled Home Automation Project using Raspberry Pi and Particle Cloud.
Raspberry Pi is one of the most famous low cost computer and powerful tool for prototyping different types of IoT and embedded projects.
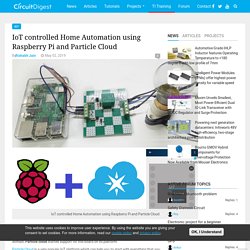
With the popularity of Raspberry pi in the IoT domain, Particle cloud started support for this board on its platform. Particle Cloud is a very popular IoT platform which can help you to start with everything that you want to do in your IoT device. Particle is a reliable, scalable, and secure IoT device platform. There are many IoT enabled Particle devices like Xenon, Photon, Electron, etc. which have different functionalities according to our need. Arduino Projects. How to Make a MAZE GENERATOR Using ATtiny13a.: 12 Steps (with Pictures) ESP8266 WiFi Module based Projects. Arduino Door Alarm: 10 Steps (with Pictures) The following code gives the Arduino the ability to perform the intended task.
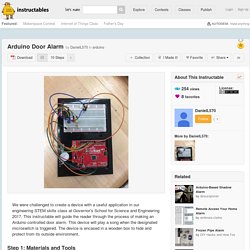
This code is based of the Arduino tutorial for a buzzer. However, it also has included the code for lights and a designated song. Insert this code into an open Arduino page to insert the code for the project. * SparkFun Inventor's Kit * Example sketch 11 * * BUZZER * * This sketch uses the buzzer to play songs. * The Arduino's tone() command will play notes of a given frequency. * * This sketch was written by SparkFun Electronics, * with lots of help from the Arduino community. * (This sketch was originally developed by D.
Arduino Earthquake Detector Alarm Circuit using Accelerometer. An earthquake is an unpredictable natural disaster that causes damage to lives and property.
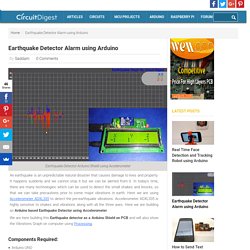
It happens suddenly and we cannot stop it but we can be alerted from it. In today’s time, there are many technologies which can be used to detect the small shakes and knocks, so that we can take precautions prior to some major vibrations in earth.