

Notifying Doorbell with PushingBox. Fasaxc/ArduRoller. Rideable Segway Clone - Low Cost and Easy Build. This Instructable will show you how to build a ride-able Segway clone.

Here are its features: Easy to build with no welding, no complicated steering linkage and minimal soldering. Uses a readily available $3 digital MPU6050 accelerometer/gyro IMU board. Total parts cost is under $400 (including shipping). ARM Cortex Tutorials. Speech Recognition with Arduino. Tiny Arduino Music Visualizer. Python Meets the Arduino -Use Arduino for Projects. Arduino Wireless Programming with XBee Series 1 or 2 -Use Arduino for Projects. Hi.
This Instructable will guide you through the process of wirelessly programming your Arduino using two XBees. I just finished designing a wireless EEG system with the XBee modules, so I’ve become quite fluent in their programming and have just now been able to accomplish this. Version 2.0 Arduino Controlled Car Tracking System based on SMS -Use Arduino for Projects. This system is upgraded version of previous project… You will be able to track your car after you build this system, you will call the device then it will send you an sms which includes LAT, LON and Google Map link for just one touch to see where it is.
Before you start to build them, you should connect the Wavecom to PC to adjust Serial Com. Baud Rate to 9600 then make it save this configuration via AT commands. (It is written in Wavecom AT command datasheet). Analog VU meter and Clock using Arduino -Use Arduino for Projects. This project brings back the old time Analog VU Meter, with the added functionality of a neat looking clock!
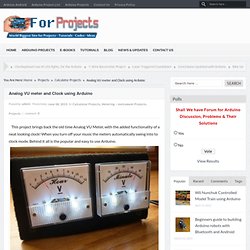
When you turn off your music the meters automatically swing into to clock mode. Behind it all is the popular and easy to use Arduino. This is my submission for the Make-to-Learn Youth Contest: What did you make? I made an old style analog VU meter and Clock using 2 analog panel meters, an Arduino, a real time clock, and other simple components. Cheap Accelerometer with the Wii Nunchuck. As you’re probably well aware, the wiimote and nunchuck have a vast array of sensors built into them.
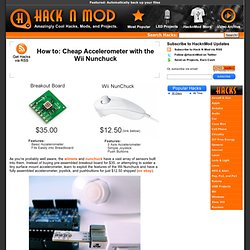
Instead of buying pre-assembled breakout board for $35, or attempting to solder a tiny surface mount accelerometer, learn to exploit the features of the Wii Nunchuck and have a fully assembled accelerometer, joystick, and pushbuttons for just $12.50 shipped (on ebay). Why use the nunchuck insead of the actual WiiMote? Wiimotes can be about $40 and have a lot of extra features you wont need at the moment. Plus, the nunchuck has a cable which can easily be plugged into the Arduino. Speech Recognition with Arduino. Main_fr - xplduino - an ethernet home automation controller based on arduino and xpl protocol. Le projet xPLDuino se décompose en 3 parties: xPLDuino Core xPLDuino Manager xPLDuino Master xPLDuino Core xPLDuino Core est le coeur du projet.
Il est constitué: une partie matérielle modulaire sur base d'Arduino une carte principale (Atmega12848p + ethernet ENC28J60) de multiples cartes d'interfaces (entrées digitale, relais, dimmers) une partie software en langage C/C++ pour microcontrôleur: gestion bas niveau (matériel) gestion applicative (éclairage, volets roulants, bouttons...) gestion de scenarios xPLDuino Manager Le manager est un logiciel multiplateforme destinée à aider à la configuration applicative des xplduinos Exemple d'architecture des modules xPLDuino un xPLDuino Master (scénarios évolués) un PC éxécutant xPLDuino Manager (configuration du système) un serveur domotique libre Domogik et son IHM web Domoweb l'appli Domodroïd (IHM mobile Domogik sous androïd)
Arduino Projects -Arduino for Projects. Arduino Examples Free - Android lietotnes pakalpojumā Google Play. A lot of Arduino examples with code,diagrams and images for arduino beginners and programmers.
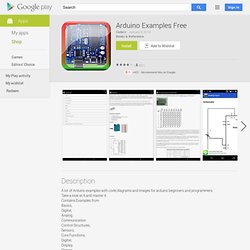
Take a look at it and master it.Contains Examples from Basics, Digital, Analog, CommunicationControl Structures,Sensors,Core Functions, Digital, Display, Strings,USB (Leonardo, Micro, and Due specific examples),Keyboard,Mouse. Adafruit Learning System. INA219 Current Sensor Breakout. The INA219B breakout board will solve all your power-monitoring problems.
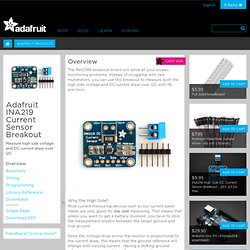
Instead of struggling with two multimeters, you can use this breakout to measure both the high side voltage and DC current draw over I2C with 1% precision. Most current-measuring devices such as our current panel meter are only good for low side measuring. That means that unless you want to get a battery involved, you have to stick the measurement resistor between the target ground and true ground. Since the voltage drop across the resistor is proportional to the current draw, this means that the ground reference will change with varying current. Having a shifting ground reference can cause problems for many circuits. The INA219B chip is much smarter - it can handle high side current measuring, up to +26VDC, even though it is powered with 3 or 5V. Tiny Arduino Music Visualizer. Firewalker LED Sneakers. Let's Cook - Community Hacks - Parking Sensor. Can you move over? The 74HC595 8 bit shift register. OK, so say you have this crazy cool idea where you need to control a ton of LEDs (I know, I know… LEDs).
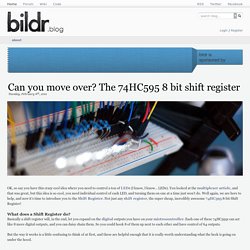
You looked at the multiplexer article, and that was great, but this idea is so cool, you need individual control of each LED, and turning them on one at a time just won’t do. Well again, we are here to help, and now it’s time to introduce you to the Shift Register. Not just any shift register, the super cheap, incredibly awesome 74HC595 8-bit Shift Register! What does a Shift Register do? Basically a shift register will, in the end, let you expand on the digital outputs you have on your mictrocontroller. But the way it works is a little confusing to think of at first, and these are helpful enough that it is really worth understanding what the heck is going on under the hood. Lampduino - an 8x8 RGB Floor Lamp : Programming the Colorduino. The Colorduino comes with the Arduino bootloader pre-loaded, so it can be programmed via the Arduino IDE.
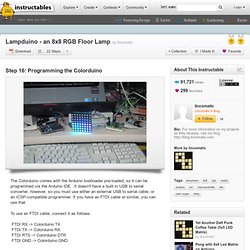
It doesn't have a built-in USB to serial converter, however, so you must use either an external USB to serial cable, or an ICSP-compatible programmer. Normunds Lacis (nlacis) on Pinterest. Speech Recognition with Arduino. Projects. An Arduino “Radar” Installation. Web thermostat with Arduino. Arduino Temp / Humidity Monitor with Web and SNMP. Step #1: PrevNext Here are the pieces needed for this project:Arduino UNONetshieldMakerShield with BreadboardSensorsWiresSerial LCD Screen Step #2: Add the Netshield to the Arduino. Step #3: Solder custom header pins to use as a spacer for the MakerShield.Using long-pin male headers and long-pin female headers solder them as shown.These custom headers will be used as spacers between the Netshield and the MakerShield.NOTE: The center pin on the longer spacer will not be used. Step #6:
Arduino Astronomical Clock for Automatic Light Control. Arduino Astronomical Clock for Automatic Light Control There are many ways to automatically control these lights. The gadget I was using (until I completed this project, that is) was a simple mechanical timer. Arduino-Based Drum Machine. Geo Data Logger: Arduino+GPS+SD+Accelerometer to log, time-stamp, and geo-tag sensor data. UPDATES Oct 17, 2013: I have published a guide on using your Android phone to accomplish a similar task by leveraging your Android device's built in GPS and sensors. Feb 6, 2013: Featured on GeoAwesomeness Nov 24, 2012: Featured on Hackaday Nov 21, 2012: Featured by John Boxall @ Freetronics Nov 20, 2012: Featured on Dangerous Prototypes INTRODUCTION I thought it would be educational to build a prototype that I can take on the road to log, geo-tag, and time-stamp sensor data to be analyzed later with mapping and/or data analysis applications.
So I figured why not start with a gadget that can log road conditions. This prototype, the Bump-O-Meter, measures road conditions by using an Arduino, a GPS receiver, an SD card, and an accelerometer sensor. E-Health Sensor Shield for Arduino and Raspberry Pi [Biometric / Medical Applications] Getting Online with Arduino: Round Up of Devices. If you’re manipulating the physical environment through software, or the other way around, then you need a way to get your hardware online. Arduino (and its community and ecosystem of sensors and shields) makes it easy to experiment on the physical side of things, but it wasn’t designed with any networking interface built in.
That’s why many in the community right now are building devices and add-ins that make it easy to get an Arduino (or Arduino-compatible board) connected easily. Here’s a round-up: UDOO UDOO, currently on Kickstarter combines the best of two worlds — Arduino and Raspberry Pi — to create a powerful and flexible brain that can talk to the sensor world, run some mighty code local and connect to the internet via built-in Wifi.
It also pipes the lower-level Arduino side to the higher powered computer side to allow more computational power and expressive programming when manipulating the physical world. A Remotely Programable Relay Controller (Christmas Lights or Home Automation Controller) What was that? A Whats-a-Maja-Thimagig? Yep - One of those! This Instructable extends my Arduino Ethernet controller to control a set of up to 6 relays, but that's not the neat bit. The neat bit is that there is a web based state machine in the AtMega chip so that the relays will operate in whatever sequence with whatever timing you want - all by themselves.
AmbientMonitor. In different blog posts, I’ve already explained how to receive data from Arduino using a .Net application or a server-side script. Today I’m going to show you how it’s possible, using JavaScript, to receive and show data using only a Web browser. Logical architecture The project has two main elements: Arduino, connected to an AM2302 sensor to get temperature and humidity valuesan HTML page, with some external resources (JavaScript and CSS files) opened in a browser the JavaScript code in the HTML page sends JSONP requests to Arduino, which responds with a JSON message that contains the values obtained from the sensor. Resources All the files for this project (HTML page, JavaScript libraries, Arduino sketch…) are available in my GitHub’s repository: JavaScript When you open the ambientMonitor.html page in your browser, the different JavaScript libraries are loaded and executed.
Change the IP address in the url parameter with the one Arduino has in your network.