

EVT v. DVT v. PVT Explained. It probably won’t come as a surprise that engineers love their acronyms.
If you’re not fully immersed in this world, it can become increasingly difficult to decode what may sound like a foreign language, and while we can’t explain every abbreviation you may come across in one blog post, we’re going to start by discussing the differences between EVT, DVT and PVT, or the engineering validation process. Building the Prototype Before any testing can occur, the first step is a prototype build (also known as EP or Proto), which is essentially a low quantity (1-10 units) run combining engineering and design with the end goal of creating an MVP (Minimum Viable Product) the engineers can confidently claim is only a handful of iterations away from being mass production ready. Often these prototypes are significantly more expensive than the expected production build because there are typically few cost optimizations at this stage. You’ve got a working prototype, now it’s time to start testing. Reverse engineer hex.
Set 1 (Introduction) Priority Queue is an extension of queue with following properties.

Every item has a priority associated with it.An element with high priority is dequeued before an element with low priority.If two elements have the same priority, they are served according to their order in the queue. In the below priority queue, element with maximum ASCII value will have the highest priority. A typical priority queue supports following operations.insert(item, priority): Inserts an item with given priority.getHighestPriority(): Returns the highest priority item.deleteHighestPriority(): Removes the highest priority item. Implementation of priority queue using linked list. Home » Data Structure In this article, we are going to learn how to implement a priority queue using C language with the linked list in the data structure?
Submitted by Manu Jemini, on December 21, 2017. Solutions for the Internet of Things by SEGGER - The Embedded Experts. Software IP components from SEGGER, such as emSSL Transport Layer Security (TLS), emSSH Secure Shell, emSecure Digital Signature suite, emCrypt Crypto libraries, emWeb HTTP Web server, and emNet TCP/IP stack, to name a few, can be used as foundations for your securely connected IoT device.
Our software works on virtually any MCU. We work with all major silicon vendors, keeping our fingers on the pulse of their latest developments to enable the next generation of designs.
Custom Firmware For Cheap Fitness Trackers. The concept of wearable hardware is an enticing one, but it can be difficult to tackle for the first-time maker.
While many of us are experienced at designing PCBs and soldering up arcane gadgets, interfacing with the soft and fleshy human form can present unforeseen difficulties. There’s a way around that, of course – leveraging an existing platform where someone else has already done the work. That’s precisely what [Aaron Christophel] has done, by reverse engineering and developing custom firmware for cheap fitness trackers (Google Translate).
The first part of [Aaron]’s work consisted of research and disassembly. After purchasing a wide variety of fitness trackers online, he eventually came across his favored unit, the Tracker I6HRC by IWOWNFIT. Profiling the Softdevice and FreeRTOS with Segger SystemView - Nordic Blog - Nordic Blog. Instrumenting with Segger SystemView - Nordic Blog - Nordic Blog. Ayke van Laëthem – Internals of the MBR in Nordic SoftDevices. For some time, I've been working on a bootloader/DFU for Nordic BLE chips (nRF51822, nRF52832).
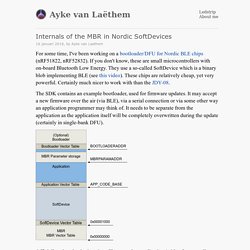
If you don't know, these are small microcontrollers with on-board Bluetooth Low Energy. They use a so-called SoftDevice which is a binary blob implementing BLE (see this video). These chips are relatively cheap, yet very powerful. Certainly much nicer to work with than the JDY-08. The SDK contains an example bootloader, used for firmware updates. The four kinds of data you need to consider when developing an IoT product - Nordic Blog - Nordic Blog.
nRF52 unit testing. Automated Unit Testing. Nrf52 emulator. How to setup nRF52 continuous integration? - Jumper Blog. Four Tools To Automate Embedded Software Build Process - Jumper Blog. Why automate embedded software build?
The first step in continuous integration and test automation is to have an automated build process. To automate embedded software build you need to have a system that can compile and build your code after you push a code change. If we take the following development cycle: edit -> compile -> test, having the compilation and building phase automated and triggered upon every code push has the following benefits: Productivity improvement.Catching compilation errors right on the spot, before it gets to other team members’ code base.Having a clean firmware executable ready for tests all the time.
A successful Git branching model » nvie.com. Note of reflection (March 5, 2020)This model was conceived in 2010, now more than 10 years ago, and not very long after Git itself came into being.
In those 10 years, git-flow (the branching model laid out in this article) has become hugely popular in many a software team to the point where people have started treating it like a standard of sorts — but unfortunately also as a dogma or panacea.During those 10 years, Git itself has taken the world by a storm, and the most popular type of software that is being developed with Git is shifting more towards web apps — at least in my filter bubble.
Web apps are typically continuously delivered, not rolled back, and you don't have to support multiple versions of the software running in the wild.This is not the class of software that I had in mind when I wrote the blog post 10 years ago. Why git? ¶ For a thorough discussion on the pros and cons of Git compared to centralized source code control systems, see the web. The main branches ¶ develop. Android-nRF-Connect/documentation/Automated tests at master · NordicSemiconductor/Android-nRF-Connect. How to Build Continuous Integration for Embedded Software - Jumper Blog. Researches of SW R&D teams show significant improvements in all R&D and operation metrics when proper continuous integration and delivery processes were implemented (take a look at this case study).
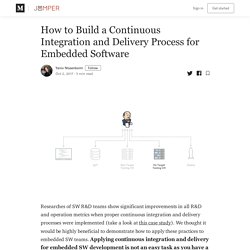
We thought it would be highly beneficial to demonstrate how to apply these practices to embedded SW teams. Applying continuous integration and delivery for embedded SW development is not an easy task as you have a physical device with many constraints when it comes to rapid testing. However, the gained benefits outweigh the effort. How To Automate Device Drivers Testing In IoT Embedded Software Projects. BSP (Board Support Package) and device drivers are the heart of every embedded software project.
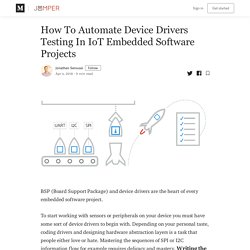
To start working with sensors or peripherals on your device you must have some sort of device drivers to begin with. Depending on your personal taste, coding drivers and designing hardware abstraction layers is a task that people either love or hate. Mastering the sequences of SPI or I2C information flow for example requires delicacy and mastery. Writing the code that interacts with hardware requires reading through long data sheets, carefully combining byte after byte to make the thing work and usually after it works the R&D team will avoid any changes to this code.
Writing tests that cover this part is particularly tricky. Writing the drivers code is probably one of the first things you do in an embedded project right after initializing the processor and UART. From this point the code typically doesn’t change much. All these issues raise the cost of solving a bug. Moving from manual to automated testing in embedded software - Jumper Blog. Automated Testing in Embedded Software – Why? Automated testing in embedded software has many benefits. When implemented in your organization it can: Reduce the number of bugs discovered late in the development cycle.Help you refactor your code with confidence.Reduce recovery time for post-production failures.Improve time to market and build a more productive R&D cycle.Increase features delivery and drives business initiatives. Yes, it sounds promising, and it is! (check out the transformation HP made)
Automated test using nRF Connect desktop version? Introduction to Bluetooth low energy and Bluetooth low energy development (video tutorial) - Getting Started - Short-range guides. Coding nRF52 with Rust and Apache Mynewt on Visual Studio Code. Mynewt is a lightweight embedded operating system that pulls in only the modules that it needs to create the firmware image. Here are the files in our Mynewt project… (Check this article if you wish to download the source code and browse with Visual Studio Code) 1️⃣ apps: C Source Code for Bootloader and Application This is where we put our Bootloader and Application source code in C.
The Mynewt build script will compile the code here into the Bootloader and Application Firmware Images. STM32 Blue Pill — Analyse and Optimise Your RAM and ROM. Embedded devices - Rust Programming Language.