

How-To: Instant Hairstyles- Do Yourself. It's just love on we heart it / visual bookmark #8843333. Tag Archive for "wedding hairstyles" - The Beauty Department: Your daily dose of pretty. Photo/post/graphic design: Kristin Ess One of my all time favorite hairstyles for a wedding or for red carpet is the most super simple chic chignon (say that 3 times fast!). In this tutorial we show future brides and bridesmaids alike how to keep their hair out of the way while maintaining a timeless, classic look for any event. This is one of those updos that really allows you to focus on the dress, accessories and overall beauty instead of being a major focal point. How to- Pin Curls. Pin curls are one of the easiest most fuss free ways to get curls and they are a personal favorite of mine.
They take very little time to put in and can be styled in many different ways. There have already been a whole lot of tutorials on the subject, Super Kawaii Mama did a great pin curl video here: after a lot of requests I thought it was about time I did one too ^_^ *edit* I have added a video which includes me taking them out at the bottom too. THE LONG + THE SHORT OF IT - thebeautydepartment.com. Tutorials. Hola there!
Here you can find an organized list of all my tutorials, projects and printables. I want to point out that I am no sewing expert and have no formal education in either sewing or English (Spanish is my native language) So I might not always use the correct terminology or best technique, I am always learning too! It might not always be perfect, but it’s sure a lot of fun! All of my tutorials and printables for personal use only, if you want to sell items made with these tutorials please purchase a Limited Production License. If you blog them, please do not share the complete post and share a link crediting back to the post and DO NOT link directly to downloads, please read my Site Policy and Contact me if you have questions, hope you all enjoy! Hair Romance: 30 Days of Twist & Pin Hairstyles – Day 20. Day 20 – Plaited half up hairstyle Plaits twisted and tied together create an effortless half up, half down hairstyle.
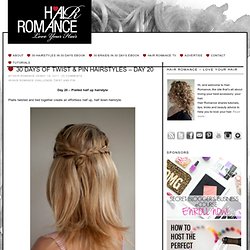
Want to learn how to do this hairstyle? Check out my ebook 30 Days of Twist & Pin Hairstyles! It gives you over 75 pages of detailed instructions and how-to pictures, tips, tricks, techniques and cheats for a different hairstyle every day. You can get your copy right here by clicking the button below. Hair Romance: 30 Hairstyles in 30 Days. Pretty Bridal Hair Tutorial: Half Up Half Down. Update On The 'S' French Braid Updo: Step By Step How-to. I am flattered that the response is so great on the French Braid Updo.
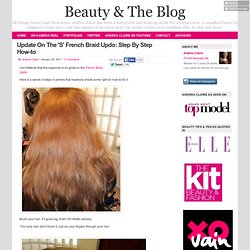
Here is a series of steps in photos that hopefully sheds some light on how to do it. Brush your hair. If it goes big, that's OK! Better actually. *For curly hair, don't brush it, just run your fingers through your hair. Start slight off centre of your crown. Braid slightly diagonally towards your ear. Curve back from your ear and braid in the same manner to the other side. Keep braiding as per above back and forth until you run out of hair. Et Voila. Helps?? Let me know if this a) helps or b) confuses more. How To Put Your Hair Up In A Cute Bun.
Comb your hair carefully to eliminate any tangles or knots.Take some hair from the top of your head. 3.
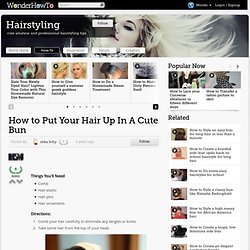
Tie off this hair with a hair elastic. 4. Don't pull off the ends. 5. 6. 7. 8. The sock bun secret (no remaining hair!) How to curl your hair with a sock! No heat. Hairstyles, Haircuts and Hair Colors. ...love Maegan: Messy Rope Braids and Low Bun Hair Tutorial Fashion+Home+Lifestyle.
These little rope braids are a fun way to add a little style with your own hair, creating a sort-of headband of sorts.
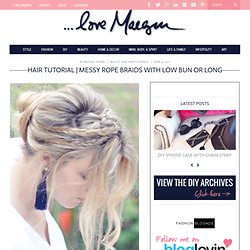
Your hair doesn’t need to be extremely long, but you do need some length to cover the top of your head with. If you have layers, you could instead create a tiny French Braid where the hair is shorter and closer to your head, if that makes sense. But it’s a fun and cute braided hair style that’s just a little different. I originally wore this style last Summer with two slightly larger braids Watch and Enjoy… * Notes: Instead of one large bun, create two or three little buns at base of your head OR swap the bun for a clean pony tail. How To: Easy Fishtail Braid/Plait. GUEST POST - thebeautydepartment.com. Photos by: Kathleen Bly post designed by kristin ess Mad love for our first guest post winner, Taylor Nick!!!

I am fully obsessed with this bohemian-inspired-braided-goodness! Even though Taylor had some SERIOUS competition, there’s no doubt that this little lady took the cake in our hair tutorial contest. She created a beautiful, textured, easy hairstyle that will work with almost any hair type. Congratulations Taylor, and thanks to ALL of you who entered this post contest. Xx Kristin “My look is inspired by all of the bohemian braids on the 2011 runways. ViewDo: How To French Braid Hair. Braid Hairstyle. Simply Vintagegirl Blog » Blog Archive » Tutorial: How to Make Lovely Fabric Flowers. 29 May 2010 These elegant fabric flowers are very simple to make . . . and only take a few basic supplies.
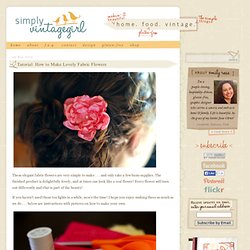
The finished product is delightfully lovely, and at times can look like a real flower! Every flower will turn out differently and that is part of the beauty! If you haven’t used those tea lights in a while, now’s the time! Cutesy name: Pin Curl Twist, 17 Hairstyles That Take Less Than 10 Minutes. Hair tutorials. After many requests, I finally made a tutorial on how to tie a simple head scarf.
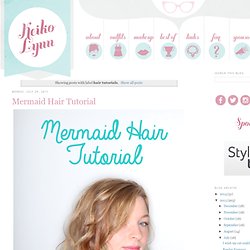
It's really, really easy. I did this without looking in the mirror, so that should tell you how easy it is. Let's get started! Start with a large, square scarf. I like my vintage silk scarves because they're soft and not bulky. Fold one corner to the other to form a triangle. Fold the corner down to about the middle, and then fold over again (but not all the way to the edge, because you want it to be a little thicker). Put the scarf around your head with the ends in the front, making sure the wrong side of the scarf (the part where you can see the folds) is against your head. Tie it in a loose knot at the front. Tuck the ends behind/underneath the scarf.