

Aussie Pumpkin Patch: Ladybird Art. Author: Kendra I don't really consider myself an artistically inclined person, but I know how much my kids love doing art projects.
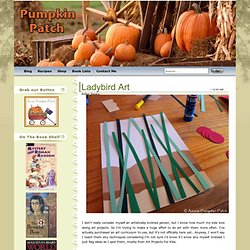
So I'm trying to make a huge effort to do art with them more often. I've actually purchased an art curriculum to use, but it's not officially here yet.. Spoon Dragonfly Craft. Bugs and Insect Crafts. Roly Poly Paper Craft for Kids This little roly poly curls up into a ball whenever it is scared just like real roly polies.
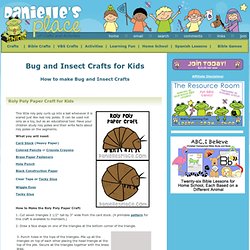
It can be used not only as a toy, but as an educational tool. Have your children study roly polies and then write facts about roly polies on the segments. What you will need: Card Stock (Heavy Paper) Colored Pencils or Crayola Crayons Brass Paper Fasteners Hole Punch Black Construction Paper Clear Tape or Tacky Glue Wiggle Eyes Tacky Glue How to Make the Roly Poly Paper Craft: 1. Cut seven triangles 3 1/2" tall by 3" wide from the card stock. 5.
Fly with Compound Eyes Educational Craft for Children. Oeil2cha: Espèces rares. Kids with a View: April 2011. Study a beehive and you will see The mathematical genius of the bee.
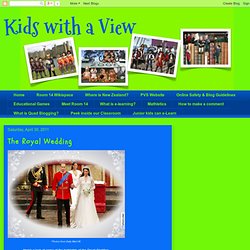
The Hexagons that you’ll find inside fit side, by side, by side, by side. This math is passed mysteriously from worker bee to worker bee! Bees, Snails & Peacock Tails by Betsy Franco and Steve Jenkins This is our hexagon wall display. Ourselves and made some bees to go on it. Which bees do you think are doing the waggle dance?
Which bees do you think are the worker bees? What are the bees on the flowers doing? What is the worker bees job? We explored the hidden shapes and patterns found in a beehive. Check out our beehive slideshow below. When we ran out of hexagon shapes... we discovered that 6 triangles make a hexagon. And that 3 diamonds make a hexagon. We also had some shapes that we didn’t know what they were. Mrs Laburn told us they were trapeziums. Library Arts: Bead & Button Butterfly. I mentioned this once before and I'll mention it here again, Pottery Barn (kids & teens) is a great source for ideas.
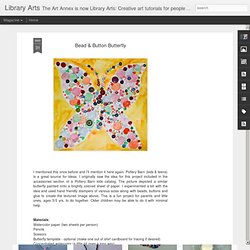
I originally saw the idea for this project included in the accessories section of a Pottery Barn kids catalog. The picture depicted a similar butterfly painted onto a brightly colored sheet of paper. I experimented a bit with the idea and used hand friendly stampers of various sizes along with beads, buttons and glue to create the textured image above. This is a fun project for parents and little ones, ages 3-5 yrs. to do together. Older children may be able to do it with minimal help. Animal Sillouettes and Patterns. Furry, Spiky, Slimy, Fuzzy and Sharp - Animals Here We Come!
Looking Closely At Your Favorite Animal I love animals and so do most people that I've ever met. Its clear why so many children's art projects have animals in them. Its a fun topic and a great tie in to pets or a trip to the zoo. This project includes looking at the patterns and textures on an animal as well as their silhouette. This is an easy project that only gets cooler looking the more that you do!
Materials You Need To Make an Animal Silhouette with Pattern and Texture: Black paper (I suggest 8.5" x 11" or larger)PencilA sheet of white paper (I suggest 8.5" x 11" or larger)ScissorsGlue StickColor Pencil or Oil Pastel *For more advanced kids, you could use tempera or acrylic paint How To Create Your Masterpiece of the Animal Kindom: Tips: This is a GREAT project to do after going to the zoo. Clean Up: After your masterpieces are complete, wash paintbrushes immediately so they'll last for many more paintings. Camouflage critters.
I feel no shame saying, that like many of you I love this book: I have used a lot of lessons straight from this book.
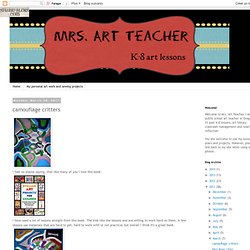
The kids like the lessons and are willing to work hard on them. A few lessons use materials that are hard to get, hard to work with or not practical but overall I think it's a great book. So one of my favorite lessons is the camouflage critters. I've done this lesson in the past with sharpies and tooling foil but this year we just used construction paper, tempra paint and oil pastel. After having the kids divided the paper with white paint (use the smallest paint brush you have) the paint dried fast and I hit each kids paper with the hair dryer for 15 seconds and sent them back to their table to use 3 colors per section to make an interesting background.
We spent some time practicing the animals in the book and going through the step by step drawing directions. Reptile Camouflage. Look carefully and you’ll see the hidden reptile.
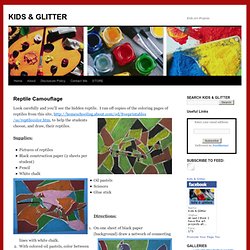
I ran off copies of the coloring pages of reptiles from this site, , to help the students choose, and draw, their reptiles. Supplies: Pictures of reptilesBlack construction paper (2 sheets per student)PencilWhite chalkOil pastelsScissorsGlue stick. Creature Camouflage. Camouflage occurs when animals are either hard to see, like a black panther lurking in the night looking for its prey, or when they blend in with their environment by resembling something else, like a stick insect looking like a twig.
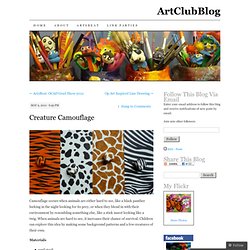
When animals are hard to see, it increases their chance of survival.