

Star Crossing Table Runner. Ideas for Quilting Gifts - Free Mug Rug Project - Keepsake Quilting. Recently, we took a poll on the Keepsake Quilting Facebook page asking what you do with all your quilting projects.
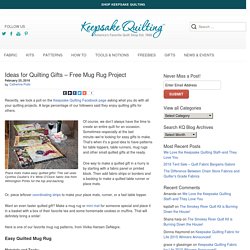
A large percentage of our followers said they enjoy quilting gifts for others. Of course, we don’t always have the time to create an entire quilt for an occasion. Sometimes–especially at the last minute–we’re looking for easy gifts to make. That’s when it’s a good idea to have patterns for table toppers, table runners, mug rugs and other small quilted gifts at the ready. One way to make a quilted gift in a hurry is by starting with a fabric panel or printed block.
Or, piece leftover coordinating strips to make your place mats, runner, or a fast table topper. Want an even faster quilted gift? Here is one of our favorite mug rug patterns, from Vivika Hansen DeNegre. Easy Quilted Mug Rug Materials and Tools: (These directions make one mug rug. Directions: 1. 2. 3. Samelia's Mum: A Mug Rug Tutorial. Here's a tutorial on one way that I make my mug rugs.
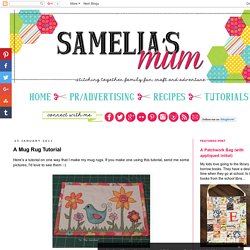
If you make one using this tutorial, send me some pictures, I'd love to see them :-) First I like to sketch the design onto a piece of paper. I generally try to stick to a 6" x 10" border. Trace your designs onto some double sided fusible paper (such as vliesofix or applifix). Remember to seperate all segments of the design (ie the bird body and the wing are seperate) . Cut around the shape leaving approx 1/4" around each. Cut a piece of fabricfor your background. Now the fun big begins. Fuse onto the back of your fabric with a hot, dry iron.
Now you can either fuse all of them or cut and position them onto your backing fabric as you go. Either put it together on your ironing board, or onto a hard flat surface which you can easily transport to your ironing board. Once you have it arranged just as you'd like, remove the backing paper and fuse onto the background fabric. Free Motion Quilted Scissors Pincushion Tutorial. Sewing Projects Using Charm Squares.
Circle Zip Earbud Pouch Tutorial - Dog Under My Desk. I use a little zippered pouch to carry around my earbuds since they are the fancy microphone ones and I don’t want them to break or get tangled.
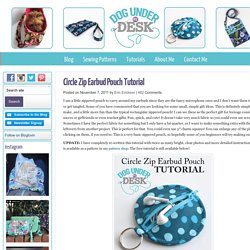
Some of you have commented that you are looking for some small, simple gift ideas. This is definitely simple to make, and a little more fun than the typical rectangular zippered pouch! I can see these as the perfect gift for teenage cousins or nieces or girlfriends or even teacher gifts. Fun, quick, and cute! It doesn’t take very much fabric so you could even use scraps! UPDATE: I have completely re-written this tutorial with twice as many bright, clear photos and more detailed instructions and it is available as a pattern in my pattern shop. First, download the pattern template HERE. Notions - The Connecting Threads Staff Blog. I like to save the very quick and easy projects for the tail end of the Gifty Galore season.
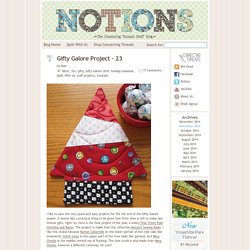
It seems like a practical thing to do given how little time is left to make last minute gifts, right? So, here is the final project of the year, a lovely Tree Trivet from Stitching and Bacon. The project is made from the collection Maryjo’s Sewing Room. I like this choice because Button Collection on the lower portion of the tree look like ornaments, Stitch Lines in the upper part of the tree looks like garland, and Wavy Checks in the middle remind me of flocking. The tree trunk is also made from Wavy Checks, however a different colorway; SO cute!
Fat Quarter Friday {guest post from Syzygy of Me}
Quilted tissue holder w/ vintage button closure. - Leland Ave Studios. It’s that time of the year again. . . where my mind skips ahead to the holidays and all of the fun gifts I can make for the special people in my life.
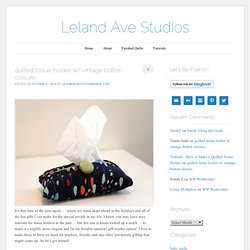
I know you may have seen tutorials for tissue holders in the past — but this one is kinda kicked up a notch — to make it a slightly more elegant and (in my humble opinion) gift-worthy option! I love to make these to have on hand for teachers, friends, and any other last-minute gifting that might come up. So let’s get started! Supplies: 2 pieces of coordinating fabric measuring 6.5 x 7 inches (one for the exterior, and one for the lining)1 piece of thin batting measuring 7 x 7.5 inches (you can even use a piece flannel in place of the batting)1 piece of 2mm elastic cording cut to 3.5 inches (Tip: I have bought elastic by the yard, OR cut hair ties in coordinating colors to match my fabric — just use the thin ones!)
The How-To:
Pin Cushions, Needle Books, etc. Postcard!!!! Fabric Baskets... Pot Holders, etc.... Pillows.... Mug Rugs... Coasters... Placemat Ideas.... For Kids...