
VectorScribe v3 - Astute Graphics. How to Vectorize Hand Lettering. Veerle's blog 3.0 - Webdesign - XHTML CSS. Like I mentioned on Twitter yesterday, this is the largest tutorial I've ever written.

Today I'll share you how I created a colorful cityscape in Adobe Illustrator. You'll start from an Illustrator template file, where I prepared the document for you including the colors I've used. We go step by step through the process, creating the sky, the grass, houses, trees, bushes, clouds… I show you several different, yet very simple techniques. Hope you are ready for this very extended tutorial. I promise it'll be fun... Most of you know I have a fascination of everything geometrical. In a previous post I talked about how you can apply a texture effect using a Scatter Brush. One of the things I've been playing with lately is applying textures to my illustrations in Illustrator. I've always been fascinated by the wonderful animated gifimages created by the talented folks of RADIO. Create a Trendy Line Art Logo with MirrorMe.
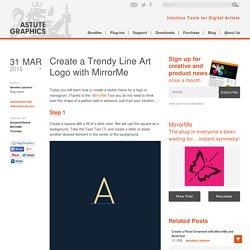
Today you will learn how to create a stylish frame for a logo or monogram.

Thanks to the MirrorMe Tool you do not need to think over the shape of a pattern well in advance, just trust your intuition… Step 1 Create a square with a fill of a dark color. We will use this square as a background. Take the Type Tool (T) and create a letter or place another desired element in the center of the background. Lock the letter and background in the Layers panel. Step 2 Take the MirrorMe Tool and set the center of symmetry in the center of the square. Completely Embed Font (not Subset) in PDF sever... Hi, Dov, if you're reading this, I'd appreciate your input, as I readily admit to being novice in print preparation, but I'm also a perfectionist, so my knowledge is growing at least!

1) I notice that if I use the OnlinePrinters_v1.4.INDD setting from Illustrator or InDesign (which is pretty much the same as PDF-X 2008, it successfully fully embeds some of the fonts, but Arial, and Tahoma it only subsets. Subsetting is apparently not a problem for the printer, so I guess that's ok. (Previously, when trying to fully embed I had tested using 2001 and 2002.) 2) Also, in the Onlineprinters_v1.4.INDD setting file, it is set to output Coated FOGRA39 (ISO 12647-2:2004), yet ISO Coated v2 (ECI) is the colour space that the printer wants me to use, and I make my documents in this colour space. 3) I have images in my files of various resolutions (all of them at least 300dpi, though). 5) Finally, the setting uses JPEG compression to downsample, at Maximum quality.
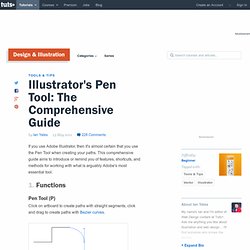
Thanks, Edward. Illustrator’s Pen Tool: The Comprehensive Guide. If you use Adobe Illustrator, then it's almost certain that you use the Pen Tool when creating your paths.

This comprehensive guide aims to introduce or remind you of features, shortcuts, and methods for working with what is arguably Adobe's most essential tool. 1. Functions Pen Tool (P) Click on artboard to create paths with straight segments, click and drag to create paths with Bezier curves. Add Anchor Point Tool (+) The Bézier Game. How To: Create a Seamless Diagonal Pattern in Illustrator. If our freebies have benefited you personally or have helped you earn a profit please consider donating via paypal.

Donate Now. How To Use Bitmap Tiff Textures in Adobe Illustrator. Convert Photoshop Text to Vector for Use in Illustrator. Recently I found myself needing to convert some text created in Photoshop to a vector in Illustrator (without reformatting all the text).

After some research via Google, Twitter, and asking around, no one seemed to have a sure-fire solution. I called a fellow designer and we bounced ideas off each other until we found a solution that worked in just a few simple steps. Step 1 Open Photoshop file containing the text you'd like to be vectorized. It's not necessary to have the text as the only layer in the file, just make sure the text layer is selected. Step 2 Create a Work Path from the text. Step 3 While the Work Path is selected, go under File > Export > Paths to Illustrator and save the file. Step 4 Open the saved file in Illustrator, and change the color mode to RGB, it defaults to CMYK. Step 5 Select path and fill with colour, it defaults to no fill and no stroke. Conclusion. Adobe Illustrator CS5 Tutorial: How to Make A Clipping Mask. Learn How to Create a Pattern in Illustrator CS5.
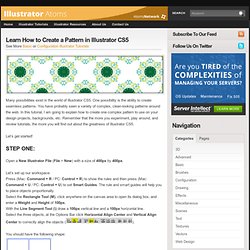
Many possibilities exist in the world of Illustrator CS5.

One possibility is the ability to create seamless patterns. You have probably seen a variety of complex, clean-looking patterns around the web. In this tutorial, I am going to explain how to create one complex pattern to use on your design projects, backgrounds, etc. Remember that the more you experiment, play around, and review tutorials, the more you will find out about the greatness of Illustrator CS5. Let’s get started! Open a New Illustrator File (File > New) with a size of 400px by 400px. Let’s set up our workspace: Press (Mac: Command + R / PC: Control + R) to show the rules and then press (Mac: Command + U / PC: Control + U) to set Smart Guides. You should have the following shape: (Images are zoomed-in to 200%) Right-click the entire shape and select Make Guides. At the LAYERS palette (Window > Layers) rename “layer 1” as, “Guidelines” and Lock the layer.
Create a New Layer and name it, “Shapes”. Looking good! Using enhanced art and pattern brushes. Share this Episode Autoplay End of Video Show End Screen Default Quality Adjust your embed size below, then copy and paste the embed code above.

Community Translation Your transcript request has been submitted. Adobe TV does its best to accommodate transcript requests. Join the Community Translation Project Thanks for your interest in translating this episode! Please Confirm Your Interest. Adobe Illustrator CS6 Tutorial – Pattern Swatches.