

Upgrading the Raspberry Pi's SD Card. I’ve been running my Raspberry Pi on a really old 2GB SanDisk Ultra SD card.

It worked fine, but it wasn’t fast, and there certainly wasn’t that much free space to do anything on. After installing a bunch of packages, compiling Node.js, and cloning a couple of Git repositories, I ran out of space. I had a Transcend 4GB SD card lying around, and wanted to transfer the entire contents of the older SD card to the larger one. Cloning the Old Card. How do I transfer my setup between SD cards? Current community your communities Sign up or log in to customize your list. more stack exchange communities Stack Exchange.
Debian - How do I backup my Raspberry Pi? If you want to preserve all of the data, you will probably have to create a disk image.
Furthermore, Windows cannot recognize typical Linux filesystems, so you probably won't even be able to see your files, when you plug in your SD card. Creating a disk image will preserve not only files but also the filesystem structure and when you decide to flash your new SD card, you will be able to just plug it in and it will work. On Linux, you can use the standard dd tool: RPi Backup Server. As a geek, I always imagine worst-case scenarios.
I was worried about my data I had at home. My laptop is backuped on my server, which hosts some other websites (this wiki), and family stuff (photos, mainly). At first, I had an external hard drive that I would connect once every blue moon (I tried at least every two months), and I would then launch a bash script that would backup the server drives into the external HDD. That was great, but I needed two things: The backups must be automated. Backup Box: La mejor forma de respaldar tus archivos en la nube. Si les hablo de Dropbox, SkyDrive, Box, etc... no les estaré diciendo nada nuevo.
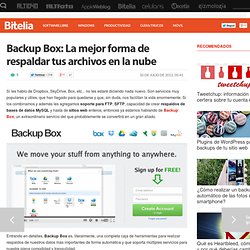
Son servicios muy populares y útiles, que han llegado para quedarse y que, sin duda, nos facilitan la vida enormemente. Si los combinamos y además les agregamos soporte para FTP, SFTP, capacidad de crear respaldos de bases de datos MySQL y hasta de sitios web enteros, entonces ya estamos hablando de Backup Box, un extraordinario servicio del que probablemente se convertirá en un gran aliado.
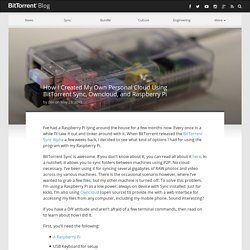
Entrando en detalles, Backup Box es, literalmente, una completa caja de herramientas para realizar respaldos de nuestros datos más importantes de forma automática y que soporta múltiples servicios para nuestra plena comodidad y tranquilidad. Con esta herramienta podrás: BitTorrent Sync, RPi & Owncloud. I’ve had a Raspberry Pi lying around the house for a few months now.
Owncloud vs. Dropbox. What do you get for your money?

That’s the question everyone looking to buy a piece of tech asks themselves. It also happens to be the question this recurring feature will try to answer. Is it worth spending extra on high-end gear, or do you get what you need with cheaper models? Every month, we’ll look at some of the cheapest and most expensive products in a given category, testing each to see what their limits are and to help you figure out when you can cheap it out, and when to plunk down some extra cash to get what you need. Hi/Low: Cloud Storage “I wandered lonely as a cloud,” William Wordsworth once wrote, perhaps while pondering the dearth of cloud storage options available in 1802. Modern hunters of cloud-related bliss have an overwhelming number of solutions, ranging from basic and cheap to feature-rich and expensive. Space. OwnCloud, un sueño por hacerse realidad. Tras unas semanas probando a fondo ownCloud 6, es hora de compartir la conclusión -y otros muchos, muchos detalles- de una experiencia, que, como resume el titular, es un sueño por hacerse realidad.
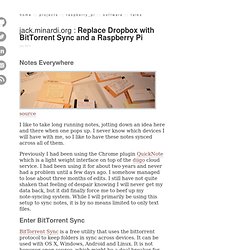
Es un sueño por las increíbles posibilidades de un proyecto de software libre único en su categoría… que está por hacerse realidad porque, aristas aparte, hasta que el gran público pueda disfrutar de él, todavía falta. Files Tree apps.ownCloud.com. 6 Replace Dropbox with BitTorrent Sync and a Raspberry Pi. Notes Everywhere source I like to take long running notes, jotting down an idea here and there when one pops up.
Raspberry Pi Bittorrent Sync - Bitsync. Gegevens Categorie: Tutorials Bitsync.
With Bitsync you can sync folders/files aross computers, tablets, phones. Kind of Dropbox. But your data with bitsync is private. Build Your Own Cloud Storage with Raspberry Pi and BitTorrent Sync. Don’t believe the hype: the Cloud is far from secure. But have no fear – now you can forget Dropbox once and for all, and show the authorities a solid middle finger by rolling your own private, unlimited, and secure cloud storage platform with a Raspberry Pi and BitTorrent Sync. Part of this process overlaps with making a Pi-based Network Attached Storage, which you might also want to check out. If you’re really adventurous, you could even build a Raspberry Pi Twitter Bot that tweets out all the new files added to it. Do it. 3. Connect RPIto a USB hard disk. SFTP> Webdav> FTP. Sftp para acceso remoto a los ficheros de la Raspberry. Para acceder a todos los fichero de la Raspberry, ya sea con Raspbian, RaspBMC o Xbian solo necesitamos una cosa. confirmar que tenemos acceso remoto por SSH.Esto suele estar activado por defecto en todas estas versiones mencionadas del sistema operativo de la Raspberry y es lo que nos permite acceder por Terminal.
Si lo hemos deshabilitado lo volvemos a activar desde la configuración. En ese caso no tenemos que instalar nada, ni configurar ni mover un solo dedo.Solo tenemos que saber que el protocolo sFTP es mucho mejor que el FTP ya que gestiona el acceso mediante contraseña pero además cifra todas las comunicacione, de ahí la *“s” de “seguro”. BARRACUDA Configure WebDAV on Raspberry Pi - The Raspberry Pi Blog. 5.2B Davenport WebDAV-SMB Gateway. Pi into a File Server Using Samba. 5.2B How to setup Windows filesharing over SSH – How-To. If you have a Linux file server you know how easy it is to access its files from Windows clients; just install Samba on the Linux server and you can connect using Windows file sharing (Netbios / CIFS / SMB).
Unfortunately this simple setup cannot be used by itself to access files remotely over the Internet. One reason is that SMB traffic is not encrypted, another is that firewalls normally block it. That is where SSH enters – it is the leading way of securely connecting to systems over the Internet. However, to use Windows file sharing over SSH requires some tricks, which are explained in this article.
They are a bit complicated but have to be done only once, work quite reliably, don’t require any additional software and are well worth the ten minutes it takes to perform them. Prerequisites. 5.1 Install a Loopback Adapter in Windows 7. If you're new here, you may want to subscribe to Windows Reference RSS feed Thanks for visiting! The Microsoft Loopback adapter is a testing tool for a virtual network environment where network access is not available.
You can bind network clients, protocols, and other network configuration items to the Loopback adapter, and you can install the network adapter driver or network adapter later while retaining the network configuration information. You can also install the Loopback adapter during the unattended installation process. To installa Microsoft Loopback adapter in WIndows 7 1. 3. 4. 5. 5.2A Windows File Sharing and SSH Tunneling. This article is not about SFTP or SCP file transfer. The topic is Windows file shares: folders exposed to a local network using built-in Windows functionality. It is possible to set up SSH port forwarding so as to access Windows file shares from a remote Windows computer over SSH. This allows accessing remote files over an encrypted connection as if they were files on a local drive, without requiring SFTP or SCP file transfers. In recent versions of Windows, including Vista, Windows 7, and 2008, setting up port forwarding of file shares over SSH is now considerably more difficult.
5. Tunneling SMB over SSH: Secure file sharing. 4.A SAMBA Low-Power NAS & simple redundancy. Mix together one Raspberry Pi and a sprinkle of cheap external hard drives and you have the recipe for an ultra-low-power and always-on network storage device. Read on as we show you how to set up your own Pi-based NAS.
Why Do I Want to Do This? The benefit of having an always-on network storage device is that it’s extremely convenient to have your data (or backup destination) always accessible to the computers both inside and outside your network. The downside, in most instances, is that you’re consuming a fair amount of power for the convenience. Our office server, for example, runs 24/7 and consumes almost $200 worth of power a year. 4.B Windows Networking on the Raspberry Pi. The goal of this article is to configure the Raspberry Pi so that it can integrate into an existing Windows Networking environment without needing to make changes to any of the other, perhaps numerous, Windows PCs. I know that there are numerous other ways to achieve networking like this though so please don’t feel the need to tell me about them in the comments below. Please note that I will be doing a version of this article for the Apple Macintosh too.
4.C Raspberry Pi as NAS with Samba. Samba port usage. From SambaWiki. Make a network drive available over the internet. 4.0 How to Add USB Storage to the Raspberry Pi. I’ve recently been looking at options for expanding the storage on my Raspberry Pi. Such choices are limited – the USB ports are often used by a keyboard, mouse or retro game controllers, while the SD card slot is naturally limited to just a single device. In terms of expanding storage via USB devices, there are two options, but how you connect these will affect how successful you are.
For instance, you might connect your USB hard disk drive or flash drive to one of the USB ports – but if that port is needed for another device, things can get tricky. Use USB hard disk & flash drives with your Raspberry Pi. 2. Setup a FTP server on Raspbian for the Raspberry Pi? INSTRUCTABLES Install an FTP server. Debian Squeeze FTP Server.