

Free Spinning & Dyeing Tutorials at Knitting-and.com. The Art of Tie Dye. After you have gathered all of the supplies that are needed, it’s time to master the art.

The video will take you through each step or you can check out the basic directions below. Make sure that you have a clean white t-shirt and that your dyes are mixed. If you have powder dyes, you need to pour water into the bottles. Cover the surface you are working on and wear rubber or plastic gloves. The dyes will stain many materials. . * Ready for more? DIY: Tie Dye Denim. This DIY kick starts my tie dye week (another version to come) and just might be my most favorite DIY yet!!

As I was perusing the latest Elle magazine, I saw an ad for Paige denim. It was for a beautiful pair of tri-colored tie dye jeans (Paige Toulouse Verdugo Skinny). The Bleaching 101: Dark Jeans to Pastel Shorts. Fabric Bleach Art - Craft By Photo. BLEACH BLACK. How To Do Flower Pounding. Did you know that you can transfer the color from flowers and even leaves onto fabric by beating them with a hammer?
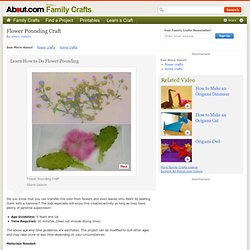
The kids especially will enjoy this creative activity as long as they have plenty of parental supervision! Age Guideline: 5 Years and Up Time Required: 30 minutes (Does not include drying time) The above age and time guidelines are estimates. This project can be modified to suit other ages and may take more or less time depending on your circumstances. Materials Needed: Variety of Fresh Flowers and Leaves White, cotton fabric (muslin works well) Wax Paper Masking Tape Hammer Instructions: It is best to work on a hard surface, like a sidewalk or cement floor. Carefully lay the fabric over the flowers and/or leaves. Hammered Leaf & Flower Prints. Set Colors From Pounding Flowers Onto Cloth. You are here: Home > All About Hand Dyeing > FAQs > Fixing Dyes > Fixing pounded flowers on cloth If you pound flowers or leaves onto cloth with a hammer, you can make a lovely image with the natural pigment.

Is this dyeing? No. The majority of natural pigments do not make suitable dyes. They may fade when exposed to light; they may change color upon being exposed to the air by the action of the pounding - and most of them will certainly wash out, if you ever make the mistake of washing your creation. Dyeing Tips & Tricks. RIT and tintex dyes are a combination of Acid, Direct, and Disperse dyes mixed with acetic acid and salt.
Acetic acid is needed to aid the acid dyes, and salt is needed for direct. (mortants= acetic acid( or citric acid) and salt are safe to use) To get the best results with RIT or TINTEX is to heat the dye bath. 1. wash fabrics/clothing, set aside. 2. mix dyes with hot water to dissolve. ( I boil water and then mix the dye into that for better dissolving. 3.
Paula Burch's All About Hand Dyeing. DIY: Sharpie Tie Dye. This is a great project for kids, or adults.
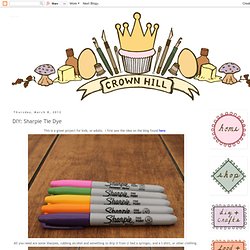
I first saw the idea on the blog found here. How To Bleach Fabric Decoratively. Here is my Bleaching Tutorial, exclusively for Stencil Revolution members.

In 2002, I was hired by a small clothing company to invent a process by which we could produce images on garments that would be more “tattooed” into the fabric than screened on. I immediately thought about bleach and began two years of research and testing. I worked with chemists, fabric manufacturers, and artists. I wrecked my studio, my clothes, and my lungs. I wasn’t paid nearly enough for this. Chemically, to achieve different values, I worked with retardants to slow the process of the chemical’s effects, I watered down mixtures, I used “stop-baths”, dehydrated bleach crystals… you name it. DIY Shibori (Japanese Tie-Dye)
Today marks HonestlyWTF’s four year anniversary.
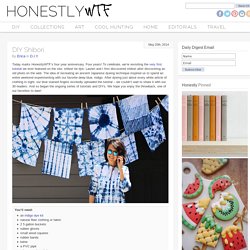
Four years! To celebrate, we’re revisiting the very first tutorial we ever featured on the site: shibori tie dye. Lauren and I first discovered shibori after discovering an old photo on the web. The idea of recreating an ancient Japanese dyeing technique inspired us to spend an entire weekend experimenting with our favorite deep blue, indigo. After dyeing just about every white article of clothing in sight, our blue stained fingers excitedly uploaded the tutorial – we couldn’t wait to share it with our 30 readers. You’ll need:an indigo dye kitnatural fiber clothing or fabric2 5 gallon bucketsrubber glovessmall wood squaresrubber bandstwinea PVC pipea long wooden sticka drop clothrubber glovesscissors When choosing fabric or clothing, it’s important that made of natural fibers. Itajime shibori is known as the shape-resist technique. Fold it again in the other direction – again, like an accordion.
Wrap the twine around the fabric. Dying Self-Striping Yarn With Kool-Aid/Food Coloring. Ok, 1st of all I am going to tell you that I am super excited about this post.
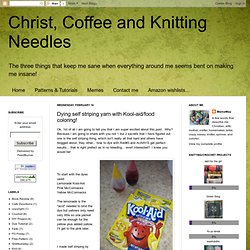
Why? Because I am going to share with you not 1 but 2 secrets that I have figured out. one is the self striping thing, which isn't really all that hard and others have blogged about, they other... how to dye with Red#3 and ALWAYS get perfect results... that is right prefect as in no bleeding... ever! Interested? I knew you would be! To start with the dyes used: Lemonade Kool-Aid Pink McCormacks Yellow McCormacks The lemonade is the "acid" needed to bind the dye but yellows only need very little so one packet can be enough for the yellow plus added yellow.
I made self striping by wrapping around the 2 sides of my bread cutter. Permanently Dye Fabric With Sunlight & Inkodye.