

You searched for diy spring. Oh hey there!

Long time no see besties. Let’s chat, let’s talk about how it’s Easter this Sunday. How did that happen? Blow box party lights. These paper blow box lights give the most festive vibe to any home or party space.
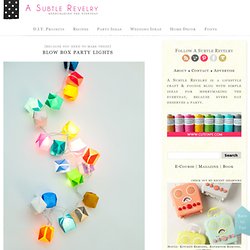
We originally made them to hang over the deck for our last party, but I loved the look so much I decided to bring them inside afterwards. Adding simple details that make our home feel festive is one of my favorite ways to decorate. The blow boxes are simple to make with sheets of origami paper (sold at craft stores) and can be hung as garland on their own, or given as favors. DIY Gold Geometric Lamp. What's not to love!?
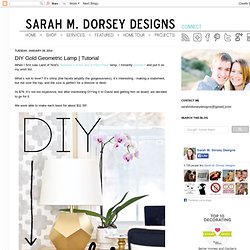
It's shiny (the facets amplify the gorgeousness), it's interesting - making a statement, but not over the top, and the size is perfect for a dresser or desk. At $79, it's not too expensive, but after mentioning DIYing it to David and getting him on board, we decided to go for it. We were able to make each base for about $11.50! Here's how we did it. First, David did a little research and we found out that the shape (12 sided pentagon) is called a dodecahedron.
The angles were pretty tricky to figure out (probably took about an afternoon), but there here in case you'd like to try it :) Materials for 2 lamps: No sew bench cushion. Make Your Own Photo Wall Clock! I don't know why, but I always had the impression that making a DIY clock would be really tedious and stressful.

Boy was I wrong! This cute, customized photo clock is simple to make in about an hour. Really! It's that easy. You're going to love it. Supply list: Canon Semi-Gloss Photo Paper Plus, glue, clock kit, nail polish, X-Acto knife Step 1. Step 2. Step 3. Step 4: Assemble the clock. Spring “Peeps” Embroidery Hoop Art. Spring is just around the corner!
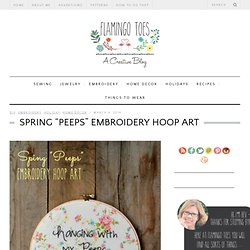
And with Spring comes . . . spring candy. One of my favorite things ever. Back in the dark ages of Flamingo Toes I made up a printable celebrating the awesomeness that is Peeps. A DIY Take It On Tuesday: Embroidery Hoop Art! DIY Spring Applique Pillow by Anna Joyce. Sometimes I have to sit back and marvel at the sheer amount of incredibly talented artists and designers working in Portland, Oregon.
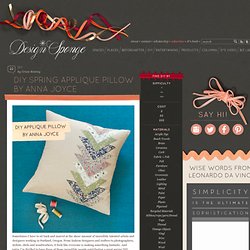
From fashion designers and crafters to photographers, stylists, chefs and woodworkers, it feels like everyone is making something fantastic. And today I’m thrilled to have three of those incredible people contributing a great spring DIY project. Textile designer and applique artist Anna Joyce created this beautiful pillow project using gorgeous Liberty of London patterns and was helped by stylist Chelsea Fuss and photographer Lisa Warninger for the final photos. Ranunculus Applique Pillow 1. Weekend project: Fruit welcome mats. We're slowly making our new apartment into a home inch by inch.
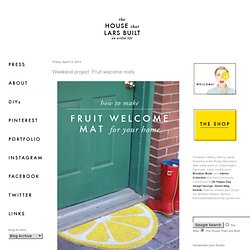
We just barely got a bed last week after sleeping on a mattress on the ground for the past 4 months! On one of my Ikea runs I picked up a circular welcome mat that I thought would be fun to turn into something and yesterday I got it--FRUIT! Plus, once you cut it in half, you get two mats for the price of one. Painted Sconce DIY. After passing by many a forlorn sconce at thrift stores and flea markets, I realized one reason these beauties may have been passed over is because their modern potential was getting lost in their dated finish.

So I decided to go on the hunt for a sconce that had good bones with an interesting shape and detailing and breathe a bit of new life into it with an updated color, texture, and shade. Here’s What You’ll Need: 52. I’ve been really into crystals lately. i love the combination of the rough texture and vibrant color. i picked up a few at the rose bowl flea market last weekend that have been living on my nightstand. today we are going to make a beautiful amethyst mirror… what you’ ll need: • 11 inch round wood clock face • 10 inch round mirror • amethyst crystals (we purchased 200 amethyst pieces from BlissCrystals on etsy) • Loctite Go2 Glue • Silver spray paint • 2 small eye hooks • wire • Spray paint both sides of clock face.

The back of the clock face will be the front of the mirror. • Glue mirror to clock face and press surfaces together. . • Using a generous amount of glue, attach crystal pieces around the border of the mirror, with some overlapping the mirror edge to conceal it. . • Attach eye hooks to back edge of wood (pre-drilling holes makes it easier.) • Thread wire through eye hooks and twist to tighten so that the wire is taut and not visible from the front.
The Green Space Travel Case + Goodbye to you. Spending as much time in thrift shops as I do (see the spoils at my etsy shop The Modern Hunter), I come across many items that just don’t seem to move.
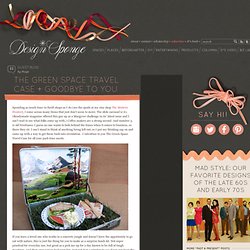
The slide carousel is #1. (Readymade magazine offered this guy up as a Macgyver challenge in its’ latest issue and I can’t wait to see what folks come up with.) Coffee makers are a strong second. And number 3, is old briefcases.