
Cheap Arduino Wireless Communications. I was looking for a way to handle wireless communications between two Arduino boards.

Other options like Xbee or Bluetooth were going to cost $50 to over $100. Then I found a cheap RF transmitter and receiver at Sparkfun. The total cost is only $9! Here are a few limitations to RF solution: Communications is only one way. The advantages are that it is cheap and it is pretty easy to use. Below are some images showing how I hooked up the receiver and transmitter to two different Arduino boards.
Here’s a picture of the my actual bread boarded circuit. Since the receiver is constantly picking up random noise I add a few extra bytes to every data packet. I broke the Arduino code into two files. I did all of my initial testing without any of these improvement and everything worked fine with these devices inside the same room. Add an antenna. I got a lot of help from the transmitter/receiver data sheets, and from this article. Build Your FM transmission Station with Arduino. Getting Started with nRF24L01+ on Arduino.
Nordic’s nRF24L01+ 2.4GHz RF radios are a great way to communicate wirelessly between Arduino’s.

They’re cheap, and powerful. Unfortunately, they can be a little daunting to beginners to get started. Today, I want to make it easy for total beginners to get up and running on nRF24L01+ radios quickly and easily. Stuff we need First, we have to go shopping. Reasonable substitutes for this stuff can also be found at Sparkfun if you like spending a lot more money.
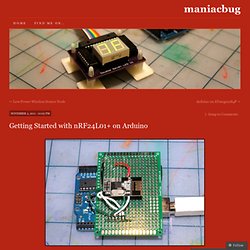
Preparation We only need one of the 2×4 pin female headers. Here’s what it looks like all ready to go. Solder it up The 8-pin male header goes in position C09-16.The 6-pin male header goes in position V13-18.The 2×4-pin male header goes in position K16-N15.The wires are connected as follows: Here’s what it looks like with all the wires in place, up close and personal. Software Get the RF24 library from github. From the File menu, select “Examples”, then “RF24″, and finally “GettingStarted”. Make another one From here… Elinchrom EL-Skyport triggered by Arduino - infar.be. After figuring out how the Elinchrom EL-Skyport Transmitter works, I wanted to do a proof of concept implementation with an Arduino.

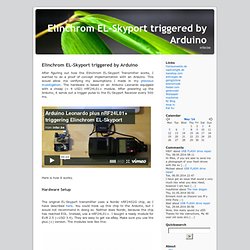
This would allow me verifying my assumptions I made in my previous investigation. The hardware is based on an Arduino Leonardo equipped with a cheap (< 4 USD) nRF24L01+ module. After powering up the Arduino, it sends out a trigger pulse to the EL-Skyport Receiver every 500 ms. How to work with the NRF24L01+ Best Wireless Communication for Arduino. Ciseco wireless products the XRF ERF and URF. Our range of ultra-low power, long range, high value wireless s UART serial data modules come in a variety of shapes to suit your application.

XRF is Xbee shaped to fit Arduino, PIC, PICAXE etc. fits the Raspberry Pi using our Slice of Pi.ERF is the same size as the Arduino Mini and has a six way FTDI laid out connector.URF has a USB connector for connection to a computer.SRF is our latest and smallest surface mount design.SRF STICK is an encased version of the SRF-UARF is the latest version and it incorporates a built in power amplifier for even greater distances. Here is a handy comparison chart for all the above. Also in this section you will find WiFi and Bluetooth units that we can re-sell at competitive prices, as well as several other supporting products.
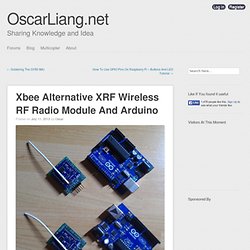
Xbee Alternative XRF Wireless RF Radio Module And Arduino. In this post I will show you how to connect the XRF with Arduino, and will show you a example application with two Arduinos talking to each other using the XRF wireless module.

As part of the DIY Custom Remote Control, I will be using wireless modules for remote communication. There isn’t much choice, either Radio Transceiver or Xbee. Both are great but quite expensive. Later on I stumble on an cheaper Xbee Alternative called XRF Wireless RF Radio Module, that claims it has the same pin configuration as the Xbee, the way it’s used is also the same, and the range can reach up to 1 Km (although some feedbacks said it’s more like 300m but it’s still great). More importantly, it’s only half of the price of a Xbee module. I think the main difference is that this module transmits data at lower frequency (868 and 915 MHz) than the Xbee (2.4G Hz), and that partly explains why the transmit distance is longer.
I found this image about Xbee and arduino: