

PWMDAC - Open Music Labs Wiki. Arduino (ATmega) PWM audio DAC About PWM on the Arduino (ATmega) This page describes all the nitty gritty of getting your Arduino set up to output decent audio on its PWM via Timer1.
For more in-depth information on what the settings mean, and what values are right for your application, please check out our PWM Tutorial on the main site. Timer1 outputs its data on pins 9 and 10 on the Arduino (pin 9/10 are OC1A/B and PORTB1/2 on the ATmega328p). For all of the following, it will be assumed that pin 9 is used for Single PWM, and is the high byte for Dual PWM.
Other timers can be similarly setup to run PWM, but we use Timer1 because it is a 16 bit timer, so it can do greater bit depth at lower frequencies (if desired). Register settings The following charts all assume a microcontroller clock frequency of 16MHz (standard on the Arduino). There are only 3 values to set in order to configure your PWM. they are: PWM_FREQ - This is the frequency value taken from the table below. Dual PWMs. Super simple 10 bit DAC for the Arduino. 1.
Don't use analogWrite() anymore The Arduino has no DAC; to get analog output values, we can use the standard Arduino function analogWrite(). This creates a so called PWM DAC, a PWM signal which has to be filtered with a low-pass filter. However, analogWrite() has some disadvantages: The resolution is just 8 bit.The PWM frequency is very low: 490 Hz. To reduce the ripple, a low pass filter with a large RC time is required. 2. Luckily there is a better solution. The DAC is faster; the PWM frequency is 31250Hz instead of 490Hz for 8 bit resolution.The maximum resolution is 10 bit.The low pass filter requires no elco. Super simple 10 bit DAC for the Arduino - Super simple 10 bit DAC for the Arduino Super simple 10 bit DAC for the Arduino Download the TimerOne library HERE. 3. 3.1. The DAC value is 10 bit, regardless of the resolution, thus 0 ... 1023.For a 5V supply voltage, the output voltage is:U = DACvalue * 5 / 1023. Simple 10 bit DAC for the Arduino. (Sample)RC Low-pass Filter Design for PWM - Result -
Arduino Waveform Generator. Waveform generators (also called function generators) are useful for testing and debugging circuits.
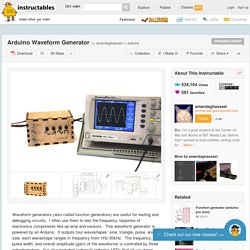
I often use them to test the frequency response of electronics components like op amp and sensors. This waveform generator is powered by an Arduino. It outputs four waveshapes: sine, triangle, pulse, and saw, each waveshape ranges in frequency from 1Hz-50kHz. The frequency, pulse width, and overall amplitude (gain) of the waveforms is controlled by three potentiometers. I've also included (optional) indicator LEDs that let you know which type of wave is currently being sent to the output. Additional Materials: Heat Shrink Radioshack #278-1611 22 Gauge Wire Radioshack #278-1224 Solder Radioshack #64-013 Drill Hot Glue Glue Black diffusor material (tissue paper, plastic, etc) Arduino Audio Output. DAC stands for "digital to analog converter.
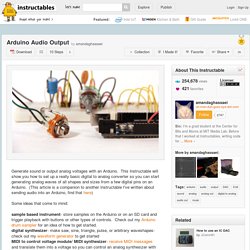
" Since the Arduino does not have analog out capabilities, we need to use a DAC to convert digital data (numbers/ints/bytes) to an analog waveform (oscillating voltage). A simple, easy to program, and cheap way to do this is to use something called an R2R resistor ladder. Essentially, it takes incoming digital bits (0V and 5V from Arduino), weights them, and sums them to produce a voltage between 0 and 5 volts (see the schematic in fig 2, taken from the Wikipedia resistor ladder page). You can think of a resistor ladder as a multi-leveled voltage divider. The resistor ladder I'll be demonstrating in this tutorial is an 8-bit DAC, this means it can produce 256 (2^8) different voltage levels between 0 and 5v.
I like using these resistor ladder DACs because I always have the materials around, they're cheap, and I think they're kind of fun, but they will not give you the highest quality audio. Review of Arduino DAC solutions. I was in a need of an analog output output for my Arduino, and I found quite many different digital-to-analog converter (DAC) solutions by googling around.
So finally I decided to gather them on one page as a reminder for myself and a guide for others. So here it comes! Breakout Board for MCP4725 I2C DAC. MCP4725 Breakout Board - 12-Bit DAC w/I2C Interface ID: 935 - $4.95.