

Série 4 / Application mobile. Formation AppInventor. Formation AppInventor (Académie Orléans Tours) ECHANGES DE DONNEES APP INVENTOR ARDUINO AUGMENTE. Turning a LED on and off with an Arduino, a HC-06 and Android. Although I use a HC-06 in the below examples the HC-05 in slave mode can also be used.
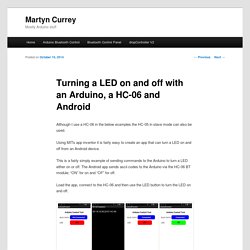
Using MITs app inventor it is fairly easy to create an app that can turn a LED on and off from an Android device. This is a fairly simply example of sending commands to the Arduino to turn a LED either on or off. The Android app sends ascii codes to the Arduino via the HC-06 BT module; “ON” for on and “OF” for off. Load the app, connect to the HC-06 and then use the LED button to turn the LED on and off. You can also open the serial monitor to see the commands as they are received The steps involved are: 1. create a circuit that includes a Bluetooth module and a LED 2. create an Arduino sketch that can receive commands from the HC-06 and turn a LED on and off 3. create an Android app that sends commands over Bluetooth The circuit The circuit is the same as the one used in Arduino and HC-06 (ZS-040) except the addition of a LED + resistor connected to pin D12.
Arduino Sketch. Android MIT App Inventor – Auto Connect To Bluetooth. In a previous post I showed how to connect an app inventor Android app to a Bluetooth module connected to an Arduino to control an LED.
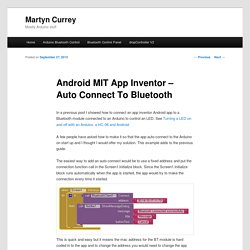
See Turning a LED on and off with an Arduino, a HC-06 and Android A few people have asked how to make it so that the app auto-connect to the Arduino on start up and I thought I would offer my solution. This example adds to the previous guide. The easiest way to add an auto connect would be to use a fixed address and put the connection function call in the Screen1.Initialize block. Learn to build Android apps. Créez une application mobile Traqueur (Android) App Inventor – Les tutos de la Techno. Tutorials for App Inventor 2. App Inventor : exemples d'IHM Android pour carte Arduino - éduscol STI. App Inventor : Première application - Orientation du smartphone - Objectif NUX. Je propose ici, d'afficher les différents angles adoptés par le smartphone, en allant chercher les valeurs sur les capteurs.
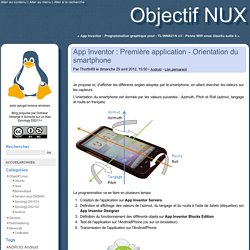
L'orientation du smartphone est donnée par les valeurs suivantes : Azimuth, Pitch et Roll (azimut, tangage et roulis en français) La programmation va se faire en plusieurs temps: Création de l'application sur App Inventor ServersDéfinition et affichage des valeurs de l'azimut, du tangage et du roulis à l'aide de labels (étiquettes) sur App Inventor DesignerDéfinition du fonctionnement des différents objets sur App Inventor Blocks EditionTest de l'application sur l'AndroidPhone (ou sur un émulateur)Transmission de l'application sur l'AndroidPhone App Inventor Servers Connectez le smatphone en mode synchronisation et allez sur le serveur MIT App Inventor : Dans My Projects, cliquez sur New et créez le projet Orientation. validez par Ok, l'interface de création apparait.
App Inventor Designer Vous pouvez déjà sauver votre projet en cliquant sur Save. Test sur l'AndroidPhone. LEGO® MINDSTORMS® These components provide control of LEGO® MINDSTORMS® NXT robots using Bluetooth.
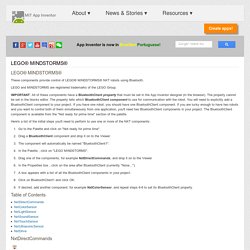
LEGO and MINDSTORMS are registered trademarks of the LEGO Group. IMPORTANT: All of these components have a BluetoothClient property that must be set in the App Inventor designer (in the browser). The property cannot be set in the blocks editor. The property tells which BluetoothClient component to use for communication with the robot. You will need to explicitly add a BluetoothClient component to your project. Here's a list of the initial steps you'll need to perform to use one or more of the NXT components: Table of Contents NxtDirectCommands. LEGO EV3 Tutorial: Tilt-to-Drive. Create apps for NXT with MIT App Inventor – LEGO Engineering. MIT App Inventor is a web-based tool for creating apps for Android phones.
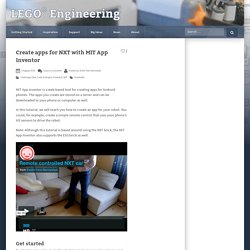
The apps you create are stored on a server and can be downloaded to your phone or computer as well. In this tutorial, we will teach you how to create an app for your robot. You could, for example, create a simple remote control that uses your phone’s tilt sensors to drive the robot. Note: Although this tutorial is based around using the NXT brick, the MIT App Inventor also supports the EV3 brick as well. Get started To start App Inventor, go to the site and log in using a Google account. Once logged in, you will have access to a range of tutorials includes one for creating an app to control a MINDSTORMS robot, but we have created a NXT-based project template for you where you can start programming an NXT robot at once.
In App Inventor, press the More actions button and select upload source: Browse to where the NXT_Template.aia is located, select the file and press OK. The designer screen Palette Viewer. 6858 191 p16.