

How To Add Swap on Ubuntu 14.04. Introduction One of the easiest way of increasing the responsiveness of your server and guarding against out of memory errors in your applications is to add some swap space.
Swap is an area on a hard drive that has been designated as a place where the operating system can temporarily store data that it can no longer hold in RAM. Basically, this gives you the ability to increase the amount of information that your server can keep in its working "memory", with some caveats. The space on the hard drive will be used mainly when space in RAM is no longer sufficient for data. The information written to disk will be slower than information kept in RAM, but the operating system will prefer to keep running application data in memory and use swap for the older data. In this guide, we'll cover how to create and enable a swap file on an Ubuntu 14.04 server. Check the System for Swap Information We can see if the system has any configured swap by typing: sudo swapon -s Filename Type Size Used Priority. Cleaning up Ubuntu 14.10,14.04,13.10 system. Sponsored Link We have already discussed Cleaning up a Ubuntu GNU/Linux system and this tutorial is updated with new ubuntu versions and more tools added.
If you want to clean your ubuntu machine you need to follow these simple steps to remove all unnecessary junk files. Remove partial packages This is yet another built-in feature, but this time it is not used in Synaptic Package Manager. It is used in the Terminal. Sudo apt-get autoclean Then enact the package clean command. Sudo apt-get clean You can then use the autoremove command. Sudo apt-get autoremove Remove unnecessary locale data For this we need to install localepurge.Automagically remove unnecessary locale data.This is just a simple script to recover diskspace wasted for unneeded locale files and localized man pages. Install localepurge in Ubuntu sudo apt-get install localepurge After installing anything with apt-get install, localepurge will remove all translation files and translated man pages in languages you cannot read. Example:- Recon2013-Joshua%20J.%20Drake-Reversing%20and%20Auditing%20Android%27s%20Proprietary%20Bits-public.pdf.
Mod rewrite - Running PHP without extension without using mod_rewrite? How To Create a SSL Certificate on Apache for Ubuntu 14.04. Client Certificate Authentication With Apache (An Example) The client, running Windows 2000 and IE 5.5, which requests a key with openssl.exe, and attempts to view the pages protected by the web server.
Note that in a production environment, the CA should be a separate machine and disconnected from the network. Create the Certificate Authority (CA) On the machine used for the CA, create a directory for its keys: mkdir -p /etc/ssl/ca/private chown -R root:wheel /etc/ssl/ca chmod 700 /etc/ssl/ca/private Next, generate a private key and a certificate request, and then self-sign the certificate. Adding Easy SSL Client Authentication To Any Webapp « Thoughts on Security. Go straight to the code samples/instructions Let’s face it, if you are using passwords on your web site or application, you are part of the problem.
It doesn’t matter if you’re using bcrypt or scrypt, or all the salt in the world, you’re still perpetuating the password problems and pain. A previous post talked about the many authentication problems with enterprise Windows networks, but the world of web applications is at least as big of an authentication hairball, and many of the same password problems apply: They can be guessed – Regardless of complexity requirements, users will find and use the simplest pattern allowed, and attackers routinely take advantage. Everybody reuses them – Even if you tell your users not to, it will still happen. But thankfully, using “soft” client certificates is almost as good, and it is surprisingly easy: Private keys cannot be guessed – Because users didn’t choose them! But certificate authentication and even issuance is actually easy with modern browsers. Client certificates with apache. How to use client certificates with apache This How-To is intended to give a step-by-step configuration guide for creating your own certificate authority (CA) and how to configure apache to allow only certain self-signed user certificates to connect to the webserver.
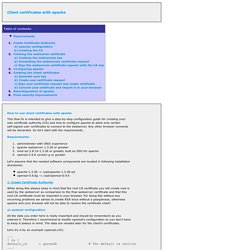
Any other browser connects will be discarded. So let's start with the requirements. Requirements: administrator with UNIX experience apache webserver 1.3.26 or greater mod-ssl 2.8.10-1.3.26 or greater, built as DSO for apache openssl 0.9.6 version g or greater Let's assume that the needed software components are located in following installation directories:
IPTables. Radius.