
Mendel90 finishing touches. I have tweaked a lot of things since building the prototype.

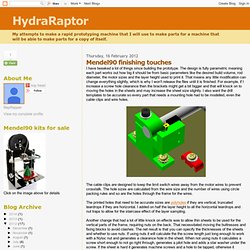
The design is fully parametric meaning each part works out how big it should be from basic parameters like the desired build volume, rod diameter, the motor sizes and the layer height used to print it. That means any little modification can change everything slightly, which is why I won't release the files until it is finished. For example, if I increase a screw hole clearance then the brackets might get a bit bigger and that will knock on to moving the holes in the sheets and may increase the sheet size slightly. I also want the drill templates to be accurate so every part that needs a mounting hole had to be modelled, even the cable clips and wire holes. The cable clips are designed to keep the limit switch wires away from the motor wires to prevent crosstalk. The printed holes that need to be accurate sizes are polyholes if they are vertical, truncated teardrops if they are horizontal. Mendel90 axes.
Bearings With the stainless steel bars that I use I found that PLA bushings only last a few hundred hours before they wear out.

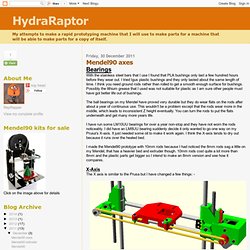
I tried Igus plastic bushings and they only lasted about the same length of time. I think you need ground rods rather than rolled to get a smooth enough surface for bushings. Possibly the lithium grease that I used was not suitable for plastic as I am sure other people must have got better life out of bushings. The ball bearings on my Mendel have proved very durable but they do wear flats on the rods after about a year of continuous use. This wouldn't be a problem except that the rods wear more in the middle, which leads to inconsistent Z height eventually. I have run some LM10UU bearings for over a year non-stop and they have not worn the rods noticeably. X-Axis The X axis is similar to the Prusa but I have changed a few things: - Note the axis is shortened in this picture, the belt has a twist not shown and a loop round the tensioning screw.
Mendel90 extrudeuse. The Mendel90 parametric design starts from the extruder dimensions and works outwards.

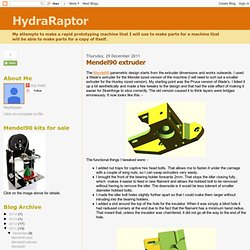
I used a Wade's extruder for the Mendel sized version of the machine (I will need to sort out a smaller extruder for the Huxley sized version). My starting point was the Prusa version of Wade's. I tidied it up a bit aesthetically and made a few tweaks to the design and that had the side effect of making it easier for Skeinforge to slice correctly. The old version caused it to think layers were bridges erroneously. It now looks like this: - The functional things I tweaked were: - I added nut traps for captive hex head bolts. I use hobbed bolts and 10mm hot ends from reprap-fab.org. I don't use Greg's accessible version of the extruder because I never remove the idler.
To make the nut easy to remove, rather than use lock nuts or a Nyloc, I use a single nut and a weak spring. I have several extruders with difference nozzle sizes that I can change very quickly. Mendel90. I never understood why Mendel has a triangular prism frame.

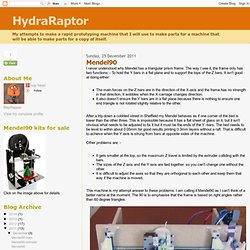
The way I see it, the frame only has two functions: - To hold the Y bars in a flat plane and to support the tops of the Z bars. It isn't good at doing either:The main forces on the Z bars are in the direction of the X-axis and the frame has no strength in that direction. It wobbles when the X-carriage changes direction. It also doesn't ensure the Y bars are in a flat plane because there is nothing to ensure one end triangle is not rotated slightly relative to the other.
After a trip down a cobbled street in Sheffield my Mendel behaves as if one corner of the bed is lower than the other three. Other problems are: - It gets smaller at the top, so the maximum Z travel is limited by the extruder colliding with the bars. Two flat sheets are mounted at right angles to form the XY and XZ planes. The buttresses are bigger than they need to be. I used B&Q style fixing blocks to fasten the sheets together.
Merry Christmas! Nophead/Mendel90.