

Thin & Warm Insulated Sole Shoe Insert Pattern. DIY Denim Slippers Pattern & Instructions. Cozy Socks From Polarfleece Blanket. Make A Sweater Into Boots. Upcycled Socks From Sweater Sleeves. I'm so excited to share this tutorial with you!
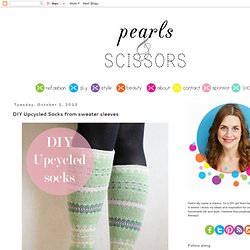
The creation of these socks was like an "ahaa" moment. I have been trying to think of ways to upcycle sweater sleeves (I already know how to upcycled the body part) that I have left over from previous projects. And then, on a whim I put one of the sleeves on my foot and a light bulb went on in my mind. Sweater sleeve socks!! They are super easy and fun to make, and they are so cute!
You will need:a pair of sweater sleeves. So, after you've cut off your sleeves you need to put them on your feet. This is how my toe area looked after sewing. Now to the top of the socks. Measure two strips of elastic making sure they are just tight enough at the hight where your sock ends. Put the elastic circles around each sock (it being still inside out). Sew the tunnel shut by hand or using the wide zig-zag stitch on you sewing machine.
As always, let me know in the comments what you think, if you have any questions, or just want to say Hi! Upcycled Sweater Slippers. So I decided to commemorate the LONGEST winter I can remember by making myself some striped slippers from an old, holey sweater.
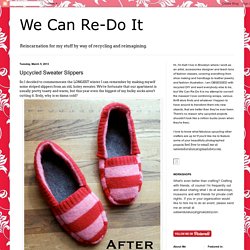
We're fortunate that our apartment is usually pretty toasty and warm, but this year even the biggest of my bulky socks aren't cutting it. Srsly, why is so damn cold? Materials: -old sweater -2 pieces of 12"X 8" felt (maybe larger if you have a really big foot) Creating The FootbedStep 1: Trace your foot onto a manilla folder. Step 2: Cleanly cut out. Step 3: Next trace the pattern onto your pieces of felt. When you're done you'll have 4 foot shaped pieces of felt: Step 4: Now place the foot pattern onto the sweater with the heel 1 1/4 - 1 1/2" away from the bottom edge of the sweater. Step 6: Use double stick tape to stick to stick the felt piece onto the sweater. Step 7: Then repeat on the back side. Step 8: Place on your sewing machine with good side facing up and stitch all around.
Felt Slippers. Homemade slippers of thick wool felt make a heartwarming (and foot-warming) gift.
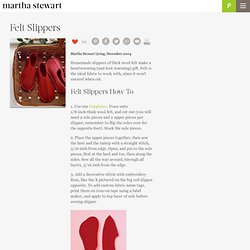
Felt is the ideal fabric to work with, since it won't unravel when cut. Felt Slippers How-To1. Use our templates. Trace onto 1/8-inch-thick wool felt, and cut out (you will need 2 sole pieces and 2 upper pieces per slipper; remember to flip the soles over for the opposite foot). Stack the sole pieces. 2. Whimsical Felt Slippers Tutorial. Now that fall is here, I wake up every morning with cold toes- yes, even in Southern California.
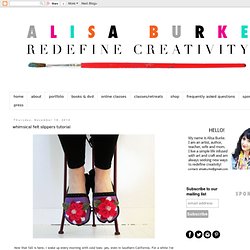
For a while I've been wanting to try making my own slippers with a fun and whimsical twist and my icy toes were the perfect excuse. This project could be altered and adapted in so many different ways and would be a great little handmade gift for the holidays. I have a huge pile of colorful felt squares (those cheap ones you can buy for .29) and scraps of fleece and I decided that they were perfect to use for my slippers. For the sole of the slipper, I started by tracing my foot onto a piece of felt. I traced it a little larger than the exact size of my foot so I would have a little room. I then cut out the shape and used it as a template to cut out two pieces of fleece (two pieces for a little stability and for warmth). All three pieces got stacked on top of each (the felt for the bottom and the fleece for the top) and then repeated for the second slipper. Stephanie's Sewn Felt Slippers - Martha Stewart Holiday & Seasonal Crafts.
DIY Legwarmers & Boot Socks. DIY Viking Shoes From Scratch. Edited to add: Due to alle the comments regarding the title of this instruction, I've changed the name to 'iron age shoes' which might be more historycally correct.
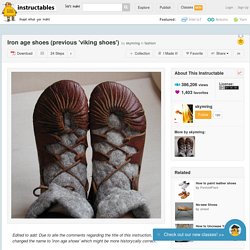
I learned to make these by using my own foot as a template. Therefore, all the measures given here are highly approximate. If your foot diverges a lot from mine (European size 39, long and narrow/slender), some sewing experience might come in handy. That said, there's no reason to be too specific in making these. As you can see, the 'laces' can be loosened or tightened to fit, and the basic idea is really very simple.