

DIY CD cover. DIY Pallet Swing Bed. {Tutorial} Fleece Tug Toy for Dogs. With our big move coming up, I went ahead and packed away my sewing machine and all of my fabric last week – I figured I would be low on time and wouldn’t be able to make anything until we got settled in in our new home.
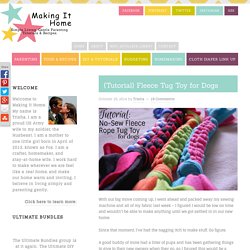
Since that moment, I’ve had the nagging itch to make stuff. Go figure. A good buddy of mine had a litter of pups and has been gathering things to give to their new owners when they go, so I figured this would be a perfect opportunity to scratch my creative itch! I’m working on making these adorable (and durable, and machine-washable, and QUICK!) Suede Colorblocked Catchall DIY. Being a DIY-minded girl, I often see pretty items being sold in stores and instead of thinking, "I want that!

" it's usually "Can I make that? " I saw this cute little suede catchall dish online and my brain went straight to how I could recreate the idea at home. In case you aren't sure what a "catchall dish" is, it's a little dish or container that people keep on their entryway table or counter where they can throw their keys, loose change, or other items that are floating around in the vicinity. They're great! It's like a junk drawer for your keys! Supplies:- suede (real or faux) in two colors- scissors or rotary cutter and metal ruler- leather punch (anything that will punch a hole through leather as big as your screw posts will work)- leather glue- 1/4" screw posts (4 sets)- hammer- small square object as a corner guide First you'll want to cut a square of leather that is 7" x 7" and another smaller square of your second color that is 4.5" x 4.5".
Fabric Crafts. Lattice smocking. So here comes a tutorial on how to do lattice smocking, the smock on the left in this picture.
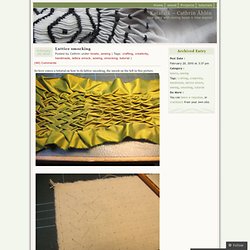
Just as in honeycomb smocking one have a net of dots on the fabric, this time we are marking them out on the backside of the fabric. To make it simple we also mark out how we are going to gather the dots this time. In this kind of smocking we are working from the back, so the result will not be visible unless you turn your work over. It is also hard to see how it looks until you have made a few rows. Like this. Here is a diagram that show you how to do it, but I’ll explain with pictures to.
Stick the needle up the second dot on the second row. Pick up some fabric, just like three threads or so, and go to the first dot on the fist row and pick up some fabric there to. Gather, sew some stitches and secure the thread. Go to the dot directly under and secure the thread, all the threads that you do not gather should lie loose on the back. Gather, sew some stitches and secure the thread. 3M Reflective Fabrics, Flame Resistant Reflective Fabric, Fire Coat Trim, & Reflective Coverall Trim.
3M Reflective Fabrics, Flame Resistant Reflective Fabric, Fire Coat Trim, & Reflective Coverall Trim. Grant Thompson shows how to make Fight Club bacon soap. How to reupholster a wingback chair. Welcome!
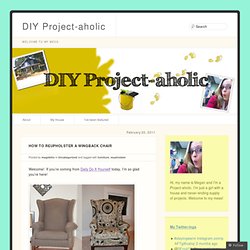
If you’re coming from Daily Do It Yourself today, I’m so glad you’re here! Disclaimer: I’d never reupholstered anything before this chair, but I had the gumption to take on the project anyway. There is not a lot of extraordinary skill involved, just patience and determination. Nothing difficult, just a little time consuming. But, the recognition at the end (when people comment that the job looks professional) is worth the effort. Upholstered chairs are built like an onion. **After each piece is taken off, label it with its location and number.
Here’s what I started with: Lay down the sheet, and turn the chair so the legs are in the air. MOUNTING and FRAMING CANVAS PRINTS. No-Sew Fleece Octopus Tutorial - While She Naps. I picked up this craft booklet, circa 1966, a few months ago at a church rummage sale and got inspired to update one of its projects.
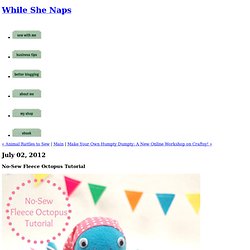
The yarn octopus has long been a classic toy to make for children, and I've transformed it into an even easier, and perhaps more cuddly, no-sew fleece octopus! According to my 8-year-old, her fleece octopus is "the cutest thing ever. " You'll need: -16" x 16" piece of fleece.
How do you do the Square/Box Boondoggle stitch? The Square Stitch Sometimes referred to as the "Box Stitch", the Square Stitch is the cornerstone of all boondoggling stitches.
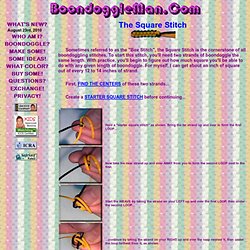
To start this stitch, you'll need two strands of boondoggle the same length. With practice, you'll begin to figure out how much square you'll be able to do with any given length of boondoggle. For myself, I can get about an inch of square out of every 12 to 14 inches of strand. Braids. Braiding is a easy, medieval and quite practical way to make laces, straps, ties, and many other narrow wares.
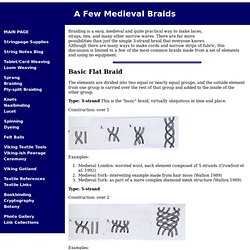
There are far more possibilities than just the simple 3-strand braid that everyone knows. Although there are many ways to make cords and narrow strips of fabric, this discussion is limited to a few of the most common braids made from a set of elements and using no equipment. Basic Flat Braid The elements are divided into two equal or nearly equal groups, and the outside element from one group is carried over the rest of that group and added to the inside of the other group.
Type: 3-strand This is the "basic" braid, virtually ubiquitous in time and place. Construction: over 1 Examples: Medieval London- worsted wool, each element composed of 5 strands (Crowfoot et al. 1992) Medieval York- interesting example made from hair moss (Walton 1989) Medieval York- as part of a more complex diamond mesh structure (Walton 1989) Type: 5-strand.
Fabric Crafts. Quiet Book. Tatting.