

TKJ Electronics » RFCOMM/SPP Library for Arduino. Home > Arduino, Bluetooth, USB > RFCOMM/SPP Library for Arduino This is yet again a new library for Arduino.
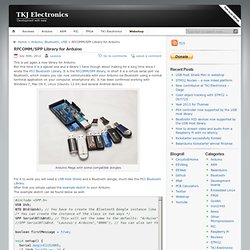
But this time it is a speciel one and a library I have though about making for a long time since I wrote the PS3 Bluetooth Library. It is the RFCOMM/SPP library, in short it is a virtual serial port via Bluetooth, which means you can now communicate with your Arduino via Bluetooth using a normal terminal application on your computer, smartphone etc. It has been confirmed working with Windows 7, Mac OS X, Linux (Ubuntu 12.04) and several Android devices. Arduino Mega with some compatible dongles For it to work you will need a USB Host Shield and a Bluetooth dongle, much like the PS3 Bluetooth Library.
Boolean firstMessage = true; The example sketch is pretty easy to understand: First you include the library and create the USB instance. I then simple create the bool “firstMessage” which is used to detect when the connection is established. PS3 Information · felis/USB_Host_Shield_2.0 Wiki. PS3 Dualshock 3 Controller The PS3 Controller like most game controllers have bulk inputs, analog joysticks, triggers and buttons.
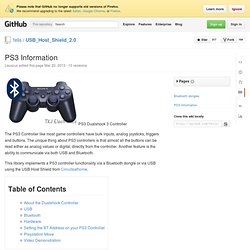
The unique thing about PS3 controllers is that almost all the buttons can be read either as analog values or digital, directly from the controller. Another feature is the ability to communicate via both USB and Bluetooth. Troubleshooting Arduino USB Host Shield. USB Host Shield in a test fixture Making electronic devices requires close interaction with parts – reversing supply polarity, overloading inputs, and inadvertently shorting pins with test leads. Consequently, occasional destroying of parts is natural and shall be anticipated.
I have been in correspondence with several electronics enthusiasts helping them getting their shields fixed and since their problems look similar to what I see when doing post-manufacturing quality control I decided to share my testing procedure along with some pictures. In the past, it was customary to include schematic with every electronic device documentation. Complex devices, such as oscilloscopes, spectrum analyzers and other test instruments used to have service manuals containing detailed calibration and repair procedures. Much of the testing is performed using board test sketch, available from examples section on github. The resistance figures given above are different for other configurations. Arduino USB Host – USB Descriptors. Get device descriptor trace I finished porting USB transfers from PIC C to Arduino C++.
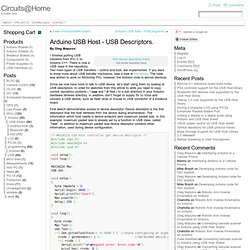
There is now a USB class in the repository. Two main types of USB transfers – control and bulk, are implemented. If you want to know more about USB transfer mechanics, take a look at this article. The code was written to work on Microchip PIC, however, the Arduino code is almost identical. Since we now have tools to talk to USB device, let’s start using them by looking at USB descriptors. First sketch demonstrates access to device descriptor. Load the sketch, compile, and run. Start Device descriptor: Descriptor Length: 12 Descriptor type: 01 USB version: 0100 Device class: 00 Device Subclass: 00 Device Protocol: 00 Max.packet size: 40 Vendor ID: 0CF2 Product ID: 6220 Revision ID: 0100 Mfg.string index: 01 Prod.string index: 02 Serial number index: 04 Number of conf.: 01 Let’s take a look.
Device class, subclass, and protocol are set to zero. Strings are human-readable descriptors. Google Open Accessory Interface for USB Host Shield Library 2.0 released. ADK code Google Open Accessory Interface is now included in USB Host Shield Library 2.0 package.
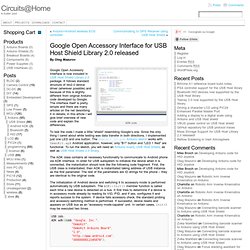
It follows standard structure of rev2.0 device driver (wherever possible) and because of this is slightly different from original Arduino code developed by Google. The interface itself is pretty simple and there are many articles on the net describing it in details; in this article I will give brief overview of new code and explain the differences.
To test the code I made a little “shield” resembling Google’s one. Since the only thing I cared about while testing was data transfer in both directions, I implemented just one LED and one button. The ADK class contains all necessary functionality to communicate to Android phone via ADK interface. Arduino USB Host Shield project landing page. USB Host Shield USB Host Shield is an inexpensive ( $25 for the full-sized board and $20 for the Mini variant ) development board designed to be used in embedded applications which require USB Host functionality.
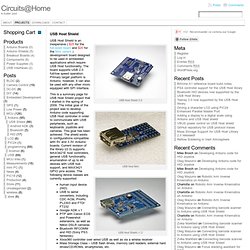
The board supports USB 2.0 full/low speed operation. Primary target platform is Arduino, however, it can also be used with any other micro equipped with SPI interface. This is a summary page for USB Host Shield project that I started in the spring of 2009. The initial goal of the project was to develop Arduino code supporting USB Host controller in order to communicate with USB peripherals, such as keyboards, joysticks and cameras. Human input device (HID)USB to serial converters, including CDC ACM, Prolific PL2303 and FTDI FT232Google ADK v.1PTP with Canon EOS and Powershot extensions, as well as Nikon DSLR camerasBluetooth RFCOMM and HID (Sony PS3. Hardware information. USB Host Shield for Arduino (Sparkfun)
This is very powerful tool to add to arduino, why?!! Because this shield add USB Host capability to Arduino. Simply, you will be able to plug USB mouse, USB key board or any other USB device into Arduino.It also allows to use your Arduino to interface with and control any USB slave device such as digital cameras, bluetooth dongles,etc.!. Using USB host shield enables the use of cell phones in Arduino projects to exchange data via SMS. Documents Important Tips If you are using the shield with Arduino Uno make sure it is powered by 9V external source (battery or adaptor) and do not use USB power. Examples - MicroBridge is a powerful software tool allows almost any Android device to talk to USB host, click here - Send SMS text messages to scrolling LED display via an Android cell phone, check this instructable. USB Shield. Allan Caplan sent me a write-up and pictures of putting together headers on USB Host Shield 2.0.
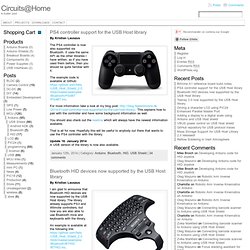
The post can be used as an assembly guide for the shield. The following text and pictures were taken straight from Allan’s Evernote which he kindly shared with me and gave me permission to repost. I just wanted to add that after assembly is is a good idea to load and run the quality control routine to make sure the shield works. Enjoy!