

DK LABORATORIES. Netduino PWM tutorials. Text to Speech. Implements a voice synthesiser using a single hardware PWM pin.
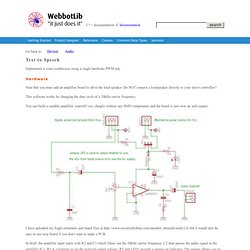
Hardware Note that you must add an amplifier board to drive the loud speaker. Do NOT connect a loudspeaker directly to your micro controller!! This software works by changing the duty cycle of a 20kHz carrier frequency. You can build a suitable amplifier yourself very cheaply without any SMD components and the board is just over an inch square: I have uploaded my Eagle schematic and board files at but it would also be easy to use strip board if you don't want to make a PCB. In brief: the amplifier input starts with R2 and C1 which filters out the 20kHz carrier frequency. Alternatively: there are some commercial boards available - just make sure the amplifier you use has a low-pass filter that filters out this 20kHz or add R2, C1 and C2 yourself.
Audio Beacon Part 1. MCU Electronics projects. History I decided to do this project for several reasons: first I like music, second I have a huge collection of MP3, and third I wanted to be able to play them anytime in my living room.
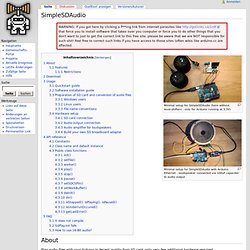
I began the project with one major restriction, the printed circuit board of MP3 player MUST be single side in order to do it myself. After 2 months of drawing, I realized this project was in fact ‘feasible’! One major characteristic of this player was the bi-directional remote control. DIY MP3/OGG/FLAC music player using Arduino and VS1053 - kalum's posterous. SimpleSDAudio – Hackerspace Ffm. Untitled. SimpleSDAudio – Hackerspace Ffm. Aus Hackerspace Ffm.
SD card for PCM sound (Everything Else) MaxEmbedded. Is it possible to make Arduino talk without shield. Hi again,I am trying to make the Arduino to say the current temperature.I have connected temperature sensor LM35 to analog pin 0.
There is something wrong with the red part. /* The Text To Speech library uses Timer1 to generate the PWM output on digital pin 10. The output signal needs to be fed to an RC filter then through an amplifier to the speaker.*/ #include <TTS.h> // Media pins#define ledPin 13 // digital pin 13 const int pin = 0; // analog pin 0 int tempc = 0;int tempb = 0; // Variableschar text [50];boolean state=0; Apps For Arduino. Speech for Arduino Give your electronics a voice!
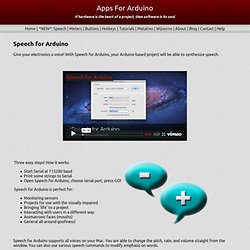
With Speech for Arduino, your Arduino-based project will be able to synthesize speech. Speech for Arduino supports all voices on your Mac. You are able to change the pitch, rate, and volume straight from the window. You can also use various speech commands to modify emphasis on words. Speech for Arduino works on Mac OS X 10.6+, and is 1.3 MB. Is it possible to make Arduino talk without shield. Teensy2 USB WAV player – Part 2. [Update Jan 6th, 2011 / An error in the capacitor unit (pF instead of nF) has been fixed in the schematics] Long overdue post in my USB WAV player implementation series.
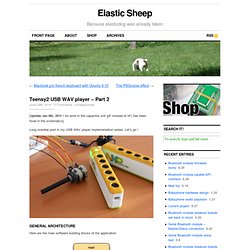
Let’s go ! General architecture Here are the main software building blocks of the application: The left side is the USB Mass Storage implementation based on the LUFA library. The right side is the WAV playback application and its related blocks. The Player block offers a high-level API to control the playback of files,The Wav parser contains some simple WAV-header parsing code to determine what are the sampling rate and number of channels of a file; it also helps to locate the audio data start in the file,The Dac block implements the digital to analog conversion to output sound to a speaker. Here's my PCM audio player with SD card (fat16lib) Here's my PCM audio player with SD card (fat16lib) anon10500: Edited from First, you should convert sound files to PCM 8 bit 8Khz Wav files, I use Switch Sound File Converter for this.
Then fill playlist string variable with file names separated with space(so files must not include space). Also the code uses Timer0 so you cannot use delay/milis while playing sounds, after playing is finished you can use delay/milis as usual. I hope someone could give an idea whether it can be accomplished with only 1 timer. Code: #include <Fat16.h>
EngBlaze. uC Hobby. Tinker.it. Wiki. Simple Arduino audio samples. Secrets of Arduino PWM. Pulse-width modulation (PWM) can be implemented on the Arduino in several ways.
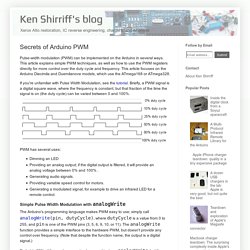
This article explains simple PWM techniques, as well as how to use the PWM registers directly for more control over the duty cycle and frequency. This article focuses on the Arduino Diecimila and Duemilanove models, which use the ATmega168 or ATmega328. If you're unfamiliar with Pulse Width Modulation, see the tutorial. Briefly, a PWM signal is a digital square wave, where the frequency is constant, but that fraction of the time the signal is on (the duty cycle) can be varied between 0 and 100%. Having some fun with PCM multi voice code ... How to Configure Arduino Timer 2 Registers to Drive an Ultrasonic Transducer with a Square Wave
The Arduino IDE has many built-in commands to produce PWM outputs but directly setting the timer registers gives you much more flexibility and power.
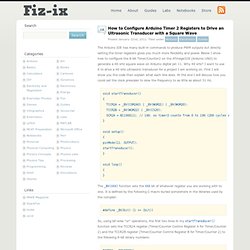
Below I show how to configure the 8-bit Timer/Counter2 on the ATmega328 (Ardunio UNO) to generate a 40 kHz square wave on Arduino digital pin 11. Why 40 kHz? I want to use it to drive a 40 kHz ultrasonic transducer for a project I am working on. First I will show you the code then explain what each line does. At the end I will discuss how you could set the clock prescaler to slow the frequency to as little as about 31 Hz. void startTransducer() { TCCR2A = _BV(COM2A0) | _BV(WGM21) | _BV(WGM20); TCCR2B = _BV(WGM22) | _BV(CS20); OCR2A = B11000111; // 199, so timer2 counts from 0 to 199 (200 cycles at 16 MHz) } void setup() { pinMode(11, OUTPUT); startTransducer(); } void loop() { } The _BV(XXX) function sets the XXX bit of whatever register you are working with to one.
Frequency. General rule for choosing frequency for PWM signal: higher is better.
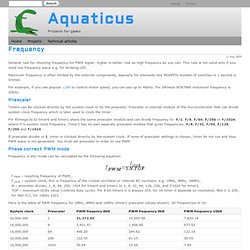
Use as high frequency as you can. This rule is not valid only if you need low frequency wave e.g. for blinking LED. Maximum frequency is often limited by the external components, basically for elements like MOSFETs number of switches in 1 second is limited. PWM - an overview. PWM sometimes seems to be a misunderstood and complicated topic. This tutorial will cover the basics of what PWM is, what it can be used for, and how to use the AVR controllers to generate PWM. PWM stands for Pulse Width Modulation. This means that we can generate a pulse whose width (ie duration) can be altered. The digital world.