

DIY Eco Friendly Packaging. February 26th, 2013 Have you ever needed to find a box to package up a gift in a hurry?
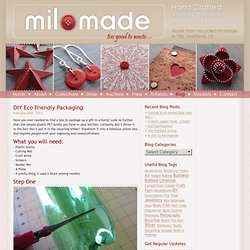
Look no further than the simple plastic PET bottle you have in your kitchen. Certainly don’t throw it in the bin! Don’t put it in the recycling either! Recycled Keys. I have a planter box outside my door where each year I plant my herb garden.
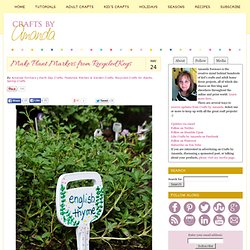
I’m not crazy about those little plastic markers that come with the potted herbs, so I decided to make a set of my own. Luck would have it that I had been given a big container full of keys, and so these recycled key plant markers were born! My daughter’s boyfriend works at the hardware store here in town. One day he showed up with a 2-liter plastic bottle, the top cut off and filled with keys.
They have a key cutting machine, and apparently these were all the rejects. Can Calendar. Happy april!
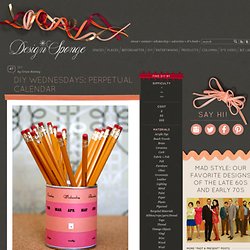
Normally this would be an odd month to introduce a new calendar into your life, but this handy little guy is perpetual, which means “good anytime”, forever and always. we ran across something similar at a thrift store a while back and thought it would be an easy, and super customizable project that could be made using little more than an empty peanut can and some paper. we’ve provided some downloadable templates, but you could mix it up with all sorts of fun font and color combinations. In addition to the rotating strips for day of the week, month of the year, and date, we thought it would be fun to add an option for mood as well. this being april 1st and all…we had to go with “nutty”.
Birthday Board. Here ya go - - a Tutorial on how to make a Birthday Board!
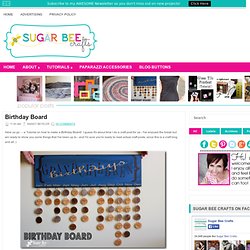
I guess it's about time I do a craft post for ya - I've enjoyed the break but am ready to show you some things that I've been up to - and I'm sure you're ready to read actual craft posts, since this is a craft blog and all :) I made this Birthday Board for Trevor's mom - Trevor is one of 9 kids, so there's a lot of them! Instead of doing the whole family's birthdays, I just did the grandkids and great-grandkids. The way it works is each disk represents a child.
The number on the disk is their birthdate. Paint Chip Dry Erase Calandar. Button Calendar. Shoebox. Heart Bookmark. Here's a quick little origami project that's fun to do with patterned paper: heart-shaped bookmarks that slip onto page corners.
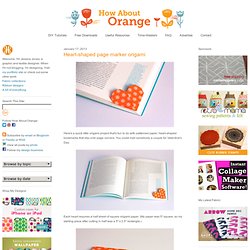
You could mail somebody a couple for Valentine's Day. Each heart requires a half sheet of square origami paper. (My paper was 5" square, so my starting piece after cutting in half was a 5" x 2.5" rectangle.) With the patterned side to the outside, fold the rectangle in half lengthwise. Then fold it in half width-wise to mark the center line, and open again. Fold one side up at a 45 degree angle, so the edge aligns with the center. Repeat with the other side. Turn the paper over. Fold in the corners to form a heart shape. Carboard Box Holder. Star Box. I suppose it isn't exactly the right time of year for stars and lanterns, but I've got a paper folding fascination at the moment and so was drawn to a project I had wanted to do back in Autumn.
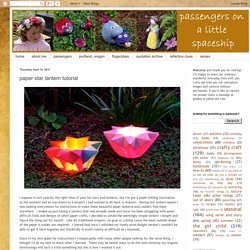
During last lantern season I was looking everywhere for instructions to make these beautiful paper lanterns and couldn't find them anywhere. I ended up purchasing a lantern that was already made and since I've been struggling with some difficult folds and designs of other paper crafts, I decided to unfold the seemingly simple lantern I bought and figure the thing out for myself. Like all traditional origami, no glue or cutting (once the basic outside shape of the paper is made) are required. Origami Basket. Have you tried making this basket and found that the handles get in the way?
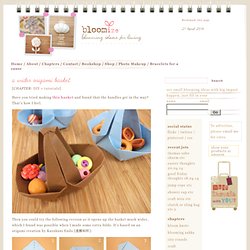
That’s how I feel. Then you could try the following version as it opens up the basket much wider, which I found was possible when I made some extra folds. It’s based on an origami creation by Kazukuni Endo [遠藤和邦]: With a piece of square, fold diagonally on each side to get the creases. Unfold. 14. Newspaper Gift Bags. When I bought something at a store recently, the clerk handed me my purchase in a bag made from a newspaper.
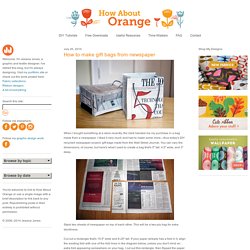
I liked it very much and had to make some more—thus today's DIY recycled newspaper project: gift bags made from the Wall Street Journal. You can vary the dimensions, of course, but here's what I used to create a bag that's 5" tall, 4.5" wide, and 3" deep. Stack two sheets of newspaper on top of each other. Newspaper Gift Bags. Gift bags made from newspaper is a great idea for birthday parties or weddings! We saw this on a site that was we think was in Vietnamese?? Anywho -here’s our best try at translation along with the photo tutorial. Supplies: Glue, Scissors, Paper Doiles, Newspapers, and Wire Ribbon Step 1: Cut into rectangular sheet of paper and then press twice the leading newspapers in the Middle as shown on the picture.
Hexagonal Stacking Boxes. The inspiration for this week’s project comes from the Japanese stacking octagonal box kit shown above.
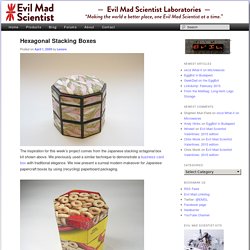
We previously used a similar technique to demonstrate a business card box with traditional elegance. We now present a surreal modern makeover for Japanese papercraft boxes by using (recycling) paperboard packaging. We follow the same basic construction techniques, but simplify it by eliminating the paper coverings and decorations. In their place, we use paperboard from cereal, cracker and cookie packaging. These cheerful boxes are easier and less expensive to make and have a surreal quality to them.
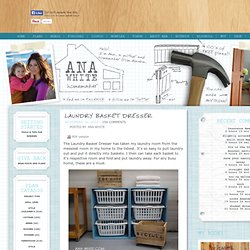
Wood Boxes. Laundry Baskets. Laundry Basket Dresser. The free content provicded by this website is made possible by the following current sponsors.
Shower Organization. As a general rule, I am not a fan of brass fixtures so when we moved into this house I couldn’t wait to replace the brass shower curtain. When my husband put in the more decorative one, he moved the old one to the back of the shower temporarily. Belt Bookcase. Hanging Basket Garden. We have a sweet little backyard at our new house but with a rambunctious puppy and a curious two-year-old, many of my efforts to plant things in the ground have been thwarted.
Well, more like dug up, chewed up, and pulled apart. Bottle Pots. As much as we love to garden, sometimes there just aren’t enough hours in the day to do it all. If there’s a way we can shorten our to-do list, we’ll take it. This week’s project, a no-fuss recycled windowsill herb garden, has knocked watering the plants off our list. Self-watering planters like these aren’t a new idea; we remember our own childhood craft books that taught us how to poke holes through Dixie cups or invert two liter plastic bottles to grow our own little bean garden. This grown-up version is much better looking and works great for small herbs and plants. Ladder Boocase. Ladder Bookcase. Floppy Disk Pencil Holder. Flower Pot Apple. OK, So I missed Teachers' Appreciation Week...I did this a bit too late but I am pretty sure my crafty friends out there can think of lots of uses for this project. There is nothing sweeter than using one item and transforming it into another. This is my Apple Clay Jar...with lid.
Things you will need: Clay pot, sizes of choiceClay bottoms, sizes of choiceAcrylic paints, brushesAir dry or bake-able clay (optional)Marble, hot glue gun (optional) At most craft stores you can find these adorable mini clay pots in all sizes. Place the bottom tray thing on the top of your planter-you decide if you want the 'lid' bigger or smaller than the opening of your clay pot.
Paint red, or whatever color you prefer-I wanted to make an apple jar for a teacher, so here's my apple... Decide how deep you need to paint the pot on the inside-this depends on how the 'lid' fits on your pot. After you are done painting, let dry. You can paint the knob red too if you want! Plastic Bottle Vase. Jar Label. Color Code Keys. A Bubbly Life is on Facebook, Twitter and Pinterest, would LOVE for you to join me there!
Gift Wrap Holder. I have told you a few times about my friends in Cincinnati…they live in this gorgeous old home. Chris had these really old pocket doors that she found in the cellar…and was at a loss for what to do with them. Organize Ribbons. Thread Holder. Un'idea per tenere in ordine tutte le vostre spolette, creare con il Riciclo Creativo un porta spolette è semplicissimo e richiede pochissimo tempo. Qualche giorno fa ho comprato delle piantine, al vaso in plastica di ognuna era ancorata una gabbietta, anch'essa in plastica. Magnetic Storage. Broom Holder 4 Spices. Bag 2 Screw Top. Hat Organize. Boxes Template.