Zoom
Trash

Proper HDR Lighting. Depth of Field in Blender. Depth of Field can be a beautiful effect, adding both aesthetic interest to an image, and serving a narrative purpose in drawing the viewer’s attention to the centre of attention.
But getting DoF right using Blenders compositing nodes can be tricky, as there are a few things to know about how the defocus node works, and some limitations it has that you need to know about. This post documents my own investigations, and hopefully should be useful for those new to the topic. It also touches on a few things that I haven’t worked out how to fix yet, so if there’s anyone out there with input I’d love to know your opinions. The Basics: In real photography, depth of field is the effect whereby objects located away from the camera lenses plane of focus appear blurred. Rendering Wooden Barrels in Blender Cycles. Hello and welcome to this Blender Cycles tutorial on creating Wooden Barrels!
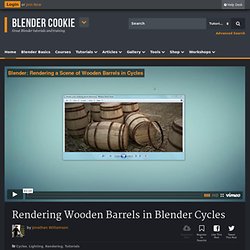
In this video tutorial for Blender Cycles we create a complete scene composed of wooden barrels. At the end of this tutorial you’ll have a final render such as the one below and should feel much more confident in using Cycles. If you’re not familiar with Cycles then check out our introduction tutorial here: What you’ll learn. Place and animate the sun with the Sun Position addon. Sun Position addon. From BlenderWiki Introduction The sun position widget can be used for creating sun animations as well as for just studying the sun position for given locations and times as a singular object or multiple objects on the ecliptic or as an analemma.
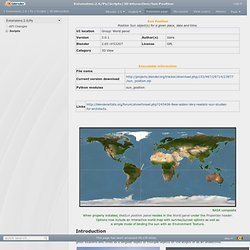
Sun animation • Created using Cycles. Installation These scripts are in modular form stored in its own directory named sun_position. Instructions In the Properties window header, click on the World context button and press Enable button in the Sun Position panel. Preferences. Get rid of Texture Interpolation - yay for blocky, no for blurry!
HiToday in IRC someone asked about how to disable the texture interpolation in Cycles.
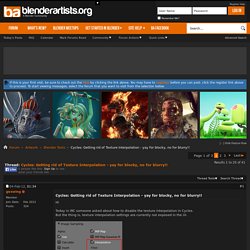
But the thing is, texture interpolation settings are currently not exposed in the UI. I came up with a Node Setup which scales the UV coordinates accordingly, so that it appears as if there was no interpolation happening.The usage of this Node Group is realy simple, just add the Group to your existing material and connect it to your UV inputs on the Textures.Here's my results: whitout/with my node group The used image textures were 3x3, 4x4, 5x5, 6x6 pixel big.
Procedural lip shader. Custom UV Transformation Nodes for Cycles. Non-Uniform Transformations Have you ever wanted to just move, scale, or rotate just part of a texture within cycles render nodes, or twist a texture about an axis?
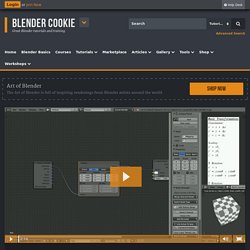
Or have you ever wanted to control several texture transformations with a single parameter? Believe it or not, Cycles’ nodes allow us to do this! We just can’t do it with the mapping node. In this series, we aim to add some functionality that the mapping node lacks; namely external translation, rotation, and scale inputs which will allow us to do things we could never do before using the mapping node alone. What You Will Learn In Part 1, we will discuss the functionality we would like to implement, and go over the tools available to us. Blur your Traces in Blender. Gernan Version The last time I have explained how to hide compression artifacts using the Bilateral Blur.
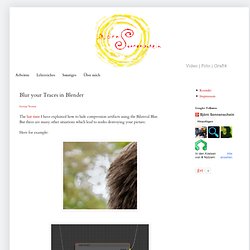
But there are many other situations which lead to nodes destroying your picture. Here for example: We see that a simple Hue Correct node may give us hell quite often! Although our initial impression implies that those borders did also arise from compression artifacts, the real core of the problem hides in the hue channel because especially in image areas with low saturation and high brightness the hue values may change abruptly from pixel to pixel so that problems occur. The Idea is to extract the change a node has applied to the image, do something with and then reapply it. This simple setup does exactly that: We subtract the original image from the output of our node and so get the difference. The artifacts have gone! That´s it for today. Fighting Compression in Blender.
German version Especially while working with selective color correction, you may quickly strech the heavily compressed material to it's limits.
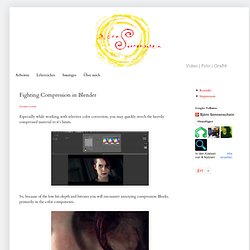
So, because of the low bit-depth and bitrates you will encounter annoying compression Blocks, primarily in the color components. Smart Sampling. Hi everyone, some of you may already tried the “Non Progressive” integrator, which has been added in Blender 2.64.
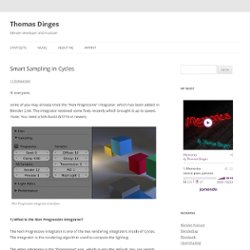
The integrator received some fixes recently which brought it up to speed. Note: You need a SVN build (53719 or newer). Non Progressive integrator interface 1) What is the Non Progressive integrator? Yet Another Thread about Cycles Materials. This material is made with Blender and Cycles.
I tried to do brushed stainless steel material, like this coffee pot. I have mixed two Glossy shaders, both with GGX option selected. Normalmap. Gimp-normalmap - A plugin for GIMP that aids in the authoring of tangent-space normal maps for use in per-pixel lighting applications. Contents Overview This is a plugin for GIMP version 2.8.x.

It allows you to convert images into RGB normal maps for use in per-pixel lighting applications. The goal is to completely clone NVIDIA's photoshop plugin, with a few new useful features. Features Filters. Download Downloads are provided either in source code form, or pre-built Windows 32-bit binaries. Changes Various bug fixes GIMP 2.8 support Native Windows 64-bit binaries No changes, recompiled against GIMP 2.6 Updated readme file for windows binaries Added "DUDV to Normal" conversion option.
Added Invert X, Invert Y and Swap RGB options Moved "Wrap" to the new Options panel Added "Convert to height" conversion option. SSbump Generator 5.3 w/ CUDA. Normal Map Generator 1.0. Tutorials/Examples. Blender. Cycles, Materials & Compositing. BLENDER_Tutorials. GAME ENGINE TUTORIALS. Tutorial sites. Noise Reduction With the Compositor. Blender 3D. Tutorials. Blender. Blender. 3D TUTORIALS. RENDERING. Blender Addon List. Blender 3D Design Course.
Blender 3D Design Course Note: Added new Lesson #13 - NURBS Surfaces / Meta Objects - April 27, 2013 Note: Added new Lesson #14 - Rigid Body Dynamics- June 1, 2013 Students: This course is also available for downloading to your iPhone or iPad via Tufts University iTunesU. (Install the iTunesU app / Search Colleges and Universities - Tufts University / Subscribe to "3D Design - Blender").
You can also download the course to a desktop or laptop via the iTunes application. The video tutorials are also available on my Vimeo channel (Blender Video Tutorials - Neal Hirsig) Instructors: If you are an instructor and would like to download the 3D Design Blender 2.6X content (Syllabus, Video Tutorials, PDF Tutorials, Projects and Exercises), send me your name, e-mail address and the name of your school or institution. Neal Hirsig nhirsig@tufts.edu.