

Make Your Own Silk Flower Brooches. Sometimes you just need a little something extra to spice up your outfit.

Here's a simple tutorial for creating your own silk flower brooch. These are so cute and would make a fun little gift too (to soon to be thinking about mother's day yet?). Supplies: fabric, brooch pin, felt, scissors, needle and thread. 2. Cut a long strip of fabric. Ours was 43 inches long. We created a single, over sized flower; but you could slightly alter the above measurements to create any size you like.
62 Free Hat Patterns. Posted on | October 9, 2008 | 8 Comments The links on this page are for sewn hats only.
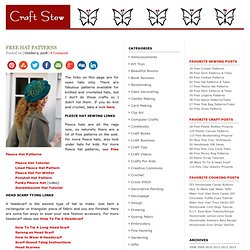
There are fabulous patterns available for knitted and crocheted hats, but I don’t do those crafts so I didn’t list them. If you do knit and crochet, take a look here. 17 Free Fleece Hat Patterns. 7 Tutorials On Making DIY Hair Accessories. Tsumami Kanzashi Flower Hair Clip. I have recently discovered these beautiful folded flowers, and I absolutely cannot stop making them.
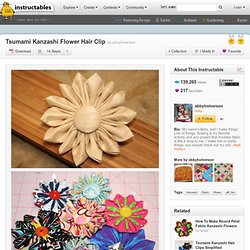
Tsumami Kanzashi are traditional Japanese folded flowers, made from small squares of silk, that are typically worn by women as hair ornaments in traditional hairstyles. They seem really complicated and intricate, and they can certainly be that if you really want; but it completely doesn't need to be! I love to make them out of cotton prints that are fun and bright, in addition to scraps of silk and other light fabrics. 16 Headband Tutorials. As a busy mom of three little boys, I don’t always have time to do my hair.
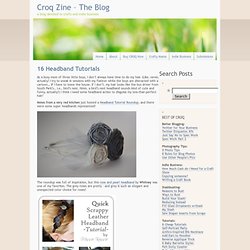
(Like, never, actually! I try to sneak in sessions with my flatiron while the boys are distracted with a cartoon… IF I have to leave the house. If I don’t, my hair looks like the bus driver from South Park’s… i.e., bird’s nest. Hmm, a bird’s nest headband sounds kind of cute and funny, actually!) How To Make Gloves. In this instructable, I will show you how to draft your own glove pattern and make a pair of gloves.
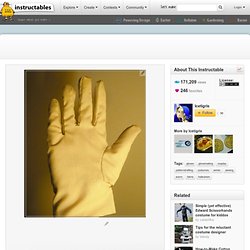
You can use this with any fabric, leather, vinyl, or similar material, stretchy or not. Hands are complicated 3D shapes with many degrees of freedom of movement. Gloves need to accommodate this and are as such more complicated than 2 pieces of hand-shaped fabric sewn together. SUPPLIES: For drafting: -duct tape (or something similarly flexible) -paper (preferably tracing paper or something similar) -a disposable glove (latex, nitrile, whatever you have on hand [HURHUR]) -a pencil -a permanent marker -sharp scissors. How To Make Gloves. Sewing > Gloves Have you thought you can sew gloves of cloth?
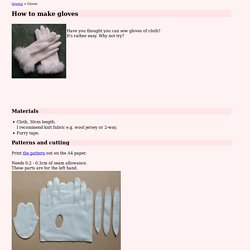
It's rather easy. Why not try? Materials Cloth, 30cm length. Patterns and cutting Print the pattern out on the A4 paper. Sewing Sew the gussets to the back of fingers. b'-c-d' and d''-e-f' and f''-g-h'. Sweater Mittens. This photo originally appeared in FamilyFun Magazine Total Time afternoon or evening Ages all-ages These mittens -- made from old sweaters that have been "felted" (shrunken into a dense, nonraveling material) -- are soft, toasty and very colorful.
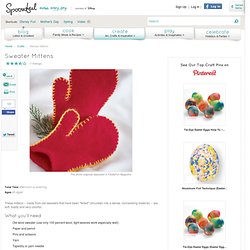
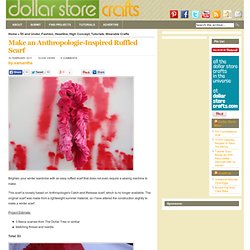
What you'll need Old wool sweater (use only 100 percent wool; tight weaves work especially well) Paper and pencil Pins and scissors Yarn Tapestry or yarn needle Helpful Tip: If you don't have any old wool sweaters, check at a local thrift shop (they rarely charge more than two or three dollars per sweater). DIY Anthropologie-Inspired Ruffled Scarf. Home » $5 and Under, Fashion, Headline, High Concept, Tutorials, Wearable Crafts 10 February 2011 19,538 views 8 Comments by samantha Brighten your winter wardrobe with an easy ruffled scarf that does not even require a sewing machine to make.
Idea For A Shrug From Old Doilies. The pattern is listed as being 'Easy' but I've found it to be very confusing.
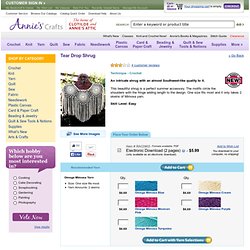
I agree that creating each motif is easy but the directions for connecting each one to the next is so vague that I haven't been able to successfully link the first to the second, let alone finish the shrug. The area that I have not figured out is Round 7 of the 2nd through the 6th motifs. It says "Round 7 - Ch 7, sc in next ch 6 space)repeat 3 times. (Ch 3, sc in free ch 7 loop of previous motif. Ch 3, sc in next ch 6 space on working motif) repeat 4 times. Purrrfectly Pumped Kitty Heels. 1.
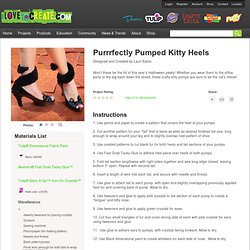
Use pencil and paper to create a pattern that covers the heel of your pumps. 2. Cut another pattern for your “tail” that is twice as wide as desired finished tail size, long enough to wrap around your leg and to slightly overlap heel pattern of shoe 3. Use created patterns to cut black fur for both heels and tail sections of your pumps. 4. 5. Beltmaking 101. Finally–the long-awaited beltmaking tutorial! Way I make my fabric-covered belts has been learned from a mix of trial-and-error and vintage manuals. The supplies are simple, and making a simple pass-through belt is quite easy.