

Sharing WiFi with Raspberry Pi using a LAN Cable. In order to login into the Shell of the Raspberry Pi connected directly to my PC via a LAN Cable, I crafted this tutorial that involved a tedious process of editing the cmdline.txt file of the Raspberry Pi.
This hack comes in very handy when there's no access to a Display Screen or no Router. Another advantage of this hack was that the Shell access on the Pi can be achieved without ever having to connect the Pi to a Display Screen/Router. After the popularity of this hack, I wrote another tutorial that allowed to also Share WiFi from the Windows PC over to the Raspberry Pi.
This has been very popular, though sometimes a big pain to get working with Win 8/10. Last night, I stumbled upon a very easy technique of Sharing WiFi with the Pi without having to edit/modify anything within the Raspberry Pi. 0. 1. The Local Area Connection is where the Raspberry Pi will eventually be connected to and the Wireless Network Connection is our PC's internal WiFi adapter. 2. 3. 4. 5. 6. 7. 8. 9. 10. 1. Analog input for Raspberry Pi. The Raspberry Pi 2 can only process digital inputs.
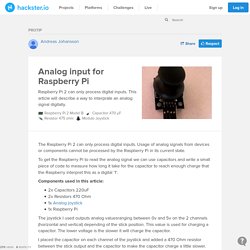
Usage of analog signals from devices or components cannot be processed by the Raspberry Pi in its current state. To get the Raspberry Pi to read the analog signal we can use capacitors and write a small piece of code to measure how long it take for the capacitor to reach enough charge that the Raspberry interpret this as a digital ‘1’. Components used in this article: PiTFT 2.8" Touchscreen for the Raspberry Pi. Opto-Isolated AC Voltage Sensor. Introduction In an upcoming project I needed a way to detect when the power in my house went off and I needed to detect when the pump was running.

There are sensors that can be purchased but I thought it would be fun to build one. In an effort to keep the other project from becoming over-complicated I decided to share the details of building this simple device in a separate project. Device Overview The device I am building is rather simple and requires only a few inexpensive components. The concept of the device is to use a photoresistor to detect light from the pilot light. A big advantage of this design, other than the low cost, is that the AC circuit is completely isolated from your IoT device. Une adresse sur Internet pour votre Raspberry Pi avec No-IP. HC-SR04 Ultrasonic Range Sensor on the Raspberry Pi. In previous tutorials we've outlined temperature sensing, PIR motion controllers and buttons and switches, all of which can plug directly into the Raspberry Pi's GPIO ports.

Access your Raspberry Pi over the Internet. You can connect to your Raspberry Pi from another computer anywhere in the world over the Internet.
One method is to use port forwarding. Port forwarding requires you to change the configuration settings on your router. You must configure your router to forward the Internet traffic delivered to your public IP address on a specific TCP port number, to automatically route to the local network IP address of your Raspberry Pi. Most routers have this feature available through their configuration webpage. However, every router is different and there is no single set of instructions that applies to every router in use today. One alternative method to port forwarding is the use of Weaved services. Remote SSH access to Raspberry Pi 2. (From Want to deploy a Raspberry Pi "in the field" and still be able to access it?
Here is an easy way to enable remote SSH access to your Raspberry Pi 2 (and other models, too). While there are solutions involving a VPN or configuring port forwarding at a local firewall, those are often hard to manage for non-experts. A new generation of relay services including My-Devices.net, Pagekite.net and Yaler.net tries to fix this. Un script Python comme serveur SMS. Disposer de sa propre passerelle SMS est aujourd’hui très accessible avec le forfait Free à 2€ (0€).
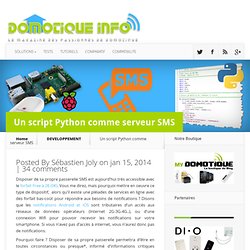
Vous me direz, mais pourquoi mettre en oeuvre ce type de dispositif, alors qu’il existe une pléiades de services en ligne avec des forfait bas-coût pour répondre aux besoins de notifications ? Disons que les notifications Androïd et iOS sont tributaires d’un accès aux réseaux de données opérateurs (Internet 2G-3G-4G..), ou d’une connexion Wifi pour pouvoir recevoir les notifications sur votre smartphone. [Projet] Utiliser un Raspberry Pi comme serveur domotique. Il y a quelques semaines, en discutant avec un collègue, je me suis rendu compte que le Raspberry Pi qui traînait dans un coin de mon salon pourrait peut-être servir à nouveau, et d’une manière plus qu’utile !
![[Projet] Utiliser un Raspberry Pi comme serveur domotique](http://cdn.pearltrees.com/s/pic/th/raspberry-domotique-guillaume-90906317)
Intéressé depuis longtemps par la domotique, mais n’ayant à l’époque pas les moyens ni le temps de m’équiper, ce projet est enfin en cours de réalisation ! Cet article va me permettre de vous présenter ce qu’est la domotique, les usages qu’il est possible d’en faire et les économies que ça peut vous faire réaliser. Pour commencer, qu’est-ce que la domotique ? Bootez sur un disque dur USB. La framboise314 est conçue pour fonctionner avec une carte SD.
Pratique, léger et pas cher… Oui mais… comme toujours en informatique, il y a le côté obscur de la force ! Se connecter en SSH au Raspberry pi à partir de Windows ou de Mac. Free dynamic DNS for your Raspberry Pi. No matter which services your Raspberry Pi is running you will want it to have a static address for global access, which is done by setting up a dynamic DNS service.
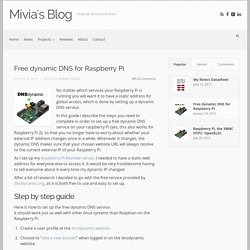
In this guide I describe the steps you need to complete in order to set up a free dynamic DNS service on your raspberry Pi (yes, this also works for Raspberry Pi 2), so that you no longer have to worry about whether your external IP address changes once in a while. Whenever it changes, the dynamic DNS makes sure that your chosen website URL will always resolve to the current external IP of your Raspberry Pi. As I set up my Raspberry Pi Mumble server, I needed to have a static web address for everyone else to access it. It would be very troublesome having to tell everyone about it every time my dynamic IP changed. After a bit of research I decided to go with the free service provided by dnsdynamic.org, as it is both free to use and easy to set up. Here is how to set up the free dynamic DNS service. Optimiser la consommation CPU et mémoire de votre RaspBerry Pi.
Aujourd’hui j’ai cherché plusieurs façons d’optimiser la consommation de mon RaspBerry Pi. En effet, votre rpi ne possède pas de ressources illimités, c’est pourquoi il faut absolument gérer sa consommation (mémoire et CPU). Au fil des pages, j’ai trouvé plusieurs astuces que je regroupe ici. Réparer ssh : WARNING: REMOTE HOST IDENTIFICATION HAS CHANGED! Vous venez de mettre à jour vos clefs ssh sur votre serveur pour une raisons X ou Y (reinstallation serveur, regénération des clefs pour la faille debian …) Contrôlez votre Raspberry Pi depuis un smartphone Android. Le père Noël étant passé un peu en avance, j’ai l’occasion de troquer un vieux téléphone sous Windows Mobile (ben oui nul n’est parfait…) contre un Galaxy S4 sous Android !
#linux #raspberrypi router with dynamic dns. One more article about controlling your home network with the raspberry pi router. This article is the sequel of "Creating a wireless router... ". In this "episode" I will walkthrough the configuration of the dynamic dns for an easier access to your home network when you are not there! For this you need to create an account in and then create an A record on the Dynamic DNS section of the site.
After this, click on "Wget Script". On the downloaded file you will see something like this: Hide Copy Code. Home Automation Using Smart Connector. Table of Contents Introduction This article will explain how to use Smart Connector to connect various devices to create connected system. This article will also explain how to make your home a Smart Home by making use of Open Source Hardware and connecting them together by the greatest cloud platform The Azure. In today's world we have many open source hardware platform available eg. Raspberry Pi - SSH Public Key Authentication. Introduction This tip describes how you can increase your security level by using public key authentication. The tip is dedicated to Rapsberry Pi SSH users, but can be used by any Linux user (Raspbian is based on Debian). The client side presented is Windows Putty.
Learn.adafruit. When you buy a Raspberry Pi, it may or may not be sold with an SD card. The SD card is important because this is where the Raspberry Pi keeps its operating system and is also where you will store your documents and programs. Even if your Pi came with an SD card with an operating system on, it is a good idea to update it to the latest version, as improvements and bug fixes are going in all the time. Since putting the operating system onto an SD card wipes everything else off the card, it is worth considering using a USB flash drive for your documents, so that when you install a new version of the operating system, you don't have the complication of copying them off somewhere safe before reformatting the SD card.
If your Pi did not come with an SD card then the minimum size you should get is 4GB, but buy a bigger SD card if you think you will need the space. S Raspberry Pi Lesson 6. Using SSH. In this lesson you will learn how to remote control your Raspberry Pi over your local network using Secure Shell (SSH). A common reason for remote controlling your Pi from another computer is that you may be using your Pi solely to control some electronics and therefore not need a keyboard, mouse and monitor, other than for setting it up. It also can just save on desktop clutter, and the problem of having multiple keyboards and mice all over the place. Learn.adafruit. Michael Teeuw. Interfacing with a Wiimote - Physical Computing with Raspberry Pi. Difficulty: intermediate This tutorial will show you how to connect a Wiimote to the Pi over Bluetooth. You will then be able to read input from it, including the state of the buttons and accelerometer and send it output, e.g. changing the LED state and playing with rumble.
It is recommended to use one of our SD cards or images, if you are not then you will need: python-cwiid and to set your Bluetooth in discoverable mode with sudo hciconfig hci0 piscan. Ultrasonic Distance Measurement Using Python – Part 1. LEDs, buzzers and switches are the most common items people attempt to interface to their Raspberry Pi’s. Something I found in eBay that is a little bit different is an ultrasonic measurement module. This allows you to measure the distance to the nearest wall or solid object.
The modules are easy to buy, cheap and relatively straight forward to interface to the GPIO header. Noobs. Noobs est un pur produit du vocabulaire geek et un dérivé de l’argot Anglais pour New boy qui a donné Newbie puis Noob par contraction. C’est la remarque habituelle faite en ligne a quelqu’un qui ne connait pas trop son sujet. Noobs & OS. Noobs. Google lance Coder, transformant un Raspberry Pi en une plateforme de développement Web.
Coder, un nouveau projet qui va sortir des bureaux de Creative Lab de Google, est un outil open source qui vous permet de transformer facilement un Raspberry Pi en un véritable serveur Web de base avec un environnement de développement dédié au développement Web. L’outil qui a été développé par un Googler, Jason Striegel, ainsi que le designer, Jeff Baxter, accompagnés d’une petite équipe à New York, est censé être un environnement pour les professeurs et les parents désireux d’enseigner les enfants « aux bases du développement pour le web ». Contrôlez votre Raspberry Pi depuis un smartphone Android. Raspberry Pi - Gérer vos tâches avec Tracks. Lorsque vous tenez un blog, que vous travaillez, etc. vous avez toujours une longue liste de choses à faire. Aujourd’hui nous allons installer l’outil miracle, celui qui va vous enlever tout le stress en utilisant la méthode « Getting Things Done » : Tracks !
Bon après cette introduction digne d’un vendeur d’aspirateur qui va révolutionner le monde, passons aux choses réelles. Un Raspberry Pi pour compléter sa box de domotique. Raspberry Pi : Créer un point d’accès WiFi. Raspberry Pi - Arduino - Lier les deux via le bus I2C. Raspberry Pi Python Adventures: Framboise a la mode arduino. [Raspberry PI] Ajouter un Bouton POWER avancé sur RPi B rév. 2 - Le Blog de KZL.
Présentation & Réalisation d'un Node de Base avec Atmega 328 - Ydle. Arduino & Raspberry Notepad: Fritzing: installer et utiliser la Librairie AdaFruit. Binerry, Raspberry Pi with I2C-Arduino-Slave. Code and Life – Arduino and Raspberry Pi Serial Communication. La domotique évolutive et innovante. Raspberry Pi - Arduino - Lier les deux via le bus I2C. Learn the basics. RssLibraries. Python Tutorial - Simple XML Parsing with feedparser.
BerryBoot - The simplest way to install and load multiple operating systems on a Raspberry Pi. How to use interrupts with Python on the Raspberry Pi and RPi.GPIO. Raspberry Pi - Dynamic DNS on Raspbian. [Tuto Geek] Présentation et configuration Raspberry Pi et installation de Raspian. Installer Raspbian sur Raspberry Pi sans écran ni clavier. Raspberry PI - Tutoriel pour installer et configurer un système sur une carte SD - www.octetmalin.net. An Unofficial Raspberry Pi Blog: How to Setup Remote Desktop from a Windows Machine to your Raspberry Pi - Step by Step Guide.
[Tuto] Installer MPD sur Raspberry Pi (distrib Raspbian) Raspbian on SD card + USB memory stick. RPi SD cards. INSTALL - webiopi - Raspberry Pi Internet of Things framework - Google Project Hosting. How to Clone Raspberry Pi SD Cards Using the Command Line in OS X - Tuts+ Mac Computer Skills Article. Pense bête pour le hacking du RPI. Raspberry Pi - Comment mettre à jour le firmware ? « Korben Korben.
Downloads. S Raspberry Pi Lesson 7. Remote Control with VNC @Raspberry_Pi +raspberrypi #piday. Code and Life – Arduino and Raspberry Pi Serial Communication. Définir une IP statique pour le raspberry pi chez Free. Communication - How to communicate the raspberry pi and the pc with one another via wireless. "ArdiPi" Wireless Arduino and R-Pi Rover : Setting up the RaspberryPi Serial/Telnet Communication. Share your Raspberry Pi's files and folders across a network. Nag Free Dynamic DNS on Raspberry Pi. SD Formatter 4.0 for Windows Download. Cheat Sheet - USB drives.