

Headband Refashion. Our headband had a flower that was starting to look a little tired and worn so we made it new again!
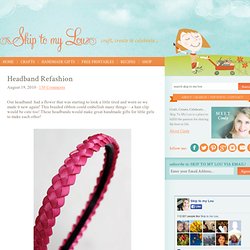
This braided ribbon could embellish many things— a hair clip would be cute too! These headbands would make great handmade gifts for little girls to make each other! Woven Ribbon Headband Gather a headband and about 4 1/2 yards of ribbon. You can use any with — I chose 1/4 inch. Begin by finding the middle of the ribbon. Now bring the bottom ribbon up and make a loop and send it through the beginning loop that you just made by crossing the ribbon. Pull the right side snug. DIY Friendship Necklace – HonestlyWTF.
As soon as Lauren and I saw this editorial in Flare Magazine, we knew we had to recreate these awesome, friendship bracelet-like necklaces.

We promise they are super easy to make and the perfect way to pass the time during those long summer roadtrips. To make a 2-tone necklace, cut a long piece of rope and wrap two different colors of embroidery thread around its own bobbin. Tie a starter knot along with the two colored threads you are using, leaving at least 3 inches of slack, Tape down the slack to a flat surface or safety pin it something that will help keep it in place (feeling nostalgic yet?). Lay the color that isn’t being used (shown here in purple) in your left hand, along with the rope, and hold them taut. Take the active color (shown here in red) in your right hand, pass it over the rope, loop it under and back through the opening. To alternate colors, simply put the inactive color (red) in your left hand and the new active color (purple) in your right. Slatts Paracord Rescue Bracelet (no buckle) I love paracord, both for its countless uses and the fact that it looks really cool when woven into bracelets, belts, straps, etc.
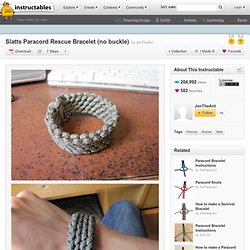
I work backstage and am always looking for a good way to carry a large amount of cord on me that can be easily accessed. I found The Slatts Rescue Belt and decided to see if I could weave one into itself without using a buckle. Boden Boulevard Necklace Knockoff. Did you know Mother’s Day is about a week and half away??
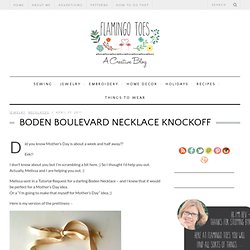
Eek!! I don’t know about you but I’m scrambling a bit here. ;) So I thought I’d help you out. Actually, Melissa and I are helping you out. :) 16 Headband Tutorials. As a busy mom of three little boys, I don’t always have time to do my hair.

(Like, never, actually! I try to sneak in sessions with my flatiron while the boys are distracted with a cartoon… IF I have to leave the house. Zipper Bracelet. T-Shirt Refashion: Jersey Necklace. Rick Rack Rosettes. Braided Chain Bracelet. The latest jewelry trends seem to consist of mixed media - fabric or ribbon weaved in and out of chains of all different colors and thicknesses.
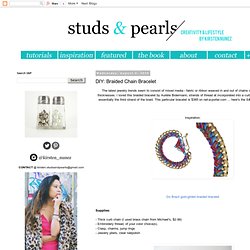
I loved this braided bracelet by Aurélie Bidermann; strands of thread at incorporated into a curb chain, so that the chain is essentially the third strand of the braid. This particular bracelet is $385 on net-a-porter.com ... here's the S&P way, for much cheaper! Inspiration: Supplies: - Thick curb chain (I used brass chain from Michael's, $2.99) - Embroidery thread, of your color choice(s). - Clasp, charms, jump rings - Jewelry pliers, clear nailpolish.
Recycled Book Cuffs. Jamie Keiles creates fashionable wrist cuffs using the spines of old and damaged books, stitched up with leather backings and heavy-duty snaps.

(She’ll line them in vinyl too, if you’d prefer.) I like the graphic, unisex look of these and of course the recycling aspect is a great plus. Recycled Book Cuffs Related. DIY Braided Hex Nut Bracelet. We’re nuts for nuts.

Is there a more versatile and inexpensive DIY component than a hex nut from the hardware store? You can imagine our excitement when we first discovered Philip Crangi’s Giles & Brother Hex Collection. Honestly, nuts braided into jewelry is WTF genius! With a few items that we always seem to have lying around, we tackled the technique and made our own spine-like braided hex nut wrap bracelet. You’ll need:3 strands of cotton butcher’s twine cut into one yard pieces18 small brass hex nutsa bit of dexterity! Gather the 3 strands of twine and tie a knot at the top, leaving about 2 inches of slack. Keep your thumb at the base of the braid, holding the nut in its place. Repeat the steps, by threading the rest of the nuts to the outer pieces of twine before they are crossed over. The bracelet should wrap around your wrist at least two or three times. Style Scrapbook: DIY: PROENZA SCHOULER BRACELET.
April 5, 2011 in Uncategorized by Andy This might be a bit of an odd accessory, but ever since I saw this Proenza Schouler bracelets, I though; Hey, cool!
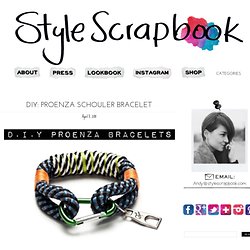
I want one! … You can certainly get the originals if you are willing to pay over 150 dollars OR you can make it yourself with my tutorial, which is actually pretty easy and you get to choose the colors you want, so hows that for improvisation?