

Forget Gold Leaf — Gold Transfer Foil Is the Stuff DIY Dreams Are Made Of. We’re in love.
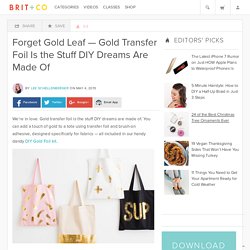
Gold transfer foil is the stuff DIY dreams are made of. You can add a touch of gold to a tote using transfer foil and brush-on adhesive, designed specifically for fabrics — all included in our handy dandy DIY Gold Foil kit. This technique also works on wood, cork and some paper objects as well as an endless list of fabric items. So take a look around and start thinking of what objects in your home could use a metallic accent! We teamed up with Ashley Rose of Sugar & Cloth to bring this beautiful DIY to life in a convenient kit. Materials: – Cotton tote bag – Gold transfer foil – Foil transfer adhesive – Paintbrush – Parchment paper (or get the kit here in one of four colors!) Additional Tools (not included): – Iron – Scissors (optional) – Paper plate Instructions: 1. Grab your main materials (pictured left) and some additional household supplies (pictured right) and let’s get started! The Brushstroke. Diy clay feathers.
I don't know about everyone else but i'm still totally in love with feathers. well technically i had a fascination with them since i was small child before they were cool and adults were telling me that they were infested with germs and parasites... but anyway, when i saw these ceramic feathers i knew i wanted some!!
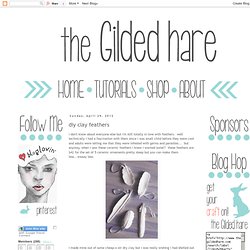
These feathers are $42 for the set of 5 ceramic ornaments-pretty steep but you can make them less...waaay less. Tutorial: color blocked bird pendant. Did you play with shrinky dink as a kid?
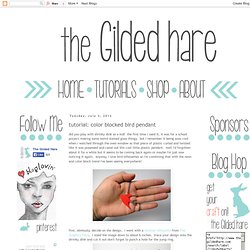
The first time i used it, it was for a school project making some weird stained glass thingy. but i remember it being sooo cool when i watched through the oven window as that piece of plastic curled and twisted like it was possessed and came out this cool little plastic pendant. well i'd forgotten about it for a while but it seems to be coming back again-or maybe i'm just now noticing it again. anyway, i love bird silhouettes so i'm combining that with the neon and color block trend i've been seeing everywhere!
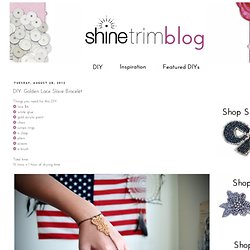
First, obviously, decide on the design. i went with a swallow silhouette from The Graphics Fairy. i sized the image down to about 6 inches. trace your design onto the shrinky dink and cut it out-don't forget to punch a hole for the jump ring. bake as per instructions and you should end up with a little mini swallow! DIY: Golden Lace Slave Bracelet. Things you need for this DIY:❂ lace $6❂ white glue❂ gold acrylic paint❂ chain❂ jumps rings❂ a clasp❂ pliers❂ scissors❂ a brush Total time: 15 mins + 1 hour of drying time Pretty bling-y for $6!
Re-purposing: Tshirts into 5-strand-braided-headbands. I was walking through Target a few weeks ago and noticed this little knit fabric headband that was not just braided together…….but woven.
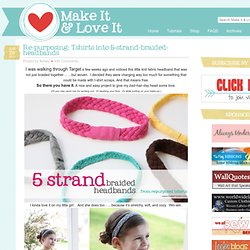
I decided they were charging way too much for something that could be made with t-shirt scraps. And that means free. So there you have it. Tutorials for Recycling T-Shirts. So way way back, in June, I wrote this Studio Organization post, about starting the process of organizing my studio by cleaning out the closet full of junk.

Well, it's September and...let's just say the closet is a work in progress. Some of the things that are taking up space in the closet are shirts that I never wear anymore. 10 T-Shirt Scarf Tutorials. FASTEST RECYCLED T-SHIRT TOTE BAG. T-Shirt Refashion: Jersey Necklace. Sometimes I feel like I ride on the coattails of creative people.

Back in January as I was surfing my favorite blogs, I came across this post on Ultra Vroom about cardigans and fabric necklaces. DIY Wrap Headphones. I got the idea to make these from the DIY wrap bracelets I made a little while ago.
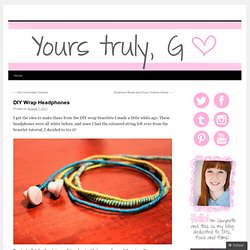
These headphones were all white before, and since I had the coloured string left over from the bracelet tutorial, I decided to try it! To start off, take the string and tie a knot with it around one of the wires. You can use one colour, or as many colours as you want. Once you have the knot set, start wrapping. Make sure you have a lot of string because you don’t want to run out halfway down the wire and have to tie another knot and start over again. 25 Ways to Wear a Scarf in 4.5 Minutes! :: Behind the Scenes :: Infinity vs.

DIY Infinity =D :: difference is very subtle - the first fold. The Infinity is folded along the diagonal while the DIY Infinity is folded in half, horizontally. The Infinity starts off as a triangle, whereas the DIY Infinity begins as a rectangle. It seems like a trivial difference, but due to the shape, the Infinity fold works best with square scarves whereas the DIY version can be pulled off on thicker longer scarves. Also, because of the different starting shapes, the way the scarves drape are also slightly different. The Shirt Skirt. » DIY: Tank Dress with Pockets! academichic.
At long last, I present a tutorial for the tank dress I made a few weeks ago before the end of the semester blindsided me.
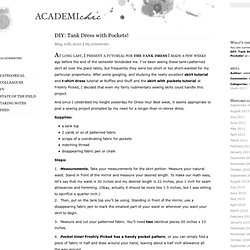
I’ve been seeing these tank+patterned skirt all over the place lately, but frequently they were too short or too short-waisted for my particular proportions. After some googling, and studying the really excellent skirt tutorial and t-shirt dress tutorial at Ruffles and Stuff and the skirt with pockets tutorial at Freshly Picked, I decided that even my fairly rudimentary sewing skills could handle this project. How To Tie Dye Your LEGS. I am about to show you how to tie dye your legs... or leggs really. Yeah, they're just stockings, but the result is still the same. I now have 3 different crazy pairs of tights that each were made from old clothes and food coloring. I do know that this red color looks like I got a sunburn or was in a bad fire, so you can stop saying so.
Fabric Necklace Tutorial. I still have lots of fun DIY projects and yummy treats coming your way this week-I was so so excited to see what Jenni would come up with and I was super impressed by this beautiful necklace she created. How fun! Hi Hi! It's Jenni from I Spy DIY. DIY Tutorial: Necklace with Fabric Birds DIY - Outfits, Shoes & Accessories Dana. Today I have to tell you one of my secrets: I can not leave an Ikea furniture store empty-handed. On good days I only buy a few scented candles, but on bad days, in addition I even take storage boxes, a bed linen, napkins and even the calorie-rich biscuits from Sweden. Most of all I like to buy the pretty Ikea fabrics, which end up in a large box as soon as I arrive home.
DIY Découpage Floral Bag. When H&M asked us to DIY a boho-inspired item for their summer issue, découpage was the first thing that came to mind. Perfect Summer Bangle. Here's a fun tutorial on how to make a message bangle that's one-of-a-kind, done in the sun, waterproof and weatherproof. Even after several trips to the beach, it won't fade or wash off! Essentially, it's the Perfect Summer Bangle. Used in this tutorial: Inkodye Red Prepare. All you'll need for this project is a raw wooden bangle (we got ours from DIYBangles.com), a black paint marker, plastic wrap, and some Inkodye! Transcribe. Perfect. Pour. Brush. Wipe. Wrap. Tape. Expose. DIY Gold Tube Bracelets. I have very vivid memories of walking into a bead store for the first time, almost 15 years ago, and being overwhelmed by the million and ten ideas that filled my mind.
I was immediately hooked on the concept of transforming simple and unexpected elements into something beautiful and wearable. That moment was the catalyst for my eventual path into jewelry design and craft – my higher calling, if you will. Today’s tutorial takes me back to my first foray into jewelry making, where I’ll show you how to make two delightful bracelets using the same basic component. Get inspired and have fun! DIY Macrame Bracelet. Quiet Lion Creations. DIY Wrap Bracelet.
You should all know by now that we are all about stacking bracelets on our wrists. The more, the better. In fact . . . the most, the best!