

Kumihimo_5F00_Crystal. Dogs. Learn Beading · Princess Wire-wrapped Ring. This ring is just too pretty to be so fast and easy!
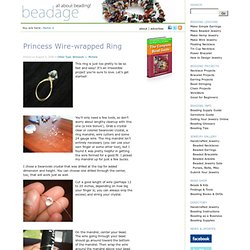
It’s an irresistible project you’re sure to love. Let’s get started! You’ll only need a few tools, so don’t worry about lengthy cleanup with this one (a nice bonus!). Grab a crystal clear or colored Swarovski crystal, a ring mandrel, wire cutters and some 24 gauge wire. The ring mandrel isn’t entirely necessary (you can use your own finger or some other tool), but I found it was pretty helpful in getting the wire formed for a good fit.
I chose a Swarovski crystal that was drilled at the top for added dimension and height. Cut a good length of wire (perhaps 12 to 20 inches, depending on how big your finger is; you can always snip the excess) and string your crystal. On the mandrel, center your bead. Pull the formed wire off the mandrel and bring one end of the wire around the base of the bead (to secure it), then bring that piece of wire back around until it’s pointing outward. Du néon aux poignets, ou comment faire ses propres bracelets ? {DIY inside} - Mon quotidien Créatif. Hello girls !
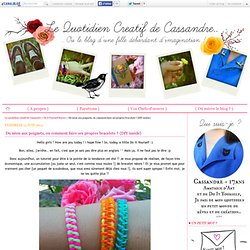
How are you today ? Kumihimo 1. First Kumihimo Braid. I had a go at using this Kumihimo plate the other night and found that the instructional pictographs were a bit difficult to understand.
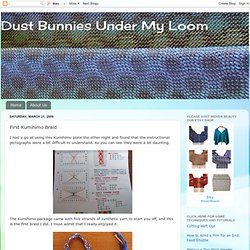
As you can see they were a bit daunting. The Kumihimo package came with five strands of synthetic yarn to start you off, and this is the first braid I did. I must admit that I really enjoyed it. I enjoyed it so much that I pulled 60” of gold ribbon, purple orlec and navy orlec to braid. The ribbon I used singly but the orlec was tripled to match the ribbons thickness. This is a close up of the braid. Accepting this award means following some rules:1. And pass the awards on to: Charlotte at Strikke-og vevebloggen Susan at Thrums Cindie at eweniquely ewe Deanna at A Winding Thread Trapunto at The Straight of the Goods Magic Stix FibersDeborahbee at Swifter Than a Weavers Shuttle My Days Have Passed Weaving WordsDuring the 13th century, a woman weaver was called a Webster. Tutorials > Shell and Kumihimo Necklace. Kumihimo 2. How to: Wedded Bliss Beaded Kumihimo Necklace. Project N666Designer: Julie Bean Make a stunning necklace for your special day using Swarovski Crystals and the ancient Japanese braiding technique of Kumihimo.
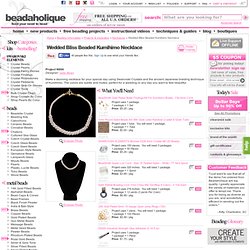
The colors are subtle and muted, perfect for a wedding or any day you want to feel beautiful. Variations Make this necklace in a wide variety of colors. When substituting in items, pay attention to sizes and styles to make sure all your pieces will fit together. Keywords: beaded kumihimo, kumihimo, braided necklace, textile, swarovski necklace, bridal necklace, wedding, kumihimo101, btq-bridal Tip: Check package quantities for each component. All designs © Beadaholique Inc. Single-Strand Necklace and Earring Set with Kumihimo Satin Cord and Imitation Silk Cord and Gold-Plated Brass Chain. The pieces featured in the Gallery of Designs are copyrighted designs and are provided for inspiration only.

We encourage you to substitute different colors, products and techniques to make the design your own. Contact Information Customer Photographs Fire Mountain Gems and Beads is proud to feature your artwork, and we invite you to submit images of your favorite projects to the Customer photographs section. Here's how you can be included: Tutorials > Shell and Kumihimo Necklace.
Emergence Necklace. What a Knit and Kumihimo too! Kumihimo Project Kits September 12, 2011 at 8:47 pm Karen’s Kumihimo Corkscrew Bracelet Springy, bouncy and lots of fun, Karen’s Kumihimo Corkscrew Bracelet is quick, fun and easy to make.
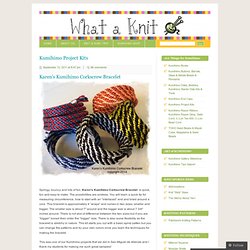
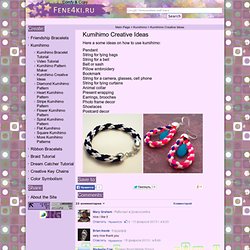
The possibilities are endless. You will learn a quick tip for measuring circumference, how to start with an “interlaced” end and braid around a core. Kumihimo beading with braids, beaded kumihimo leaf necklace project. Kumihimo necklace with seed beads. Four Cord Braided Bracelet Project Idea. Kumihimo designs- round and flat. Here a some ideas on how to use kumihimo: Pendant String for tying bags String for a bell Belt or sash Pillow embroidery Bookmark String for a camera, glasses, cell phone String for tying curtains Animal collar Present wrapping Earrings, brooches Photo frame decor Shoelaces Postcard decor.
Kumihimo-3 designs. BSBP Deconstructed: Kumihimo Lariat. For those of you looking for my BSBP reveal post, it is here; I hope you'll click and look at the whole reveal!

(one post down). THIS post is the first in a series of posts giving the gory details on my BSBP journey. Thanks for visiting, and if you like design minutiae, this is the post for you! The first piece I made for my recent BSBP (Bead Soup Blog Party) reveal was the kumihimo lariat, using semiprecious gemstone chips. When I first opened my generous bead soup, I saw so many delightful elements, but knew I wanted to work with the "wing. " toggle. I was drawn to the wing toggle on the right I wanted it to be front and center, so I turned my thoughts to deciding what I could create with a front closure.
I knew I would need to sort the chips by color, because I am far to anal to have them all randomly mixed up in my kumihimo. I wanted to make a clear boundary between each separate gemstone in the kumihimo, so I enameled some large-hole beads to match the gemstones: So, plan B. 8-Cord Kumihimo Spiral Bracelet Instructions. I love the simplicity of the design of my latest kumihimo braided bracelet using size 8 Japanese seed beads.
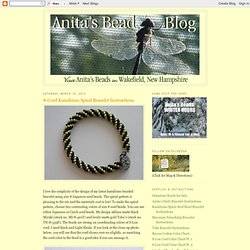
The spiral pattern is pleasing to the eye and the materials cost is low! To make the spiral pattern, choose two contrasting colors of size 8 seed beads. You can use either Japanese or Czech seed beads. My design utilizes matte black Miyuki (stock no. Craft Warehouse Blog. Supplies 3-4 colors of 2MM satin cording 24ft total (4 strands 6ft long each) C-Lon cording Tex 210 size .5 MM in diameter (in coordinating color) 8 styles of top drilled Czech glass, and or top drilled seed beads in varying sizes and shapes, 32 of each color and style of bead, for a total of 256 beads.

(model uses 3 colors of Long Magatama seed beads, 1 style of 8MM top drilled flat coin, 2 colors of 5x9MM tear drops, 1 color of 9x14MM tear drop, 1 style of top drilled leaf (leaf style bead was difficult, tear drops much easier). 1 Kumihimo Toggle clasp with cone ends 8MM wide in diameter 2 Large Cones 10MM or so in diameter 6 -8 inches of 22 wire gauge 3 jump rings (heavy duty 6MM) General Supplies: Scissors, Chain nose pliers, Round nose pliers, Side cutters, E6000, Bead fix Glue (used to turn end of C-Lon cording hard like a needle and to prevent fraying), and one rubber band. 8 Re-usable bobbins for cording, (*optional but highly recommended).
Tutorials > Shell and Kumihimo Necklace. 123BEAD - Beaded Jewelry Making Instructions, Tutorials, Projects & Kits. Craft Warehouse Blog. Thursday, August 23, 2012 Buddy's Dog Collar Supply List Para Cord -5 colors or a total of 40 feet (5 colors 8ft each) Recommend 5 different colors for pattern to show Reflective Para Cord Survival Dog Buckle w/ D-ring Kumihimo Flat Plate Scissors, pencil E6000, and or Needle and thread (for finishing) Lighter, fast drying glue (for melting/sealing the ends of the cord to prevent fraying) 1 German silver Dog Tag and 1 heavy duty jump ring Metal Complex Stamp Embossing Set Hammer, Chasing Hammer or Rubber Mallet Bench Block (nylon and steel recommended) Guilder Paste Black *Optional – Metal Embossing Templates and Big Kick Embossing Machine (for background design)Notes: This makes a large/ X Large sized dog collar 21” around, increase or decrease length of cording to fit your dogs’ neck Directions Cut 5 pieces of Para Cord 8ft long each.
Melt all ends of cord to prevent fraying. Dog Tag Directions Posted by Jennifer Evans at 12:00 PM Email ThisBlogThis! Dragon Skin Kumihimo Bracelet. Kumihimo Gone Wild Necklace.