
DIY Macrame Bracelet. Growing up by the beach in Southern California, the ability to knot a macrame bracelet was practically a right of passage.

Although those days are long behind us, we’ve never forgotten the ever-so-simple square knot technique. This time, however, we’re replacing hemp and wooden beads for more updated elements like colorful nylon cord and glossy metal charms. Happy knotting! You’ll need: Start by cutting the knotting cord into two 30 inch, two 20 inch and one 10 inch lengths. Center the 30 inch cord under the two middle strands. Pull tightly and slide the knot up to the top. Finish the 2nd half of the square knot by folding the left cord over the middle strands and under the right cord. Pull tightly and repeat the steps – left, right, left, right . . . To finish the knots, thread one of the cords onto a needle and sew up the center of 3-4 knots along the backside. Repeat the same step on the other cord. After sewing up both knotting cords, trim away any excess. How-To: Make a Nebula Pillow using Ink Effects from DecoArt.
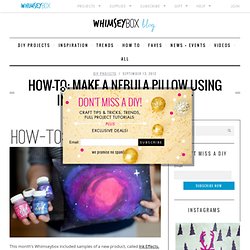
This month’s Whimseybox included samples of a new product, called Ink Effects, from our friends at DecoArt.

Ink Effects is a fabric transfer ink that allows you to paint an image on ordinary printer paper and then iron it on to a textile. Rather than sitting on top of the fabric like a stiff iron-on transfer, the Ink Effects ink settles in smoothly to the fabric with little distortion of the feel of the fabric. Ink Effects colors blend nicely together, and when I saw my collection of colors, I instantly knew what I wanted to try my hand at. I needed a project for my inner space geek, and Ink Effects was the perfect way to pull it off. Read on to see how you can create a nebula pillow of your own to add some geek chic to your home decor. Materials:From your September Whimseybox: - Ink Effects Fabric Transfer Ink (colors can vary, based on what kind of nebula you want to make. Other Materials: - Printer/Copier paper - Spongebrush - Toothpicks - Old Toothbrush - White acrylic paint.
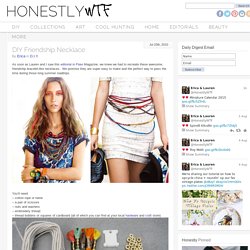
DIY Friendship Necklace. As soon as Lauren and I saw this editorial in Flare Magazine, we knew we had to recreate these awesome, friendship bracelet-like necklaces.

We promise they are super easy to make and the perfect way to pass the time during those long summer roadtrips. To make a 2-tone necklace, cut a long piece of rope and wrap two different colors of embroidery thread around its own bobbin. Tie a starter knot along with the two colored threads you are using, leaving at least 3 inches of slack, Tape down the slack to a flat surface or safety pin it something that will help keep it in place (feeling nostalgic yet?).
Lay the color that isn’t being used (shown here in purple) in your left hand, along with the rope, and hold them taut. Put Up Your Dukes: braided scarf tutorial. I have a tutorial that is forty thrillionty times easier and better than my previous (ahem, first ever...give me some grace!)

Tutorial. it is accessible to infinitely more people (you dont have to have a baby, OR a dress to start out with). and it is really simple. there are only 4 lines of stitching total. oh, did i mention it's mega cute and chic also: 5 weeks ago i saw this scarf on pinterest. it was pinned by a VERY popular pinner that i follow under her DIY board. i knew i had to make one for myself. but when i followed this "DIY" link, it actually led to a german store where the scarf was 35 euros ($60 shipped!). No DIY tutorial = no thanks and bum out! LOVE these colors. must make a yellow and gray one for me. source the more i thought about it, the more i wanted this, and wanted it CHEAP. i said out loud in our living room, "i am GOING to figure out how to make this for myself.
" the other (now massively popular and pinned, woe is me!) Here's how! What you need: oh, hi! That's it! Beading Tip.