

XPIOCARDS download. 737 Home Cockpit. A picture progress of my throttle quadrant build Hope you enjoyed the pictures of my 737NGX800 throttle quadrant project to date.
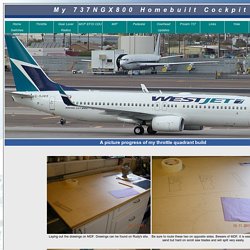
For covering the decals about 4 to 5 quick light misty sprays of clear Krylon to prevent runs, then Used a brush to add final coats of clear coat over the decals. Was tricky at times but results look ok. Parking Brake doesn't release on toe brake push, but that's a project for another day. NOTE: Ed from the netherlands has developed a toe brake release which I will improvise when time permits. If you find the site a little rough around the edges, please bear with me, as I am just learning the ins and outs of html and CSS, so most likely there will be errors and the likes click here to go to the top of the page. 2c95f1b7-0292-44fb-beed-ddf57573f479. Untitled Page. Pedestal - BUILDA737SIMULATOR. Please see dimensions above.
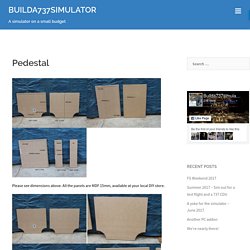
All the panels are MDF 15mm, available at your local DIY store. Cut the panels out in the right shapes. Than once finished cutting, add four of these wooden blocks to your front and backpanel (if that makes sense), this is because screws split the MDF wood itself and this panel prevents that as the screws are drilled in. Than add the side panels to one of the panels. I suggest to put the panels upside down as it makes the surface area smooth and screw the screws carefully in their place. Than add the last panel to the rest of the framework. Than add some of this white plastering stuff to the corners as it plasters the surface and makes it smooth.
You can add one of these brackets on top of your pedestal. Add the front firebox box (if that makes sense) Next step is to paint the box itself. Boeing B737 Control Column. Boeing 737 classic mip. How To Build An Airliner Crew Seat. By Daniel Friede (18 March 2004) A long time ago my cockpit shell tutorial was published.
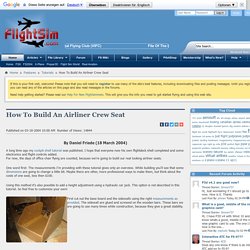
I hope that everyone now his own flightdeck shell completed and some electronics and flight controls added. For now, the days of office chair flying are counted, because we're going to build our real looking airliner seats. Seats - 737NG HOME COCKPIT. Since I’m building a complete 737NG Cockpit I need of 2 Seats, one for Captain plus another for First Officer.
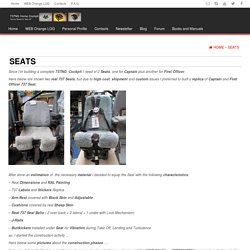
Here below are shown two real 737 Seats, but due to high cost, shipment and custom issues I preferred to built a replica of Captain and First Officer 737 Seat. After done an estimation of the necessary material I decided to equip the Seat with the following characteristics: – Real Dimensions and RAL Painting – 737 Labels and Stickers Replica. MARKUSPILOT HOMEPAGE. Cockpit panels for FSX, X-Plane, Prepar3D. Sim 737NG - ALAIN TREMBLAY - FABRICATION D'UN COCKPIT. Évidemment depuis le 11 juin il s'en est passé des choses...
Cependant j'avais un choix à faire. Travailler sur le site web ou sur le simu... Le choix fut assez facile à faire :) Mais je vais vous résumer... Bon attendez que je me souvienne de tout. 737 Flight Simulator. Note: this isn’t some high quality mechanical linked yoke system; it’s a budget one using a Saitek yoke.

I’m basically rebuilding an old one here so some of the parts are reused. Some of this might void any warranties. It’s still in progress so this page will be updated as stuff happens. This build is made of 4 main parts: The base, which puts the whole thing at the correct angle and allows everything to be screwed to the floor since I can’t access underneathThe pole – in this case 70mm PVC pipeTop bracket/supportYoke Base. Precision USB Joystick Controller BU0836. "737 overhead" 3D Models to Print - yeggi. MIP panel dimensions. 15.
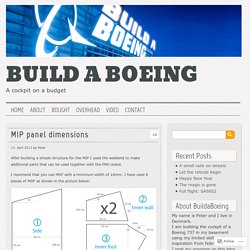
April 2013 by Peter After building a simple structure for the MIP I used the weekend to make additional parts that can be used together with the FMC-stand. I recomend that you use MDF with a minimum-width of 10mm. I have used 8 pieces of MDF as shown in the picture below: Once you are finished cutting MDF it is time to put the parts together. As you might notice the sidewalls are longer than the cockpit. PMDG Panel Config File - Re-writing for Your Cockpit. Ok,I am getting so many e-mails about setting up the PMDG for use in the cockpit that it was becoming so time consuming answering them all my project was starting to get delayed.
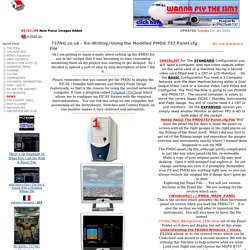
So I decided to upload a sort of step by step description of how I did it. ------------------------------------------ Please remember that you cannot get the PMDG to display the EICAS / Standby Instruments and Rotary Flaps Gauge realistically, so that is the reason for using the second networked computer. It runs a program called FsXpand / FsClient which allows me to configure my EICAS Screen with the required Instrumentation. You can run this setup on one computer, but positioning all the Instruments, Switches and Control Panels on one monitor makes it very cluttered and unrealistic. Panel Configuration Files. Overview The primary folder used by the panel system is the Panel folder.
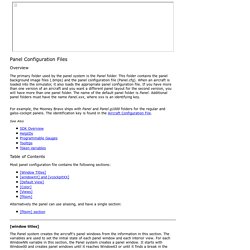
This folder contains the panel background image files (.bmps) and the panel configuration file (Panel.cfg). When an aircraft is loaded into the simulator, it also loads the appropriate panel configuration file. If you have more than one version of an aircraft and you want a different panel layout for the second version, you will have more than one panel folder. The name of the default panel folder is Panel. BOEING B737NG COCKPIT .. Main Instrument Panel ( MIP ) First of all my apologies to Marcus at Lausitz Aviation who's image i stole to create this masterpiece :o) - thank you Marcus for your kindness.
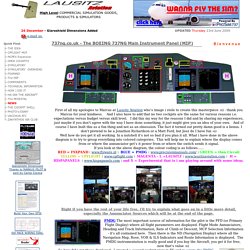
And I also have to add that no two cockpits are the same for various reasons i.e. expectations versus budget versus skill level. I did this my way for the reasons I did and by sharing my experiences, just maybe if you don't agree with the way I have done something, it just might give you an idea of your own. And of course I have built this as a fun thing and not as an obsession. The fact it turned out pretty damn good is a bonus. I don't pretend to be a Jonathon Richardson or a Matt Ford, but Jeez do I have fun :o) Well how do you get it all working.
Sim 737NG - ALAIN TREMBLAY - FABRICATION D'UN COCKPIT. FSX + Arduino + FSUIPC = MobiFlight. DataRefEditor - X-Plane SDK. DataRefEditor (DRE) is a plugin that lets you see, explore and edit datarefs inside X-Plane; it is highly recommended for editing. DataRef Editor comes as a fat plugin for 32 or 64 bits; You can download DRE here.
File:DataRefEditor 12-11.zip Mac users: if you are using an OS older than 10.6 (E.g. with an old version of X-Plane) use this version of DRE: File:DataRefEditor 11-07.zip Complete instructions on using DRE are in the README found with the download. When the plugin starts up it will read all the datarefs that are in the Datarefs.txt file. Once Xplane is up and running you can then tell the DataRefEditor plugin about your custom datarefs. We have to be sure the DataRefEditor plugin is fully loaded before we can tell it about our datarefs. BBI-32 Button Box Interface - With Connectors [BBI-32] - 29.99GBP : Leo Bodnar, Simulator Electronics. Building a cockpit for MS Flight Simulator.
This program will also work for P3D/PMDG NGX !!! MobiFlight + FSX + Arduino + FSUIPC = Your Homecockpit! 737 Home Cockpit. Contr yoke. Control Yoke & Column In this section you will find options for the control yokes and columns for your flight simulator. I am including a number of options to select from based upon the research that I completed prior to reaching my decision to purchase actual 737 flight controls. Below see pictures of my actual control yokes and columns. I just finished refinishing them today, (10/16/05) and will now start to work on fabricating my rudder pedal assemblies before wiring my flight controls to make them functional.
737 Home Cockpit. BOEING B737NG HOME COCKPIT .. HA-IAN / HA-IPS. Rksoftware Software drivers for your favourite flightsim airplanes - rk software. Francisco Sedano Flight Sim site » software. I’m building a new controller based on an ARM CPU and running Linux. So, time to install gcc cross-compiling toolchain on the development machines. B737 Motorized Throttle Quadrant. - AviationMegastore.com.
IDL-20004 DragonflyVR™ Flight Yoke – Iris Dynamics Ltd. The DragonflyVR is our most popular flight simulation yoke. Suitable for cockpit environment or desktop use, this magnetic force feedback yoke provides a smooth and extremely realistic feel. Developed using patented magnetic force feedback technology, the DragonflyVR is the only yoke actuated with linear electromagnetic fields rather than cumbersome mechanical linkages. The DragonflyVR contains fewer heavy machined parts, which drastically reduces the price without reducing the quality. The DragonflyVR is beautifully simple and awesomely robust; no maintenance is required. From taxiing to landing, the DragonflyVR is capable of recreating pothole, pavement segment, control forces, wind, turbulence, landing gear, stalling, and real trim effects.
Features: Specifications: Stroke Length: 5.25” (133mm)Maximum Linear Force: 7.5 lb (33.3N)Rotational angle: +/- 100° (200° total)Maximum rotational Torque: 2.5 ft·lb (3.39 Nm) XHSI - home. Welcome to the homepage of XHSI, an open source project to build high-fidelity airplane simulator instruments for X-Plane. About XHSI XHSI-ND in 4 different modes: MAP, VOR-CTR, APP & PLAN XHSI recreates a Navigation Display (ND) commonly used in the cockpit of modern commercial jet airplanes, recent commuters and bizjets, and brand-new light aircraft, even the smallest two-seaters. It is modelled after the Navigation Display of the Boeing 737-NG series, but can be used by any X-Plane aircraft, even if the cockpit panel doesn't have the necessary switches, or simply no navigation display at all. XHSI-ND is displayed in its own window, which can be resized, even to full screen. A cockpit on a budget. On The Glideslope – Basement aviation from a guy who loves to fly (and sometimes leaves the ground)
HOw to Build a Boeing 747 Throttle Quadrant. B747 throttle lever set Saitek. Cessna Home Cockpit Video Tour (Prepar3d / Saitek) How I Configured X-Plane Screens For The Basement Sim – On The Glideslope. Cessna 172 Cockpit - Your dream flight . . . BBI-32 Button Box Interface - With Connectors [BBI-32] - 29.99GBP : Leo Bodnar, Simulator Electronics.
Custom Sims. How to make own home cockpit. Cessna 172 Simulator. Motion for Simulators. ArdSimX Interface for your Home Cockpit Simulator. ArdSimX is the latest of our Arduino Interfaces. If you're looking for info on ArdSim, the previous interface, check here. ArdSimX Interface allows you to easily link all your controls and instruments to X-Plane using any of the popular Arduino boards (Mega, Uno, Nano, Mini, Micro), without even requiring any programming. One or two Arduino Mega boards may be enough for the whole cockpit, and you can use up to 9 boards with ArdSimX. ArdSimX main features: (additional features that differentiate ArdSimX from previous ArdSim library) Custom, optional: You can get, change and send any dataref values to X-Plane using your custom code.
Getting started Take one Arduino board, (and EthernetShield for network connection if LAN is used), a switch button to test digital inputs, install ArdSimX library and X-Plane ArdSim Plugin. Teensyduino: Using Flight Sim Controls on Teensy with Arduino. When you select "Flight Sim Controls" from the Tools->USB Type menu, Teensy implements a special USB type intended to controlling flight simulator software. A simulator plugin is used. How to link X-Plane to all kinds of electronics using Teensy boards. Cockpit Simulator Builders. HomeFlite Simulator Cockpit Plans. Just Look At These Features. DIY Flight Simulator Cockpit Plans and Blueprints. ExtPlane-Panel/README.md at master · vranki/ExtPlane-Panel.
Inicio. Welcome. Dear Visitor, Like You all can suspect from the title and photos, my passion is constructing my own static flight simulator from the world famous Dakota. The whole story starts in november 1998 when I, for the first time, played with the idea on constructing a cockpit. On this web site You can read about the whole story from the beginning, the gathering of information until the final construction of each separate part. Today an no 2007 the cockpit is almost complete except for some small details and some improvements. Sim Innovations - About. Flight Simulator and Licensed Cessna Pro Flight Sim Products. GL Studio on Raspberry Pi Integrated with X-Plane. How To Build The Cessna 172 Cockpit Simulator Project. By Rory Gillies (20 January 2004) Introduction As an avid flight simulation enthusiast for many years I've accumulated thousands of hours in the virtual skies, mostly in single engine GA aircraft such as the Cessna 172.
As with many hobbies and pastimes, as your interest develops the complexity and quality of the equipment you use gradually increases. Flightdecksolutions. Connecting RaspberryPi to XPlane. Flight Training Cockpit Panel for Saitek Hardware. Pin It. Sim-Avionics. Baron 58 Home Cockpit Simulator. ArdSim for Cockpit Simulator - Main. Interfacing Arduino with Flight Simulator- Tutorial. FSX Keyboard Emulator - How to for Gaming Simulation.