

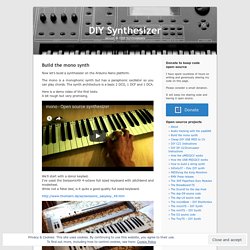
Build the mono synth. Now let’s build a synthesizer on the Arduino Nano platform.
Meet the iRig 2. Exciting news on the instrumental front today – iRig 2 has been released.
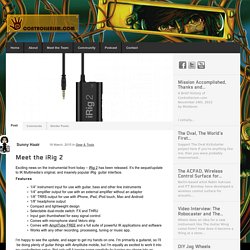
It’s the sequel/update to IK Multimedia’s original, and insanely popular iRig guitar interface. Features 1/4” instrument input for use with guitar, bass and other line instruments1/4” amplifier output for use with an external amplifier without an adaptor1/8” TRRS output for use with iPhone, iPad, iPod touch, Mac and Android1/8” headphone outputCompact and lightweight designSelectable dual-mode switch: FX and THRUInput gain thumbwheel for easy signal controlComes with microphone stand Velcro stripComes with AmpliTube FREE and a full suite of powerful IK applications and softwareWorks with any other recording, processing, tuning or music app. FS: PCBs for most usable blocks (like PSU, modelling boards, OpAmp and tube stages) Good afternoon.
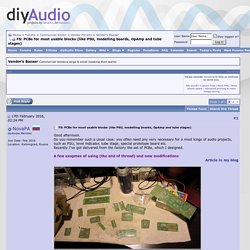
Do you remember such a usual case: you often need any very necessary for a most kings of audio projects, such as PSU, level indicator, tube stage, special prototype board etc. Recently I've got delivered from the factory the set of PCBs, which I designed. A few exapmes of using (the end of thread) and new modifications I've done these as much as possible universal: PCBs have mask, serigraphy labels of control points, input/output, king and markers of elements, name and purpose of PCB.
Most part of boards has a prototyping area to install extra elements for extending capabilities of circuit. Aluminum Housing profiles. Music From Outer Space PCB's - Modular Addict Synth-DIY. Pucktronix.snake.corral. Teensy Audio Board - DEV-12767. Description: This is the Teensy Audio board add-on for the Teensy 3.0 and 3.1 development boards.
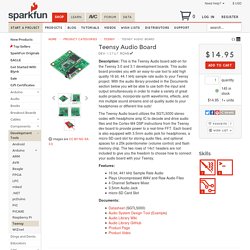
This audio board provides you with an easy-to-use tool to add high quality 16 bit, 44.1 kHz sample rate audio to your Teensy project. With the audio library provided in the Documents section below you will be able to use both the input and output simultaneously in order to make a variety of great audio projects, incorporate synth waveforms, effects, and mix multiple sound streams and cd quality audio to your headphones or different line outs!
The Teensy Audio board utilizes the SGTL5000 stereo codec with headphone amp IC to decode and drive audio files and the Cortex-M4 DSP instructions from the Teensy dev board to provide power to a real-time FFT. Each board is also equipped with 3.5mm audio jack for headphones, a micro-SD card slot for storing audio files, and optional spaces for a 25k potentiometer (volume control) and flash memory chip. Features: Documents: Wires with Pre-crimped Terminals 50-Piece Rainbow Assortment F-F 12" These wires with pre-crimped terminals are equivalent to our premium jumper wires without the 1×1 crimp connector housings on the ends.
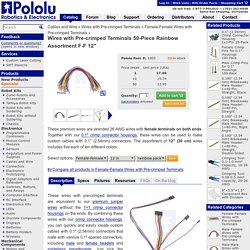
By combining these wires with our crimp connector housings, you can quickly and easily create custom cables with 0.1″ (2.54mm) connectors that mate with various 0.1″-spaced connectors, including male and female headers and solderless breadboards. Just pick the housing for the correct number of pins, pick the colors and genders for your wires, and snap them into the housings (note: it’s not easy to get the wires back out, so plan carefully!). No soldering is required! You can easily make cable harnesses or assemblies that branch from one connector on one side to multiple connectors on the other (an example of this is shown in the picture to the right); you can also cut off one pre-crimped end and solder the wires directly to components to make swapping connections easy, as shown in the motor picture below. MPS Project. SynthDIY.com - DIY Project Management. MFOS VCO Progressive Build Part 2
Stage 2: Amplify the Control Voltages In Stage 1 of Ray Wilson’s “Music from Outer Space” VCO, we created and combined control voltages from Coarse Tune and Fine Tune knobs.
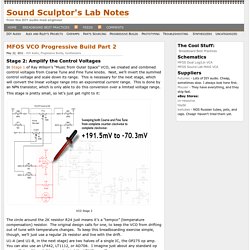
Next, we’ll invert the summed control voltage and scale down its range. This is necessary for the next stage, which will convert the linear voltage range into an exponential current range. Spring Reverb. Care and Feeding of Spring Reverb Tanks Rod Elliott (ESP) Introduction Reverb is one of those effects that simply will not go away.
While there are some excellent DSP (digital signal processor) based reverb systems that really do sound very natural, the unique sound of spring reverb tanks is still preferred by a great many guitarists and many electric/electronic organ players as well. It becomes obvious that the sound of a spring reverb must be a classic, when it becomes available as a software plug-in for computer based recording systems. For detailed info on the history of reverb, it's hard to go past the Accutronics website. Microtonal Synthesis. Radio Drum. The Radio Drum is an analyzer of gestural data.
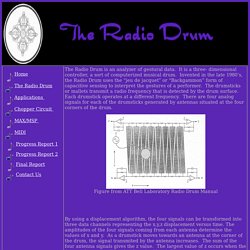
It is a three- dimensional controller, a sort of computerized musical drum. Invented in the late 1980’s, the Radio Drum uses the “jeu de jacquet” or “Backgammon” form of capacitive sensing to interpret the gestures of a performer. The drumsticks or mallets transmit a radio frequency that is detected by the drum surface. Each drumstick operates at a different frequency. There are four analog signals for each of the drumsticks generated by antennas situated at the four corners of the drum. Figure from ATT Bell Laboratory Radio Drum Manual.
DIY Synthesizers. BARTON MUSICAL CIRCUITS. Synthcube web store. A 12×16 Button Grid MIDI Sequencer. Seb's Synth-DIY Pages - Home Page. These pages are my attempt to give something back to the synthesiser DIY community.
The projects listed on these pages would not have been possible without the help of many knowledgable people who share their projects and expertise on their websites and on the synth-diy mailing list. So thank you all! Listed first are completed and fully working projects, then below are my 'under development' projects which over time will get updated on this website. Seb's Synth-DIY Pages - 4xD. This is a brief guide to surface mount soldering by hand.
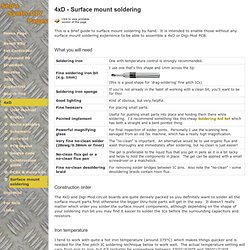
It is intended to enable those without any surface mount soldering experience to be able to assemble a 4xD or Digi-Mod PCB. What you will need Construction order The 4xD and Digi-Mod circuit boards are quite densely packed so you definitely want to solder all the surface mount parts first otherwise the bigger thru-hole parts will get in the way. It doesn't really matter which order you solder the surface mount components, although depending on the shape of your soldering iron bit you may find it easier to solder the ICs before the surrounding capacitors and resistors.
Iron temperature I tend to work with quite a hot iron temperature (around 375°C) which makes things quicker and is needed for the fine pitch IC soldering technique below to work well. Soldering 0805 chip resistors and capacitors Apply flux to both pads. Make Your Own Dry Transfer Decals and Instant Printed Circuit Boards! Kenton Electronics MIDI controllers retrofits wireless. Small Bear Electronics. MFOS Synth Modules Assembled. Muff's Modules & More. Gijs's Personal Home-Page « Gieskes.nl.
Hexinverter.net Electronics. Radio Drum. The online resource for frequenycentral products and designs. Frequency Central Raging Bull (Moog Taurus VCA/VCF Clone) Electric Druid Synth DIY and PIC microprocessor pages. How to Lock Down Your Money After the Equifax Breach - Consumer Reports. The massive data breach, announced Thursday by Equifax, involves the potential compromise of the personal data of 143 million consumers, including names, addresses, Social Security numbers, and birth dates.
