

Search. 3 Ways to Display Your Raspberry Pi On a Monitor Or TV. Back in the 1980s and 1990s, home computers didn’t rely on dedicated monitors to display operating systems, applications and games.
In those days, things were far simpler. Instead of paying extra for a monitor, the majority of home computer and console owners were happy to use their televisions. It might seem odd now, but 30 years ago people thought little of ignoring TV programs to play video games. For some, the situation hasn’t changed all that much, with games consoles often connected to the family TV. But as far as computers go, the PC model of a dedicated monitor was eventually widely adopted. If you think about it though, the option to connect to different types of display unit is pretty flexible. What The Developers Say… When I spoke to Raspberry Pi Foundation co-founder Eben Upton recently, he explained that the stripped down computer was borne from the spirit of the 8-bit era.
Three different connections are supported from the Raspberry Pi – HDMI, VGA and RCA. It’s Got HDMI! Raspberry Pi - Camera Tutorial... Raspberry PI 512 Mo Modèle B, Raspberry PI 256 Mo Model B, Raspberry Pi Camera. Raspberry Pi ⢠View topic - SSH Connexion à distance. 07 - Accéder à distance à l'interface graphique avec VNC - Raspberry Pi, Robots et autres. Connectez vous en local sur votre raspberry ou par SSH avec l'utilisateur pi.
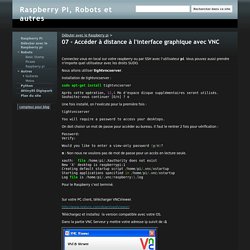
Vous pouvez aussi prendre n'importe quel utilisateur avec les droits SUDO. Nous allons utiliser tightvncserver. Installation de tightvncserver : sudo apt-get install tightvncserver Après cette opération, 12,4 Mo d'espace disque supplémentaires seront utilisés. Une fois installé, on l'exécute pour la première fois : tightvncserver You will require a password to access your desktops. On doit choisir un mot de passe pour accéder au bureau. Password: Verify: Would you like to enter a view-only password (y/n)? Contrôler son bureau à distance avec VNC sur le Raspberry pi. Dans cet article nous allons voir comment télécommander son Raspberry pi à distance grâce à VNC (Virtual Network Connection), pour que cela fonctionne il faut que vous ayez suivi le tutoriel sur SSH et donc que vous puissiez vous connecter en SSH à votre Raspberry pi.

La différence entre SSH et VNC est que SSH ne gère pas d’interface graphique il ne vous permet que d’exécuter des commandes dans le terminal, contrairement à VNC qui va vous donner la possibilité de contrôler votre Raspberry pi de manière graphique avec la souris et le clavier. Nous allons donc commencer par installer un serveur VNC, il en existe plusieurs, mais celui que je vous propose est tightvnc. Pour l’installer connecter vous en SSH au Raspberry pi et faites ces deux commandes sudo apt-get update sudo apt-get install tightvncserver Une fois que tightvnc est installé il faudra faire la commande. XBMC - Raspbian. Instructions for building XMBC from source are below, but they will take over 12 hours to compile on the Pi.
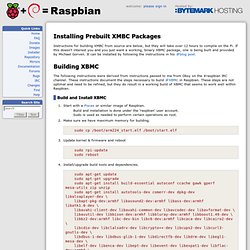
If this doesn't interest you and you just want a working, binary XBMC package, one is being built and provided by Michael Gorven. It can be installed by following the instructions in his blog post. The following instructions were derived from instructions passed to me from Obsy on the #raspbian IRC channel. These instructions document the steps necessary to build XBMC in Raspbian. These steps are not optimal and need to be refined, but they do result in a working build of XBMC that seems to work well within Raspbian.
Build and Install XBMC. Raspberry Pi RBCA000 Carte Mère ARM 1176JZF-S 512 Mo RAM HDMI 2x USB 2.0 3,5 Watt: Amazon.fr: Informatique. 07 - Accéder à distance à l'interface graphique avec VNC - Raspberry Pi, Robots et autres. Raspberry Pi - VNC remote control of Raspberry Pi on PC and Android Phone. Easy as Pi - Headless Raspberry Pi - with Android Tablet and VNC. [Solved] USB Interface (Android VNC) Hello, I'm trying to set up my nexus 7 tablet as a screen, keyboard and mouse for my raspberry pi using USB tethering.
![[Solved] USB Interface (Android VNC)](http://cdn.pearltrees.com/s/pic/th/raspberry-interface-android-83337774)
Initially the tablet didn't have usb tethering so I flashed a ROM from here: Then I installed this: Next, I downloaded x11vnc on the RPi and configured it to autostart. When I connect my N7 to the RPi and enable USB tethering I get the usb0 interface and can run this: Code: Select all sudo ifconfig usb0 192.168.42.10 I run this command through SSH in my computer. When I do all this I can access the RPi through my N7 however I want to know how to persistently configure the usb0 interface to avoid the need of using my computer to set the IP.
Is it possible to set some kind of static ip or would it be better to make a udev script that runs every time I connect my tablet? Thanks a lot. Raspberry Pi: Informatique. Class 10 vs Class 4 sd cards. Incroyables Comestibles France. African Gardens in the UK. Ingenious TipsContol odours!

Add some sawdust and woodash (in small quantities) on the top of your compost or liquid fertiliser to keep nasty fumes at bay.Wiggly waysFor a speedy and lively composting experience, start a wormery! Buy a worm bin and watch your organic waste wiggle into compost. Ingenious TipsButt outMinimise energy use by saving rain water in a water butt. Raspberry PI 512 Mo Modèle B, Raspberry PI 256 Mo Model B, Raspberry Pi Camera. RPi SD cards. SD cards The SD card is a key part of the Raspberry Pi; it provides the initial storage for the Operating System and files.
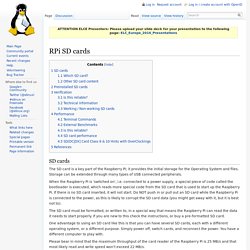
Storage can be extended through many types of USB connected peripherals. When the Raspberry Pi is 'switched on', i.e. connected to a power supply, a special piece of code called the bootloader is executed, which reads more special code from the SD card that is used to start up the Raspberry Pi. If there is no SD card inserted, it will not start.
Do NOT push in or pull out an SD card while the Raspberry Pi is connected to the power, as this is likely to corrupt the SD card data (you might get away with it, but it is best not to). The SD card must be formatted, or written to, in a special way that means the Raspberry Pi can read the data it needs to start properly. One advantage to using an SD card like this is that you can have several SD cards, each with a different operating system, or a different purpose. L’outil de la Fondation Raspberry Pi pour déployer vos distrib Linux sur carte SD. Ceux qui débutent le savent bien, il n’est pas forcement très simple de déployer l’OS (Linux le plus souvent) de votre choix sur une carte SD pour ensuite l’utiliser avec un Raspberry Pi.
Pour ma part, j’utilise depuis des années Etcher devenu BalenaEtcher qui fonctionne toujours très bien. Toutefois, la fondation Raspberry Pi a sorti un nouvel utilitaire baptisé « Raspberry Pi Imager » qui tourne sous macOS, Linux et Windows et qui permet de déployer des images « officielles » type Raspbian ou LibreElec (avec Kodi pour votre media center) et bien sûr n’importe quelle image de n’importe quelle distrib. Le fonctionnement est similaire aux autres outils de ce genre. Etcher – Pour ne plus avoir d’erreurs sur vos cartes SD ou clé USB de boot. Si vous aimez bidouiller votre Raspberry Pi ou booter des PC sous Linux, il vous faut forcement un outil pour « graver » des images sur un support de type carte SD ou clé USB.

J’en ai déjà présenté pleins comme Easy2boot, MultibootUSB, Rufus, Netboot.xyz, Unetbootin…etc et voici un petit nouveau venu qui s’appelle BalenaEtcher.