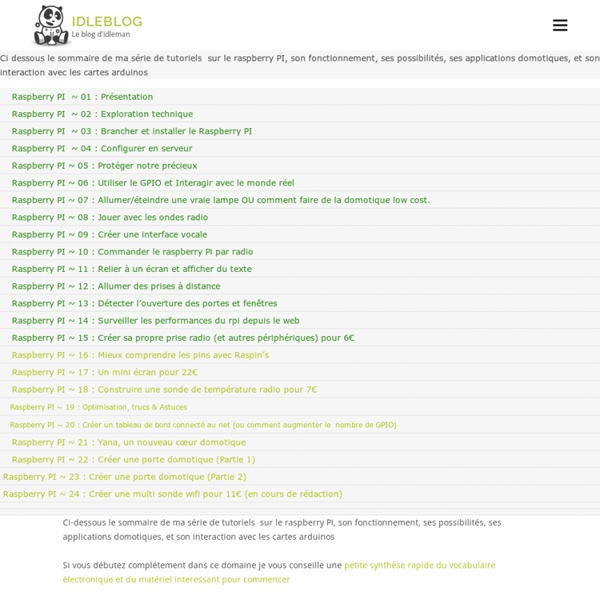


http://blog.idleman.fr/sommaire-raspberry-pi-arduino-domotique-robotique-et-pleins-de-trucs-en-ique/
Related: réalisation • DomotiqueWireless Raspberry Pi print server Wireless printing has made it possible to print to devices stored in cupboards, sheds and remote rooms. It has generally shaken up the whole process of printing and enabled output from smartphones, tablets, laptops and desktop computers alike. But you don’t have to own a shiny new printer for this to work; old printers without native wireless support don’t have to end up in the bin, thanks to the Raspberry Pi. The setup is simple. Gathering and Charting Temperatures using RRDTool and Highcharts **tl;dr Checkout the charts on my RaspberryPi ** For quite a long time I was looking for a way to monitor and record th temperature and humidity at my apartment. What was missing was a convenient, preferably wireless solution.
HDMI AD Board (PCB800099) - China Hdmi Board,Av Board Product Description The driver board functions are as follows: 1. 1 channel vga signal input, 2-way av 1 road hdmi, 1-way reversing signal input 2. standard backlight 6pin interface external high pressure plate 3. driver board integrated lcd led backlight driver board road 4. only supports the screen supply to 3.3v lcd 5. standard key board interface, and support for dual-color led display
Construct the wireless base station receiver - PrivateEyePi Project This project assumes you already have a Model A or B Raspberry Pi, power supply, HD card, screen, keyboard, network etc. Raspbian Wheezy OS. In this project you will build a wireless base station receiver that can receive communications from a multiple wireless sensors like a temperature sensor, door contact or motion sensor. The wireless sensors communicate with the Raspberry Pi over radio frequency (RF) communications to a base station receiver. You can connect as many wireless sensors as you like. You will be using the XRF wireless module from CISECO that operates at the 868 and 915 MHz ISM/SRD bands (but can also support 315, 433, 900 MHz).
Google 3D Glasses Google 3D Glasses is one of the most hyped and anticipated devices over the past year. OnlineUniversities have written this great article about how Google Glasses they will change education. Education is already seeing some major changes in light of new, cutting-edge technologies. Students can now access educational information from virtually anywhere at any time, and mobile devices are influencing some to flip their classrooms, changing the educational experience altogether.
Attiny85 and RPI It is wellknown fact that you can use the Arduino as a frontend for the RPI. A simpler and cheaper solution is to use one of the tinys from Atmel, for example the Attiny85. An ATtiny 85 cost about 1-2 $, and no other components are neede. You can use many of the librarys allready developed for the ARduino. The Attiny has among other things 3 ADC pins you can use for analog inputs, like light sensors, temperature sensor, sound etc.
Offline Speech Recognition on Raspberry Pi 4 with Respeaker - Latest open tech from seeed studio Note: This article by Dmitry Maslov originally appeared on Hackster.io In this article, we’re going to run and benchmark Mozilla’s DeepSpeech ASR (automatic speech recognition) engine on different platforms, such as Raspberry Pi 4(1 GB), Nvidia Jetson Nano, Windows PC, and Linux PC. 2019, last year, was the year when Edge AI became mainstream. Multiple companies have released boards and chips for fast inference on the edge and a plethora of optimization frameworks and models have appeared. Up to date, in my articles and videos, I mostly focused my attention on the use of machine learning for computer vision, but I was always interested in running deep learning-based ASR projects on an embedded device. The problem until recently was the lack of simple, fast and accurate engines for that task.
How to Make a Raspberry Pi Media Panel (fka Digital Photo Frame) The goal of this project was to create a low cost Raspberry Pi Media Panel--a nice looking screen that could stand in the living room or attach to the refrigerator with the primary purpose of streaming personal photo and video content full time, but also be able to do some other cool things when needed...like show the weather, play a movie, play music, or receive AirPlay content. Read this blog post if you want to learn more about what a media panel is and why you might want one. Success criteria were: -Low cost: a full blown computing device and screen for between $100 and $200 all in -Attractive: meaning my wife finds it aesthetically acceptable for the living room -Light: no more than a few pounds -Thin: no more than an inch thick, including frame -Quick: can be built in a few hours or less -Simple: requiring mainly assembly, versus construction or manufacturing Update: Several people have asked me about an integrated product/service like this that is off-the-shelf. We call it Fireside.
Wireless Projects - PrivateEyePi Project Wireless sensors and a RaspberryPi open up a world of possibilities. The Internet Of Things (IOT) is phenomenon sweeping the world at this moment where everyday things (cars, homes, household appliances, plants) are being connected to the IOT where we can monitor, control and alert in ways not possible before. RF communications can be a complex subject, but I have eliminated all the complexity by using pre-programmed devices that have the RF communication libraries already loaded. The components are plug and play ready to use. You do not need to know anything about RF communications or serial communications in order to do these projects.
recalbox.com You may want to configure your controller for your new recalbox! If you have a PS3 controller with a bluetooth dongle, just take a micro usb cable, plug the controller into recalbox and wait 10 seconds. You can now unplug the controller and press the HOME button. Your controller is configured!