

Arduino Examples #2 Use an Arduino as a FTDI Programmer. Now using your computer open up the Arduino software.
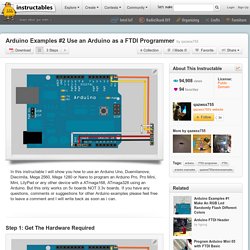
Then connect your 2 Arduino's together and to your computer. Next go to tools and select the board you want to program After that if you want to test it out you can copy and paste all the text between the //. Then upload the program to your Arduino and the led connected to pin 13 should blink. // void setup() { // this sets the output pins pinMode(13, OUTPUT); // Pin 13 has an LED connected on most Arduino boards: } void loop() { digitalWrite(13, HIGH); // set the LED on delay(1000); // wait for a second digitalWrite(13, LOW); // set the LED off delay(1000); // wait for a second } // If you have any questions, comments or suggestions for other Arduino examples please feel free to leave a comment and I will write back as soon as i can. Arduino Basics: Making Sound : Playing A Melody. First to get you started, you should run the default melody program so you you know what to expect from the arduino.
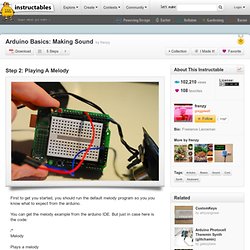
You can get the melody example from the arduino IDE. But just in case here is the code: Laser Shooting Game. Robot imprimible miniskybot2 programado con S4A. Example/control.html. The following example demonstrates the simple control of a GPIO pin on the Raspberry Pi.
Source Code The source code for this example is included in the github repository: Navigate If you have not already downloaded and installed the Pi4J library on the RaspberryPi, then view this page for instructions on where to download and how to install Pi4J: Download & Install Pi4J First, locate the ControlGpioExample.java source file in the samples folder of the Pi4J installation on the RaspberryPi. Compile. jUSB - Java USB API for Windows. Www.steelbrothers.ch/jusb/api/usb/windows/related-docs/chp7-enduserinstallation.pdf.
Adfa. Vex Curriculum. Daniela Escobar Class 1 Week 3(2) (1).xlsx. High Schools and Projects : EPICS. Digital Literacy Project Students at Bridgewater-Raritan High travelled to Paushi, India to purchase and intall a computer and printer at the local library.
The team also created lesson plans that will enable local children, ages 5-18 to learn to use the equipment. Capstone Projects R. L. Students are designing and building a more efficient stage for the La Primera de Dallas church. Creating Community Spaces Students at the Englewood Campus of Urban Prep in Chicago began their year with designing bridges out of paper and are now creating designs that will turn vacant lots in their community into usable spaces. Aquaponics System There are 200 tilapia and water hyacinth plants in an 850 gallon tank, with a filtration system in another tank above. Vertical Hydroponics The Greenhouse has been “remodeled” with poured concrete flooring to create a barrier-free, handicapped-accessible building. Guidance Department ESL Assistant Software Computers give a welcome message to Spanish speakers.
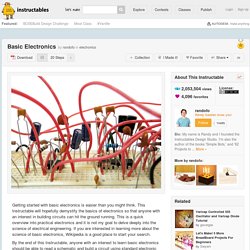
Benilde-St. Margaret's. Basic Electronics. Parts List: 2N3904 PNP transistor 2N3906 NPN transistor 47 ohm - 1/4 Watt resistor 1K ohm - 1/4 Watt resistor 470K ohm - 1/4 Watt resistor 10uF electrolytic capacitor 0.01uF ceramic disc capacitor 5mm red LED 3V AA battery holder Optional: 10K ohm - 1/4 Watt resistor 1M potentiometer This next schematic may look daunting, but it is actually rather straight-forward.
It is using all of the parts that we have just gone over to automatically blink an LED. Any general purpose NPN or PNP transistors should do for the circuit, but should you want to follow along at home, I am using 293904 (NPN) and 2N3906 (PNP) transistors. I learned their pin layouts by looking up their datasheets. For instance, from the datasheet for the 2N3904 transistor, I was quickly able to see that pin 1 was the emitter, pin 2 was the base, and pin 3 was the collector. Aside from the transistors, all of the resistors, capacitors, and LED should be straight-forward to connect. HK-GT3B AFHDS 2.4ghz 3 Channel Radio System. <div class="noscript"> JavaScript is turned off in your web browser.
Turn it on to take full advantage of this site, then refresh the page. </div> Globalwarehouse Bargain Bin. Microsoft DreamSpark. Virtual Robotic Challege 2011 - Building Blocks of STEM Education - Fi. Educational Software for Students, Teachers, and Schools Serving the education market for over 25 years, Studica offers high-quality, top notch brands of academic software and technology products such as Adobe, Autodesk, Avid, fischertechnik, GameSalad, National Instruments, Pixologic, Unity, Wacom and many more.
Studica offers these great edu software products at deep academic discounts for students and education discounts for teachers and schools. Students and teachers can receive academic software savings up to 80% off retail software brands with educational pricing. Studica has product offerings for all school levels from K-12 to High School to College, Higher-ed and University and also services the non-profit and institutional sectors.
Studica is dedicated to the education community and to provided great customer service. Motor Set XM - Building Blocks for Life - Fischertechnik North America. Gear template generator. This free online gear template generator is designed for making scale accurate paper gear templates which you can glue onto wood and then cut out with a bandsaw.
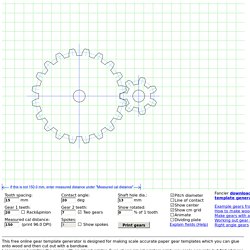
I recommend printing the gears with an ink jet printer. Even cheap ink jet printers print very scale accurate but Not all laser printers are accurate. You can still access the old (pre 2015) Flash based gear geberator Getting the printout to scale correctly, avoiding cropping Different browsers print at different scales depending on browser type and printer configuration. Use an ink jet printer I recommend using an ink jet printer. Printing the gear templates To print the gear template, use the 'Print' button, instead of printing the web page from the browser. Robot Reality Robots in automotive industry Boston Dynamics Big Dog (new video March 2008) ANIMATRONIC BABY Alien Animatronic mandibles.