

Organizing Project Life. Mrs Crafty Adams: Junkin - Vintage Record Stand Repurposed. Yesterday I kicked off my 3-day weekend by going to a couple of antique / junk stores (whatever you like to call them).
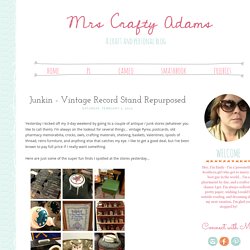
I'm always on the lookout for several things... vintage Pyrex, postcards, old pharmacy memorabilia, crocks, owls, crafting materials, shelving, baskets, Valentines, spools of thread, retro furniture, and anything else that catches my eye. I like to get a good deal, but I've been known to pay full price if I really want something. Here are just some of the super fun finds I spotted at the stores yesterday...
Left to right and row by row: (1) typeset letters - big ones were $2 each and small ones were 2/$1!!! (2) metal Texaco stool (3) sewing chair with a flip-up seat just like the one I already have - of course mine has cuter fabric ;) (4) gorgeous vintage patio lights (5) needlework affirmation (6) tiny ceramic birdhouses, each with a bird on top - they were so cute (7) radio (8) adorable owl (9) vintage cooler. Simply in Control: Re-purposing Makeup Travel Cases as a Pen Case. I purchased this small train case from Target.
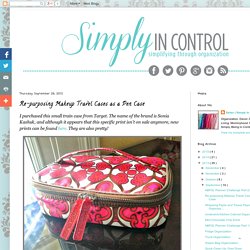
The name of the brand is Sonia Kashuk, and although it appears that this specific print isn't on sale anymore, new prints can be found here. They are also pretty! The quality is great and it's very sturdy. I've taken it on trips many times and put my makeup in it. The lip products being contained in a small removable pouch prevent them from making other items sticky, and the brushes hold up well when enclosed in the plastic. I keep liquids like foundation and under-eye concealer in a separate ziplock bag while traveling and keep it upright in my purse.
However, I can also re-purpose this handy case by using it as a pencil case. Hope you enjoyed this post! Little lamm & co: Portable Project Life (and a freebie!) I have been seeing many people asking on social media sights how to take their Project Life along on vacations and trips.
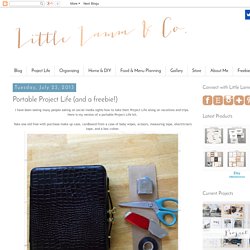
Here is my version of a portable Project Life kit. Take one old free with purchase make up case, cardboard from a case of baby wipes, scissors, measuring tape, electrician's tape, and a box cutter. I placed my most used goodies inside to space out the placement of cardboard. Then I cut the cardboard pieces and used the electrician's tape to cover the rough edges and also to attach the cardboard pieces together. Toni From Designs: Crafty Organization Thursdays: Card Organization. Good morning fellow crafters, it's Thursday, and you know what that means?
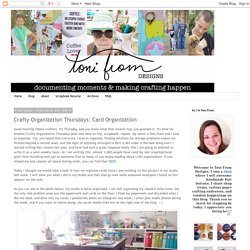
Yup, you guessed it. It's time for another Crafty Organization Thursdays post over here at life, scrapbook, repeat. My name is Toni From and I love to organize. Yes, you heard that correctly, I love to organize. Finding solutions for storage problems makes me thrilled beyond a normal level, and the sight of anything arranged in ROY G BIV order is the best thing ever! Today I thought we would take a look at how we organize cards since I was working on this project in my studio last week. As you can see in the photo below, my studio is fairly organized, I am still organizing my island a little more, but the only real problem area was the paperwork and cards on the floor. I took all of my cards in various boxes that you see stacked on the floor above and organized them in this. I have tried over the years to use various boxes to corral all of my greeting cards in one place. Happy Organizing, xoxox. A guide for Scrapbooking Refugees (or) how I organise my Raskog Cart - Betwixt & Between.
I’ve been meaning to write this post for awhile.
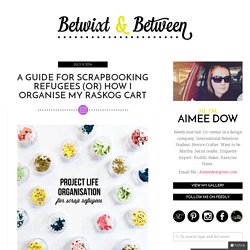
Almost a month in fact. When the idea first came to mind I had just received my Studio Calico Hello Hello kit and the Studio Calico website had just published Carissa Wiley’s studio pictures. Project life organization // the supplies. Since we talked about preparing your photos last week, we can’t just stop there. what are you gonna do with those pretty pictures once you’ve got them organized?
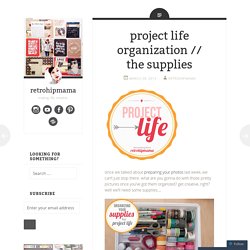
Get creative, right? Well we’ll need some supplies… last spring, i made a fabulous organizer to house all of my scrap/project life supplies. you can check out how i made it here. go ahead, check it out, i’ll wait. okay, now that you’re back, here’s how it’s evolved over the year. // the main stash i’ve invested in more traditional scrapbook supplies than project life brand stuff. i learned that if i buy a kit, i’m sick of the designs in less than half a year. and since paper companies know so many of their customers are using their stuff for project life, nearly everything can be cut into 3×4 or 4×6. genius. i have a row row for 3×4 pieces… and 4×6 stuff. keep in mind that i precut regular 12×12 cardstock as well, not just what the manufacturers design as cutouts. on the far right are some smaller sticker pages. // the 12×12 stuff. How to Organize and Print Years Worth of Photos. Donate Your Scrap Supplies. Organized and Inspired: The Feature.